


Articles
6 Reasons To Use Impact Resistant Shingles on Your Roof
 Written by : Secured Roofing and Restorations
 8 minutes read

Your roof stands as a critical line of defense against the elements. Homeowners are increasingly turning to impact resistant shingles as the preferred choice for durability and protection. But what makes these shingles so special? In this blog post, we’ll explore the reasons why impact resistant shingles are a smart investment for your home. We’ll cover everything from their superior durability to the financial benefits they offer.
- What are impact resistant shingles?
- 6 reasons to use impact resistant shingles on your roof
- Installation process
- Maintenance requirements
🤔 What Are Impact Resistant Shingles?
Impact resistant shingles are specifically engineered to withstand severe weather conditions, such as hail, strong winds, and heavy rain. These shingles are typically composed of a blend of materials, including asphalt, rubber, and polymers, which not only enhance their durability but also contribute to a longer lifespan and reduced maintenance needs.
Specifications and Standards
To be classified as impact resistant, shingles must adhere to stringent standards. The UL 2218 rating, for instance, evaluates a shingle’s capacity to endure impact. A Class 4 rating represents the highest level of protection, signifying exceptional performance against hail and other harsh elements, providing homeowners with peace of mind in extreme weather.
Types of Impact Resistant Shingles
There are several types of impact resistant shingles available, including:
- Architectural shingles: Offer a layered look and greater durability.
- Three-tab shingles: Often more budget-friendly.
Each type comes with varying levels of resilience and design options, enabling homeowners to select the best fit for their aesthetic preferences and structural needs.
Cost Considerations
While impact resistant roof materials might entail a higher initial cost compared to traditional options, their long-term advantages frequently justify the expense. These benefits include:
- Reduced risk of damage
- Lower insurance premiums
- Extended durability, which can save homeowners money over time
In the following sections, we will delve deeper into these long-term financial and practical benefits.
🏠 6 Reasons To Use Impact Resistant Shingles on Your Roof
When it comes to protecting your home, choosing the right roofing material is crucial. Impact-resistant shingles offer a range of benefits that can enhance the longevity and safety of your roof. Here are six compelling reasons to consider making the switch to impact-resistant shingles for your next roofing project.
1. The Unmatched Durability of Impact Resistant Shingles
Durability is arguably the most compelling reason to choose shingles with a high impact resistance. Their robust construction ensures that they can withstand severe weather conditions.
Material Strength
The materials used in impact resistant shingles are specifically chosen for their strength and flexibility. This makes the shingles less likely to crack or break under pressure.
Long Lifespan
Thanks to their durability, impact resistant shingles generally have a longer lifespan than traditional shingles. This means fewer replacements and repairs, saving you money in the long run.
Warranty Options
Many manufacturers offer extended warranties on impact resistant shingles, providing homeowners with additional peace of mind.
2. Weather Resilience
Weather resilience is another significant advantage of impact resistant shingles. These shingles are designed to hold up against various weather conditions, ensuring your home remains protected.
Hail Resistance
Hail can cause significant damage to traditional shingles. Impact resistant shingles, however, are specifically designed to withstand hailstorms, reducing the risk of costly repairs.
Wind Resistance
High winds can lift and tear traditional shingles. Impact resistant shingles are engineered to stay in place even during strong wind events, providing better protection for your home.
Water Resistance
Heavy rain can lead to leaks and water damage. Impact resistant shingles provide better water resistance, helping to prevent these issues and protect your home’s interior.
3. Cost-Effectiveness
While the initial cost of impact resistant shingles may be higher, their long-term benefits make them a cost-effective choice.
Fewer Repairs and Replacements
The durability of impact resistant shingles means you’ll spend less on repairs and replacements over time, saving you money in the long run.
Energy Efficiency
Impact resistant shingles are often more energy-efficient than traditional shingles. They can help regulate your home’s temperature, reducing your energy bills.
Increased Home Value
Installing impact resistant shingles can increase your home’s value, making it a worthwhile investment if you plan to sell your home in the future.
4. Insurance Benefits
Many insurance companies recognize the advantages of impact resistant shingles and offer discounts to homeowners who install them.
Lower Premiums
Because impact resistant shingles reduce the risk of damage, many insurance companies offer lower premiums to homeowners who use them.
Better Coverage
Some insurance policies may offer better coverage for homes with impact resistant shingles, providing additional financial protection for homeowners.
Claim Reductions
With impact resistant shingles, you’re less likely to file claims for roof damage, which can help keep your insurance rates low.
5. Environmental Impact
Choosing impact resistant shingles can also have positive environmental effects.
Sustainable Materials
Many impact resistant shingles are made from sustainable materials, reducing their environmental footprint.
Reduced Waste
The long lifespan of impact resistant shingles means fewer replacements and less waste, contributing to a more sustainable environment.
Energy Savings
Improved energy efficiency means you’ll use less energy to heat and cool your home, reducing your overall carbon footprint.
6. Aesthetic Appeal
Impact resistant shingles are available in a variety of styles and colors, allowing you to maintain or even enhance your home’s aesthetic appeal.
Versatile Designs
With a wide range of designs available, you can choose impact resistant shingles that complement your home’s architecture.
Color Options
Impact resistant shingles come in various colors, allowing you to select the perfect shade to match your home’s exterior.
Customization
Some manufacturers offer customization options, enabling you to create a unique look for your home.
🛠️ Installation Process
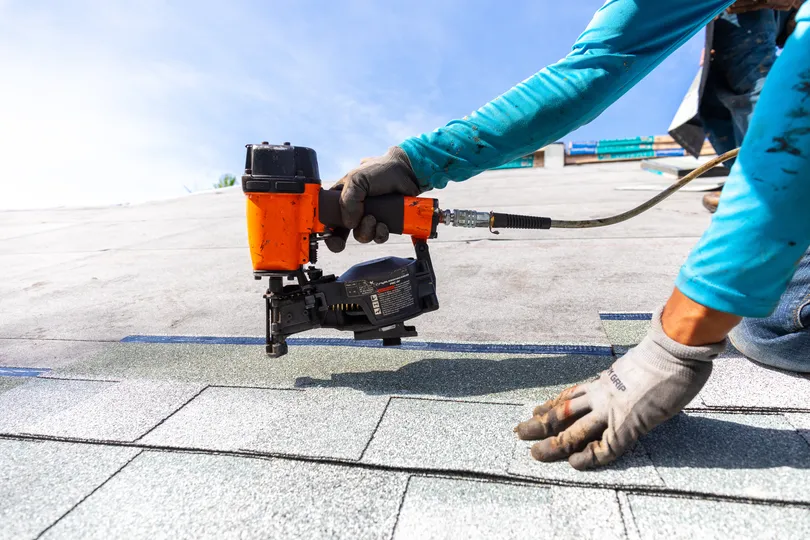
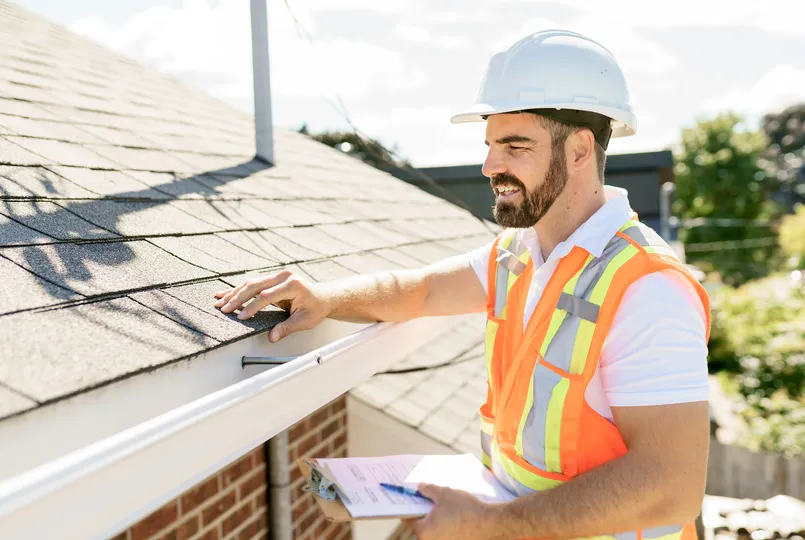
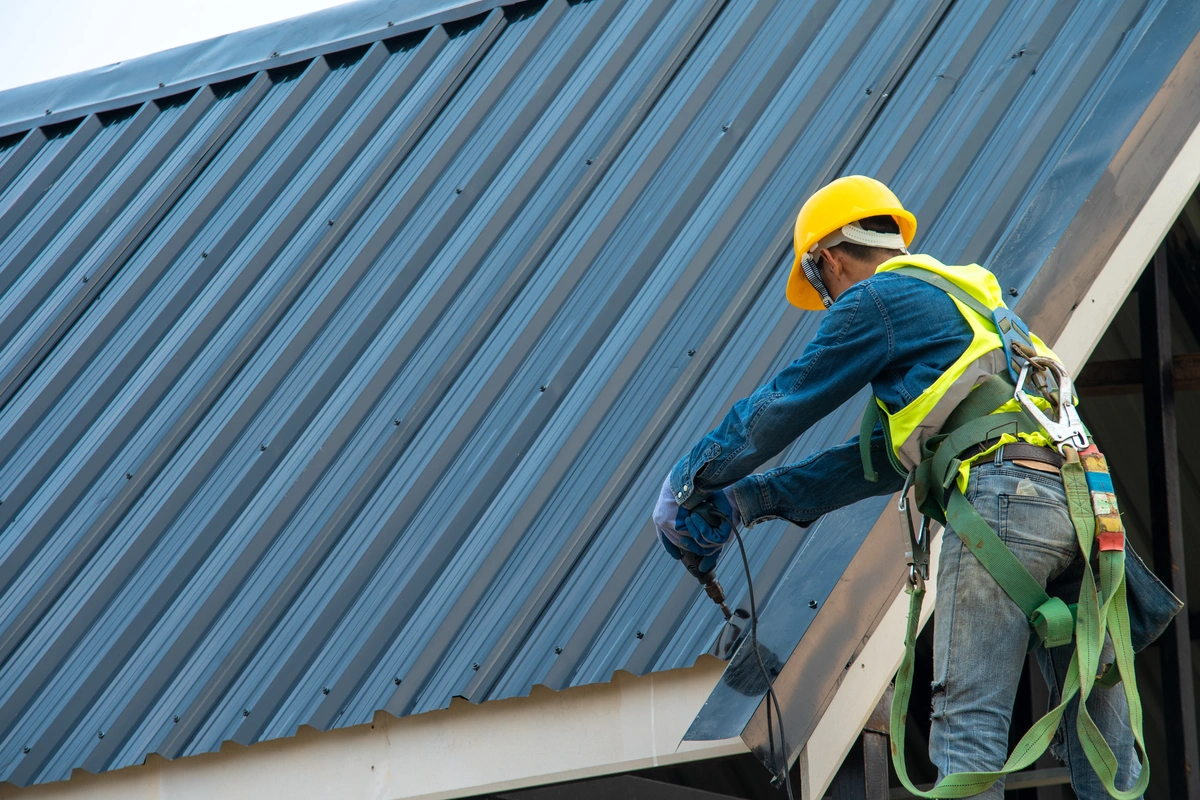
The installation process for impact resistant shingles is similar to that of traditional shingles, but it’s essential to hire experienced professionals to ensure proper installation.
Professional Installation
Hiring a professional guarantees that your impact-resistant shingles are installed correctly, maximizing their benefits. Professionals have the expertise and tools to ensure a secure fit, which can enhance the durability and performance of your roofing system, ultimately protecting your home from severe weather.
Time Frame
The installation process typically takes a few days, depending on the size of your roof and the weather conditions. Larger roofs or adverse weather may extend the timeline, so it’s essential to plan accordingly and communicate with your installer about the expected duration to minimize disruptions.
Preparation Tips
Before installation, ensure your roof is clean and any necessary repairs are completed to provide a solid foundation for your new shingles. It’s advisable to remove debris, check for leaks, and address any structural issues to ensure a smooth installation process and to maximize the longevity of your new roofing materials.
💡 Maintenance Requirements
Maintaining impact resistant shingles is straightforward, but regular inspections and minor upkeep can extend their lifespan.
Regular Inspections
Schedule regular roof inspections at least twice a year, ideally in the spring and fall. This proactive approach helps identify potential issues such as leaks, damaged shingles, or structural weaknesses early on, allowing for timely maintenance and ensuring your roof remains in top condition.
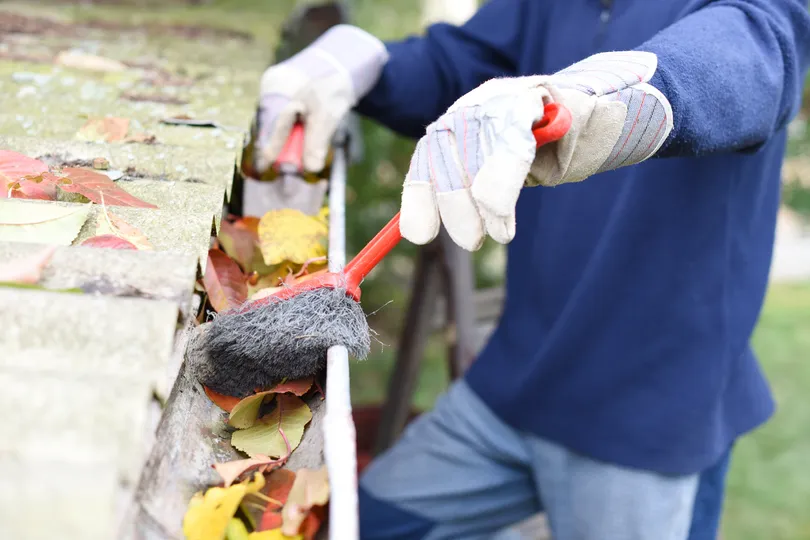
Cleaning Tips
Keep your roof clean by regularly removing debris like leaves, branches, and moss. Accumulated debris can trap moisture and lead to mold growth or shingle deterioration over time. Consider using a soft-bristle brush or hiring a professional to safely clean your roof without causing damage.
Repair Recommendations
Address any minor repairs, such as small leaks or loose shingles, promptly. Ignoring these issues can lead to more significant problems, such as water damage or costly repairs down the line. Regularly inspect your roof and take action as soon as you notice any signs of wear and tear.
🙌 Upgrade Your Home with Impact-Resistant Shingles for Safety and Style
Selecting impact-resistant shingles for your home is a smart choice that brings numerous benefits, including superior protection against harsh weather and potential savings on insurance costs. These shingles not only enhance your home’s aesthetic appeal but also support environmental sustainability through their long-lasting nature and energy efficiency.
At Secured Roofing and Restorations, we pride ourselves on being the trusted partner for all your home exterior needs. Our experienced team is dedicated to delivering top-notch installation services, ensuring your investment is protected with professionalism and care. We understand that your home is your sanctuary, and we’re here to enhance its value and comfort.
If you’re considering upgrading to impact-resistant shingles, get in touch with us today! Let us show you how we can help make your home safer and more beautiful.
Roof Coating: How To Protect Your Roof (2024)
Written by : Secured Roofing and Restorations
13 minutes read

As any homeowner knows, maintaining your roof is crucial to safeguarding your home’s integrity and value. This is where roof coating comes into play. In this comprehensive guide, we’ll walk you through everything you need to know about roof coating—from its benefits to the steps for applying it, including:
- What is roof coating?
- How roof coating works
- Preparing your roof for coating
- 5-step guide to applying roof coating
- Common mistakes to avoid
- Maintenance tips for coated roofs
- Cost considerations
- Environmental impact
🤔 What is Roof Coating?
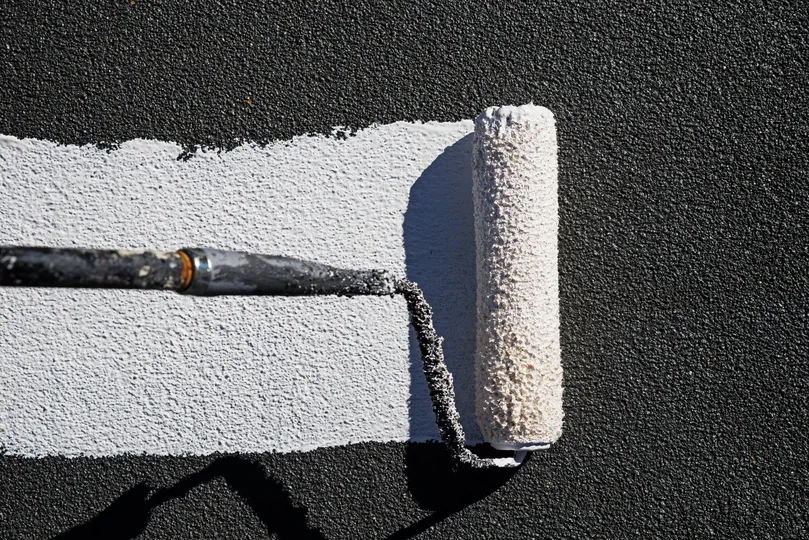
Roof coating is a specialized fluid applied to roofing materials to create a protective layer that significantly enhances the roof’s longevity and functionality. This coating is designed to bond with the existing roofing surface, providing essential benefits that include improving durability, reflecting harmful UV rays, minimizing heat absorption, and preventing water infiltration. By creating a seamless barrier, roof coatings are a proactive solution to numerous common roofing issues, ultimately leading to cost savings by extending the time between necessary repairs or total roof replacements.
Key Features
One of the standout features of a high-quality roof coating is its impressive ability to extend the life of your roof significantly. These coatings are formulated to offer various protective properties, such as UV protection to prevent sun damage, waterproofing capabilities to guard against leaks and moisture accumulation, and enhanced resistance to extreme weather conditions, including heavy rain, snow, and intense sunlight. Additionally, many roof coatings are designed to be environmentally friendly, contributing to energy efficiency by reflecting heat and lowering cooling costs in warmer months. Overall, a good roof coating not only safeguards your investment but also enhances the performance of your roofing system over time.
Common Materials
Roof coatings are made from a variety of materials, each with unique characteristics and benefits suited to different roofing types and environmental conditions. Common materials include:
- Acrylic: Known for its versatility and ease of application, acrylic coatings are water-based, making them environmentally friendly. They excel in UV protection and are suitable for most climates, providing excellent reflectivity and durability.
- Silicone: These coatings offer exceptional waterproofing capabilities and are highly resistant to ponding water, making them ideal for flat roofs. Silicone coatings maintain their flexibility over time, which helps them withstand temperature fluctuations and weathering.
- Asphalt: Often used for built-up roofing systems, asphalt coatings provide a durable protective layer that helps seal and waterproof the roof surface. They are commonly chosen for their effectiveness in harsh weather conditions.
- Polyurethane: Renowned for their toughness and elasticity, polyurethane coatings are ideal for roofs that experience foot traffic or heavy equipment use. They provide excellent resistance to abrasion and impact, making them a great choice for commercial applications.
By understanding the various materials and their features, building owners can make informed decisions when selecting the right roof coating for their specific needs and environmental challenges.
🏠 How Roof Coating Works
Roof coating is a protective layer applied to roofing surfaces that enhances durability and extends the lifespan of the roof. Understanding how roof coatings work can help homeowners make informed decisions about maintaining and protecting their roofs.
Reflective Capabilities
Roof coatings are designed to reflect a significant portion of UV rays away from the roof surface, which helps to keep the roof cooler during hot weather. This reduction in thermal load not only minimizes energy consumption for cooling but also prolongs the roof’s lifespan by preventing heat-related damage.
Protective Barrier
The coating serves as a strong protective barrier against harsh environmental factors such as rain, wind, and debris. By sealing small cracks and imperfections, it prevents water infiltration and stops minor issues from escalating into costly repairs, ensuring the roof remains in good condition over time.
Improved Aesthetics
Beyond their functional advantages, roof coatings can greatly enhance the aesthetic appeal of your home. Available in a wide range of colors and finishes, they allow homeowners to customize their roofs to complement or elevate their home’s exterior, adding to the overall value and curb appeal.
Types of Roof Coatings
Roof coatings play a vital role in extending the lifespan of your roofing system while enhancing its performance. They come in various types, each designed to address specific needs such as waterproofing, UV protection, and energy efficiency. Understanding the different types of roof coatings can help you choose the best option for your roofing project.
Acrylic Coatings
Acrylic coatings are popular for their affordability and ease of application, making them a go-to choice for many homeowners and contractors. They work well on various roof types, including metal and shingle roofs, and offer excellent UV protection, which helps to prolong the life of the roofing material and reduce energy costs by reflecting sunlight.
Silicone Coatings
Silicone coatings are known for their exceptional water resistance and durability. They create a seamless, flexible membrane that is particularly effective in areas that experience frequent rain or standing water issues. This makes them ideal for flat roofs, as they prevent leaks and protect the underlying structure from moisture damage.
Asphalt Coatings
Asphalt-based coatings are commonly used for their strong adhesive properties and ability to withstand harsh weather conditions. They provide a robust layer of protection against the elements, including heavy rain, snow, and UV rays. These coatings are often used on asphalt roofs and can help extend the lifespan of the roofing system while enhancing its appearance.
The Benefits of Roof Coating
Roof coating offers numerous advantages that can enhance the longevity and performance of your roofing system. By applying a protective layer, homeowners can improve energy efficiency, reduce maintenance costs, and extend the life of their roofs.
- Longevity
- Extends roof lifespan by 10-15 years
- Protects from elements, reducing costly replacements
- Saves homeowners money and provides peace of mind
- Energy Efficiency
- Reflects sunlight to lower cooling costs
- Eco-friendly choice, particularly in warmer climates
- Maintains cooler indoor temperatures, reducing energy consumption and utility bills
- Leak Prevention
- Forms a seamless barrier to prevent leaks and water damage
- Important during heavy rain seasons to avoid structural damage and mold growth
- Enhances protection, ensuring roofs remain intact and functional for years to come
👉 Preparing Your Roof for Coating
Preparing your roof for coating is a crucial step to ensure the longevity and effectiveness of the application. Proper preparation involves cleaning the surface, repairing any damage, and ensuring optimal weather conditions. By taking the time to prepare your roof, you can achieve better adhesion and a more durable finish.
Inspection
Before applying any coating, it’s essential to inspect your roof thoroughly. Look for signs of damage, such as cracks, leaks, or loose tiles. Pay close attention to areas where water might accumulate or where the roof is exposed to harsh weather conditions, as these spots are more prone to damage.
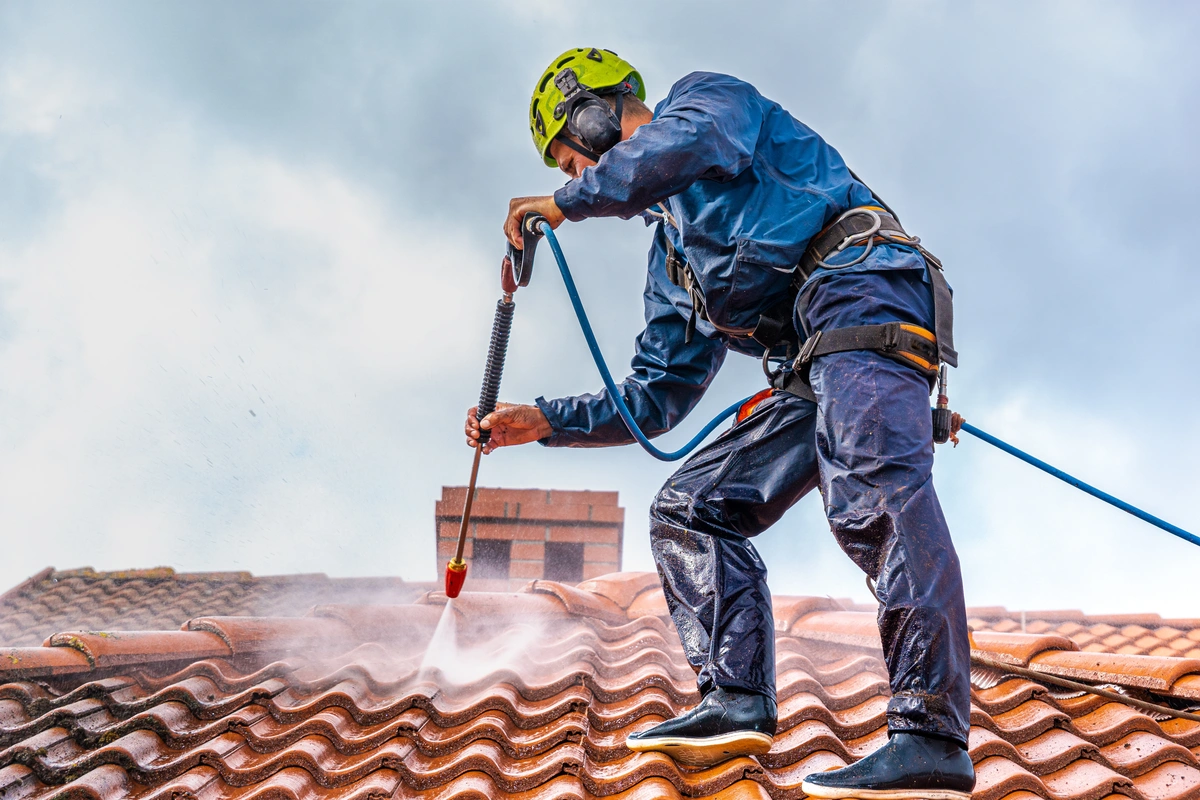
Cleaning
A clean roof ensures better adhesion of the coating. Use a pressure washer to remove dirt, debris, and any existing loose coating. Additionally, check for mold or algae growth and consider using a specialized cleaner to eliminate these issues, ensuring a smooth surface for the new coating.
Repairs
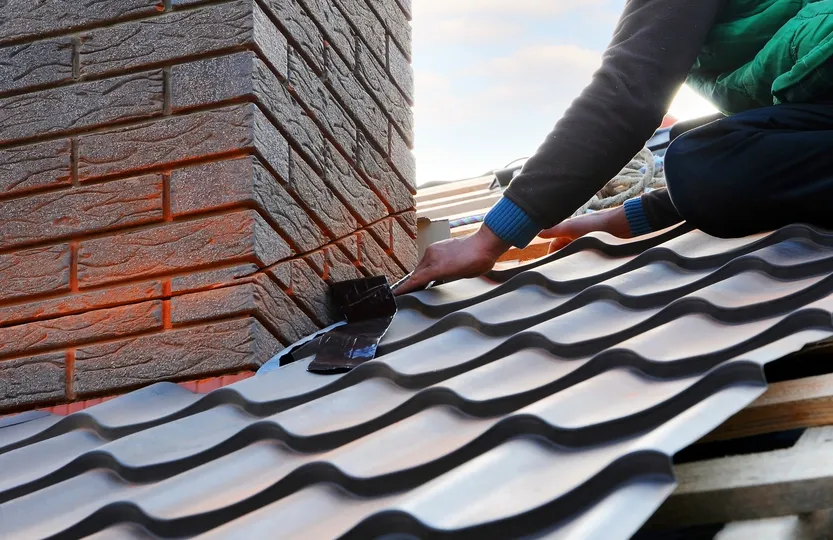
Address any minor repairs before applying the coating. Fix small cracks, replace damaged shingles, and ensure the roof is in good condition. It’s also wise to inspect flashing around vents and chimneys, as these areas can often be overlooked but are crucial for preventing leaks.
🛠️ 5-Step Guide to Applying Roof Coating
Whether you’re looking to protect your roof from the elements or enhance its longevity, following these steps will ensure a successful application.
1. Choose the Right Coating
Selecting the right roof coating is crucial for ensuring longevity and effectiveness. Consider your roof type—whether it’s flat, sloped, metal, or shingled—and the specific climate conditions of your area, such as UV exposure, rainfall, or extreme temperatures. Different coatings offer various benefits, such as reflectivity to reduce heat absorption or waterproofing capabilities. Be sure to read the manufacturer’s instructions thoroughly, as they provide specific guidelines regarding the coating’s suitability for your roof and any unique preparation requirements.
2. Gather Materials
Before you start your roofing project, gather all necessary materials to ensure a smooth process. You will need the roof coating specific to your chosen type, along with application tools like rollers or brushes that are appropriate for the coating’s consistency. A sturdy ladder is essential for reaching all areas of your roof safely, and don’t forget safety equipment such as gloves, goggles, and a mask to protect against fumes and falling debris. Having everything on hand before you begin will help you avoid interruptions and ensure a more efficient application process.
3. Apply the Primer
Applying a primer is essential for many coatings, as it helps to create a strong bond between the roof and the coating. Before applying, inspect the roof for any damage or debris and clean the surface thoroughly. Follow the manufacturer’s guidelines for the type of primer needed and the application technique. Use a roller or brush to apply the primer evenly, ensuring complete coverage without pooling. Allow the primer to dry completely before proceeding, as this step is critical for optimal adhesion of the subsequent layers.
4. Apply the Base Coat
Once the primer has dried, it’s time to apply the base coat. This layer acts as the foundation for your roof’s protection, so applying it evenly is key. Start at one end of the roof and work your way across, using a roller for larger areas and a brush for edges and corners. Pay attention to the manufacturer’s recommendations regarding the thickness of the base coat and the drying time between applications. Properly applying this layer will enhance the performance of your roof coating system.
5. Apply the Top Coat
After the base coat has dried completely, it’s time to apply the top coat. This final layer provides essential protection against the elements and enhances the durability of your roof. Use the same techniques as with the base coat, ensuring an even application across the entire surface. The top coat not only helps in waterproofing but also adds an additional layer of insulation and can improve the aesthetic appeal of your roof. Once applied, allow it to cure according to the manufacturer’s instructions for the best results.
🚫 Common Mistakes to Avoid
When considering roof coatings, it’s essential to be aware of common mistakes that can undermine their effectiveness. Avoiding these pitfalls can save you time and money while ensuring your roof is properly protected.
Skipping the Inspection
Neglecting to inspect your roof prior to applying a coating can result in inadequate adhesion, causing the coating to lift or wear off prematurely. An inspection allows you to identify and address any underlying issues such as cracks or leaks, ensuring a strong foundation for the coating.
Applying Coating to a Wet Surface
It’s crucial to make sure your roof is entirely dry before applying the coating. Any remaining moisture can hinder the bonding process, compromising the coating’s effectiveness and increasing the risk of peeling over time. Allow sufficient drying time after rain or washing the roof before proceeding.
Ignoring Manufacturer’s Instructions
Following the manufacturer’s guidelines for application and drying times is vital for achieving the best results. These instructions are designed to ensure the coating adheres properly and performs well. Deviating from them can lead to issues such as uneven application and reduced longevity of the coating.
💡 Maintenance Tips for Coated Roofs

Coated roofs require regular maintenance to ensure their longevity and effectiveness. By following specific care guidelines, you can protect your investment from damage and extend its lifespan.
Regular Inspections
Conduct regular inspections to catch any signs of wear and tear early. Look for cracks, loose shingles, or water damage. Address any minor issues promptly to prevent them from escalating into more significant problems that could lead to costly repairs.
Cleaning
Keep your roof clean by removing debris and dirt regularly. This includes clearing leaves, branches, and moss that can accumulate over time. Maintaining the reflective properties of the coating not only enhances its appearance but also improves energy efficiency by reflecting more sunlight.
Recoating
Depending on the type of coating used, you may need to reapply every few years to maintain its effectiveness. Regular recoating not only extends the life of your roof but also enhances its protective qualities against harsh weather conditions and UV damage.
💵 Cost Considerations
Understanding the financial implications is crucial for effective planning and budgeting, ensuring that resources are allocated efficiently to achieve our goals.
Initial Investment
The upfront cost of roof coating may seem high, but it’s important to view it as a long-term investment. By protecting your roof, you can prevent costly repairs and extend its lifespan, ultimately leading to significant savings on maintenance and energy bills over time.
ROI
When evaluating roof coating, it’s crucial to consider the return on investment (ROI). Not only does a coated roof last longer, but it also improves energy efficiency by reflecting sunlight, reducing cooling costs. These savings often surpass the initial expenditure, making it a financially sound decision.
Budgeting
Creating a comprehensive budget for your roof coating project is essential. Factor in the costs of high-quality materials and skilled labor, as well as any necessary repairs that need to be completed before applying the coating. By planning ahead, you can ensure that you stay within your financial limits while achieving the best results.
🌱 Environmental Impact
The environmental impact of roof coating is significant, as these coatings can enhance energy efficiency and reduce heat absorption in buildings. By reflecting sunlight, they not only lower cooling costs but also contribute to a decrease in urban heat islands and improve overall sustainability.
Eco-Friendly Options
Many roof coatings are eco-friendly and can significantly reduce your home’s carbon footprint. These coatings are designed with the environment in mind, often containing low levels of harmful substances. When choosing a coating, look for products that are low in VOCs (volatile organic compounds), which not only improves indoor air quality but also minimizes harmful emissions into the atmosphere.
Energy Savings
Roof coatings play a crucial role in reducing the need for air conditioning, as they can reflect sunlight and reduce heat absorption. This helps lower your energy consumption, leading to decreased utility bills and a smaller carbon footprint. By improving your home’s energy efficiency, roof coatings contribute to a more sustainable lifestyle and lessen your dependence on non-renewable energy sources.
Sustainable Materials
Opting for coatings made from sustainable materials is an excellent way to further minimize your environmental impact. These materials are often sourced responsibly and designed to last longer, reducing the need for frequent replacement. By choosing sustainable options, you not only support eco-friendly practices but also enhance the durability and performance of your roofing system.
🙌 Protect Your Home and Investment with Secured Roofing and Restorations
Roof coating is an essential part of home maintenance that offers numerous benefits, from extending your roof’s lifespan to improving energy efficiency. By following the steps outlined in this guide, you can ensure a successful application and enjoy the peace of mind that comes with a well-protected home. Our team at Secured Roofing and Restorations is here to help you every step of the way. Don’t hesitate—protect your investment today. Contact us to get started!
How To Tarp A Roof: Tips & Tricks
Written by : Secured Roofing and Restorations
10 minutes read

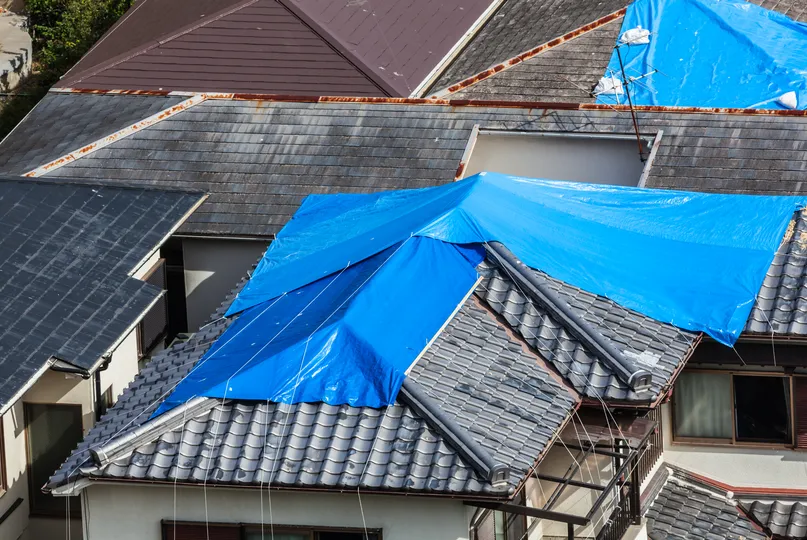
Roof damage can occur due to various reasons such as severe weather conditions, fallen trees, or even regular wear and tear. When such damage happens, it is crucial to protect your home from further water intrusion until permanent repairs can be made. One of the most effective temporary solutions is to tarp the roof. Tarping a roof involves covering the damaged area with a waterproof tarp to prevent leaks and further damage. In this article, we will provide a detailed guide on how to tarp a roof, along with some essential tips and tricks to ensure the job is done effectively and safely.
- Why tarping a roof is important
- Tools and materials needed
- Safety first
- 7 step guide to tarping a roof
- Tips and tricks for effective tarping
- When to call a professional
🤔 Why Tarping a Roof is Important
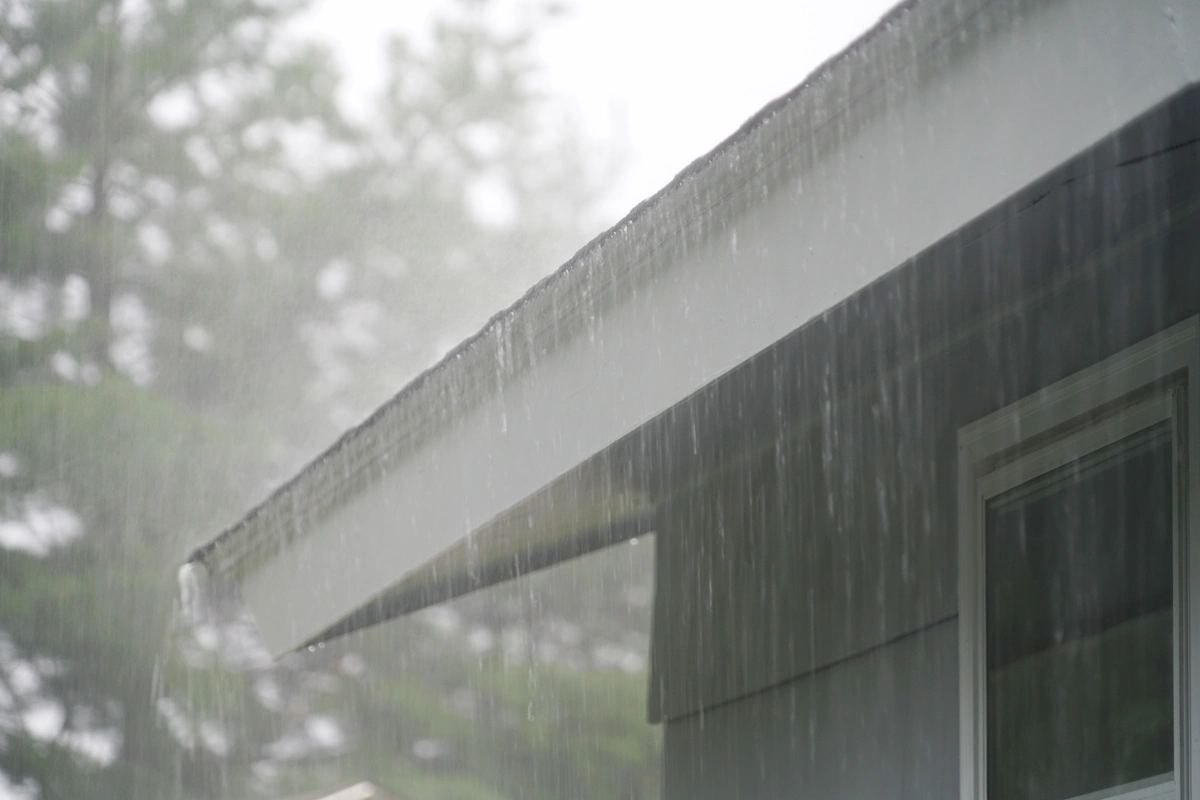
Tarping a roof serves as a crucial first line of defense against further damage when your roof is compromised. Whether it’s due to severe weather, fallen debris, or leaks, properly tarping your roof can prevent water intrusion and mitigate potential structural damage to your home. In this section, we will discuss the key reasons why tarping your roof is essential and how it can save you time and money on future repairs.
- Temporary Protection: A tarp serves as a temporary barrier against rain, snow, and debris. It helps prevent water from seeping into your home, which can cause extensive damage to the interior, including ceilings, walls, and personal belongings.
- Prevents Mold Growth: Water intrusion can lead to mold and mildew growth, which poses health risks to the occupants and can be costly to remediate. Tarping the roof helps keep moisture out, reducing the risk of mold development.
- Prevents Structural Damage: Continued exposure to water can weaken the structural integrity of your home. By tarping the roof, you minimize the amount of water that enters your home, protecting the structural components from damage.
🛠️ Tools and Materials Needed
Before you start tarping your roof, gather the necessary tools and materials to ensure a smooth and efficient process. Here is a list of items you will need:
- Heavy-duty tarp (preferably with grommets)
- Ladder
- Work gloves
- Safety harness
- Roofing nails or screws
- 2×4 wooden planks
- Utility knife
- Hammer or drill
- Measuring tape
- Rope or bungee cords
🦺 Safety First
Safety should be your top priority when working on a roof. Here are some essential safety tips to keep in mind:
- Wear Appropriate Gear: Wear non-slip shoes, gloves, and a safety harness to protect yourself from falls. If possible, have someone assist you during the process.
- Check Weather Conditions: Avoid working on the roof during adverse weather conditions such as strong winds, rain, or snow. Wet and slippery surfaces increase the risk of accidents.
- Use a Sturdy Ladder: Ensure that the ladder is in good condition and securely positioned on a flat surface. Have someone hold the ladder while you climb up and down.
- Stay Hydrated: Working on a roof can be physically demanding, especially in hot weather. Drink plenty of water and take breaks as needed to avoid dehydration and fatigue.
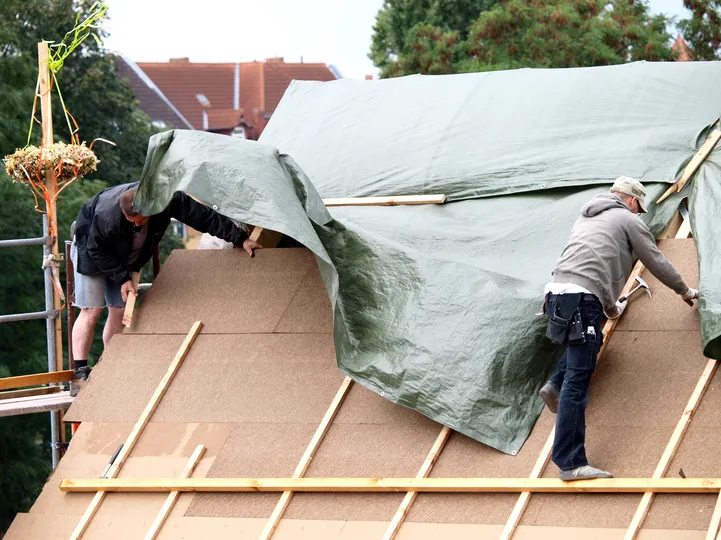
👉 7 Step Guide to Tarping a Roof
Tarping a roof is an essential skill for homeowners facing emergency situations such as storm damage or leaks. This guide will provide a straightforward, step-by-step approach to effectively install a tarp and protect your home until permanent repairs can be made.
1. Assess the Damage
Before you start tarping the roof, it’s important to thoroughly assess the extent of the damage. This initial assessment will guide you in effectively covering the affected areas. Here are a few steps to follow:
- Identify the areas that need to be covered. Look for any visible holes, leaks, or structural damage.
- Measure the size of the damaged section. This precise measurement will help you determine the size of the tarp you need to adequately cover the area.
- Consider any additional materials or tools you might need, such as nails, ropes, or adhesive, to secure the tarp in place.
2. Choose the Right Tarp
Choose a heavy-duty tarp that is sufficiently large to cover the damaged area, allowing for extra length to ensure it can be secured properly. Consider these tips:
- Opt for tarps with grommets, which facilitate easier and more secure fastening.
- Consider the material’s durability and weather resistance to ensure long-lasting protection.
- Check for reinforced edges to prevent tearing and enhance the tarp’s overall strength.
3. Position the Tarp
Unroll the tarp and carefully position it over the damaged area of the roof. Ensure that the tarp extends beyond the damaged section by at least 3-4 feet on all sides. This extra length is crucial for securing the tarp effectively and preventing it from being blown away by the wind. Here are a few tips:
- Use heavy-duty nails or screws to fasten the tarp to the roof, placing them every 12 inches along the edges.
- Consider adding weights, such as sandbags or bricks, around the perimeter of the tarp for additional stability.
- Check the tarp regularly to ensure it remains in place and make any necessary adjustments, especially after strong winds or storms.
4. Secure the Tarp
To secure the tarp, you will need to attach it to the roof using roofing nails or screws and 2×4 wooden planks. Follow these steps to secure the tarp effectively:
- Place the 2×4 Planks: Lay the 2×4 planks along the edges of the tarp, ensuring they are positioned over the undamaged sections of the roof. The planks will act as anchors to hold the tarp in place.
- Nail or Screw the Planks: Use roofing nails or screws to attach the 2×4 planks to the roof. Make sure the nails or screws penetrate the roof decking for a secure hold. Space the nails or screws approximately 2-3 feet apart along the length of the planks.
- Secure the Tarp: Fold the edges of the tarp over the 2×4 planks and nail or screw the tarp to the planks. This will help create a tight seal and prevent the tarp from flapping in the wind.
5. Fasten the Tarp with Rope or Bungee Cords
For added security, use rope or bungee cords to fasten the tarp to the roof. Here are some detailed steps to ensure the tarp remains secure:
- Attach the ropes or cords to the grommets: Begin by threading the ropes or bungee cords through the grommets on the edges of the tarp. Make sure the knots are tight and secure to prevent slipping.
- Tie to sturdy points on the roof: Identify strong, fixed points on your roof, such as chimneys, vents, or other structural components. These points should be able to withstand tension and hold the tarp in place.
- Ensure stability during strong winds: By firmly securing the tarp using the ropes or cords to these sturdy points, you can significantly reduce the risk of the tarp being blown away or damaged during strong winds. This precaution helps maintain the integrity of the covering.
6. Check for Gaps
Once the tarp is secured, inspect the entire covered area for any gaps or loose sections. Ensure every part is properly fastened to achieve a watertight seal. Here’s how to enhance the security of the tarp:
- Inspect Thoroughly: Walk around the entire area, checking for any visible gaps or sections that might be loose.
- Secure Loose Areas: Use additional nails, screws, or rope to tighten any loose spots. Make sure each point is firmly secured to prevent water from seeping through.
- Recheck for Watertight Seal: After tightening, recheck the entire tarp to confirm that it is completely sealed and no areas are left vulnerable to water or weather conditions.
7. Monitor and Maintain
Regularly check the tarp to ensure it remains secure and intact. Make any necessary adjustments or repairs to keep the tarp in good condition until permanent repairs can be made. Here are a few tips:
- Inspect the tarp for any signs of wear and tear, such as holes, fraying, or loose edges.
- Ensure that all fastenings and ties are still holding the tarp securely in place.
- Perform routine maintenance, such as tightening straps or patching small holes, to extend the life of the tarp.
💡 Tips and Tricks for Effective Tarping
When unexpected roof damage occurs, knowing how to properly tarp your roof can prevent further issues until professional repairs are possible. In this section, we will share six valuable tips and tricks for effective tarping, ensuring your home stays protected no matter the circumstances.
- Choose a High-Quality Tarp: Investing in a high-quality, heavy-duty tarp is crucial for ensuring the longevity and protection of your property. These tarps are specifically designed to withstand harsh weather conditions, such as heavy rain, strong winds, and intense sunlight.
- Unlike cheap alternatives that may tear or degrade quickly, a durable tarp provides a reliable barrier against environmental elements, safeguarding your roof from further damage.
- Additionally, high-quality tarps often come with reinforced edges and sturdy grommets, making them easier to secure and less likely to come loose during severe weather.
- Double Up for Extra Protection: For added protection, consider using two layers of tarps. This can provide an extra barrier against water intrusion and help prevent leaks.
- Angle the Tarp Properly: Ensure that the tarp is angled correctly to allow water to run off the roof. Avoid creating low spots or pockets where water can accumulate, as this can lead to leaks and further damage.
- Use Sandbags for Additional Weight: If you are unable to secure the tarp with nails or screws, consider using sandbags to hold it in place. Place sandbags along the edges and over the folds of the tarp to add weight and prevent it from being blown away by the wind.
- Check for Sharp Objects: Before placing the tarp, it’s crucial to thoroughly inspect the roof for any sharp objects such as nails, screws, or debris that could puncture the tarp. This step is essential to ensure the longevity and effectiveness of the tarp in protecting your roof. Carefully follow these guidelines to prevent damage:
- Keep a Backup Tarp: It’s a good idea to keep a backup tarp on hand in case the original tarp gets damaged or needs to be replaced. Having a spare tarp ensures you are always prepared to protect your roof from further damage.
👨🔧 When to Call a Professional
While tarping a roof can be a DIY project, there are certain situations where it is best to call a professional roofer. Here are some scenarios where professional assistance may be necessary:
- Extensive Damage: If the damage to your roof is extensive or involves structural issues, it is best to seek professional help. A professional roofer can assess the damage and provide a more permanent solution.
- Safety Concerns: If you are uncomfortable or unsure about working on a roof, it is safer to hire a professional. Roofing professionals have the necessary training and equipment to handle roof repairs safely.
- Insurance Claims: If you are filing an insurance claim for roof damage, it is often required to have a professional assessment and repairs. Check with your insurance provider for specific requirements.
- Permanent Repairs: Tarping is a temporary solution. For permanent repairs, it is best to hire a professional roofer who can ensure the repairs are done correctly and meet building codes.
🙌 Essential Roof Tarping: Protect Your Home with Secured Roofing and Restorations
Tarping a roof is an essential skill for homeowners to protect their homes from further damage in the event of roof damage. At Secured Roofing and Restorations, we understand the importance of this task and have the expertise to handle it with precision and care. Our team is dedicated to using high-quality materials, securing tarps properly, and routinely inspecting and maintaining them to ensure they remain effective. With our professional assistance, you can rest assured that your home is properly protected from water intrusion until permanent repairs can be made. Trust Secured Roofing and Restorations for all your roofing needs, and contact us today to schedule a consultation!
Metal Roof Repair: Step By Step Guide for Homeowners
Written by : Secured Roofing and Restorations
7 minutes read
Metal roofs are renowned for their durability, energy efficiency, and longevity. However, like any roofing material, they are susceptible to damage over time due to weather conditions, physical impacts, and general wear and tear. If you’re a homeowner with a metal roof, understanding how to carry out repairs can save you a significant amount of money and extend the life of your roof. In this comprehensive guide, we’ll walk you through the step-by-step process of metal roof repair, including:
- Understanding common metal roof problems
- 10 steps to repair a metal roof
🤔 Understanding Common Metal Roof Problems
Before diving into the repair process, it’s essential to understand the common issues that can affect metal roof systems:
- Leaks: Often caused by loose or missing fasteners, rusted areas, or seams that have opened up.
- Rust and Corrosion: Metal roofs can rust, especially if the protective coating wears off.
- Loose or Missing Fasteners: Screws and fasteners can become loose over time, leading to potential leaks and structural issues.
- Punctures and Tears: Hail, falling branches, or heavy debris can cause punctures and tears in the metal panels.
- Oil Canning: A visible waviness or distortion in the flat areas of the metal roof panels, usually caused by improper installation or thermal expansion.
🛠️ 10 Steps To Repair A Metal Roof
Metal roofs are known for their durability, but even the best roofs require occasional repairs. In this section, we will guide you through a systematic approach to fixing common issues with metal roofing. Follow these 10 steps to ensure your metal roof remains in excellent condition and continues to provide robust protection for your home.
1. Safety First
Before starting any roof repair, safety should be your top priority. Here are some essential safety tips:
- Wear Appropriate Gear: This includes non-slip shoes, gloves, safety glasses, and a hard hat.
- Use a Safety Harness: If your roof is steep or high, always use a safety harness and secure it properly.
- Check the Weather: Avoid working on the roof during wet, windy, or excessively hot weather conditions.
- Use a Stable Ladder: Ensure your ladder is stable and placed on solid ground. Have someone hold the ladder for added stability.
2. Inspect the Roof
A thorough inspection helps identify the problem areas that need repair. Here’s how to do it:
- Visual Inspection: Start by visually inspecting the roof from the ground. Look for obvious signs of damage, such as missing fasteners, rust spots, or punctures.
- Up-Close Inspection: Use a ladder to get a closer look. Pay attention to the seams, joints, and areas around fasteners. Check for loose screws, rust, and damaged panels.
- Check the Attic: Sometimes, leaks can be more apparent from the inside. Inspect the attic for any signs of water damage, mold, or mildew.
3. Gather the Necessary Tools and Materials
Having the right tools and materials is crucial for effective repairs. Here’s a list of what you might need:
- Replacement Screws and Fasteners: Ensure they are of the same type and size as the existing ones.
- Metal Roofing Panels: If you need to replace damaged sections.
- Metal Roof Sealant: Designed specifically for metal roofs, it helps seal seams and joints.
- Wire Brush: For cleaning rusted areas.
- Paint and Primer: To repaint repaired areas and protect them from future rust.
- Sheet Metal Snips: For cutting metal panels.
- Screw Gun/Drill: To remove and install screws and fasteners.
- Caulking Gun: For applying sealant.
- Protective Gear: Gloves, safety glasses, and a hard hat.
4. Fix Loose or Missing Fasteners
Loose or missing fasteners are a common issue and relatively easy to fix. Here’s how:
- Tighten Loose Screws: Use a screw gun or drill to tighten any loose screws. Be careful not to over-tighten, as this can strip the hole.
- Replace Missing Screws: If screws are missing, replace them with new ones of the same type and size. Ensure they are installed securely but not overly tight.
- Check for Leaks: After replacing screws, check the areas for leaks. Apply metal roof sealant around the screws to ensure a watertight seal.
5. Repair Rusted Areas
Rust can compromise the integrity of your metal roof. Here’s how to address it:
- Clean the Area: Use a wire brush to remove rust and any loose debris. Ensure the area is clean and dry before proceeding.
- Apply Rust Inhibitor: Apply a rust inhibitor to the cleaned area to prevent future rusting.
- Prime and Paint: Apply a metal primer followed by paint to match your roof. This will protect the area from future rust and blend it with the rest of the roof.
6. Seal Leaks and Seams
Leaks often occur at seams and joints. Sealing these areas can prevent water from entering your home:
- Clean the Area: Ensure the area around the leak is clean and dry.
- Apply Metal Roof Sealant: Use a caulking gun to apply metal roof sealant along the seams and joints. Ensure a generous and even application.
- Smooth the Sealant: Use a putty knife or your finger (wearing gloves) to smooth the sealant and ensure it fills the gaps completely.
7. Replace Damaged Panels

In some cases, you may need to replace entire sections of the metal roofing. Here’s how:
- Remove the Damaged Panel: Start by removing the screws or fasteners holding the damaged panel in place. Carefully lift the panel off the roof.
- Cut a New Panel: Measure the area and cut a new panel to fit using sheet metal snips.
- Install the New Panel: Place the new panel in position and secure it with screws or fasteners. Ensure it overlaps correctly with the adjacent panels to maintain a watertight seal.
- Seal the Edges: Apply metal roof sealant along the edges of the new panel to ensure a watertight seal.
8. Fix Punctures and Tears
Small punctures and tears can be repaired without replacing entire panels. Here’s how:
- Clean the Area: Ensure the area around the puncture is clean and dry.
- Apply Roofing Cement: Use roofing cement to fill the puncture or tear. Spread it evenly over the damaged area.
- Apply a Patch: Cut a piece of metal patch to fit over the puncture. Press it firmly into the roofing cement.
- Seal the Patch: Apply another layer of roofing cement over the patch, ensuring it’s sealed completely.
9. Address Oil Canning
Oil canning is more of an aesthetic issue than a functional one, but it can be addressed:
- Tighten Fasteners: Sometimes, oil canning can be reduced by tightening the fasteners around the affected area.
- Add Additional Fasteners: If tightening existing fasteners doesn’t help, consider adding additional fasteners to reduce the waviness.
- Replace Panels: In severe cases, replacing the affected panels may be necessary.
10. Preventive Maintenance
Regular maintenance can prevent many of the issues mentioned above. Here are some tips:
- Regular Inspections: Inspect your metal roof at least twice a year and after major storms.
- Keep the Roof Clean: Remove debris, leaves, and branches that can cause damage or retain moisture.
- Trim Overhanging Branches: Ensure trees near your home are trimmed to prevent branches from falling on your roof.
- Check and Tighten Fasteners: Periodically check and tighten screws and fasteners to ensure they remain secure.
- Reapply Sealant: Over time, sealant can wear out. Reapply metal roof sealant to seams and joints as needed.
🙌 Ensuring the Longevity of Your Metal Roof with Secured Roofing and Solar
Repairing a metal roof can seem daunting, but with the right tools, materials, and expertise, it doesn’t have to be. At Secured Roofing and Solar, our skilled team is equipped to handle all your roofing needs, ensuring your metal roof remains in excellent condition. By trusting us, you can protect your home and investment for years to come. Our commitment to regular maintenance and timely repairs guarantees you get the best durability and performance from your roof. Contact Secured Roofing and Solar today to experience the peace of mind that comes with working with the best in the industry!
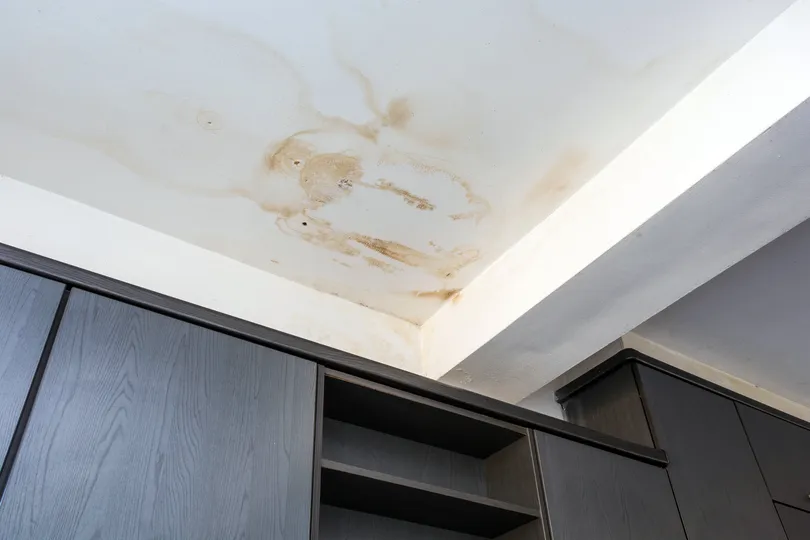
6 Causes of Water Stains on Ceiling & Ways to Fix
Written by : Secured Roofing and Restorations
5 minutes read
Water stains on the ceiling can be unsightly and indicate underlying issues that need prompt attention. Whether it’s a small discolored patch or a larger, spreading stain, understanding the causes and knowing how to fix them can prevent further damage to your home. In this comprehensive guide, we’ll explore the various reasons behind water stains on ceiling surfaces and effective ways to address them, including:
- 6 common causes of water stains on the ceiling
- Identifying Water Stains
- 7 Ways to Fix Water Stains on Ceiling
- Professional Assistance
👇 6 Common Causes of Water Stains on the Ceiling
Water stains on your ceiling can be a troubling sign of various underlying issues. Identifying the root cause is crucial in preventing further damage and ensuring the long-term health of your home. In this section, we will explore six common causes of water stains on ceilings and provide insights into effective prevention and repair strategies.
1. Roof Leaks
One of the primary culprits behind ceiling water stains is a leaky roof. Roof leaks can be caused by:
- Damaged shingles
- Deteriorated flashing around chimneys or vents
- Ice dams during winter
Water from roof leaks often travels down rafters or along pipes, causing stains to appear on ceilings below.
2. Plumbing Leaks
Leaky pipes or plumbing fixtures in bathrooms, kitchens, or even hidden within walls can lead to water stains on ceilings directly below. Common sources include leaking supply lines, drain pipes, or faulty seals around plumbing fixtures.
3. Condensation
Excessive condensation can form on ceilings, especially in high-humidity areas like bathrooms or kitchens without proper ventilation. Over time, this moisture can lead to water stains and even mold growth if left unchecked.
4. HVAC Issues
Air conditioning units, especially those with condensate drainage problems, can cause water to accumulate and drip onto ceilings below. Improperly installed or clogged HVAC systems can exacerbate this issue.
5. Overflowing Gutters
Clogged or improperly installed gutters and downspouts can cause water to overflow and seep into the walls and ceilings of your home, resulting in stains over time.
6. Structural Issues
In some cases, water stains may be caused by structural issues such as cracks in the roof or walls that allow water to penetrate and accumulate within the ceiling space.
🔎 Identifying Water Stains
Before attempting any repairs, it’s essential to correctly identify the type of stain and its underlying cause. Water stains on ceilings typically appear as discolored patches ranging from light brown to dark yellow or even black in severe cases. They may also be accompanied by peeling paint or bubbling plaster.
To accurately identify the source of the stain:
- Inspect the Attic: Check for signs of roof leaks directly above the stained area. Look for wet insulation, water marks on rafters or roof decking, and daylight entering through gaps.
- Trace Plumbing Lines: Trace plumbing lines from the stained ceiling to identify potential leaks in pipes or fixtures.
- Examine HVAC Systems: Inspect air conditioning units and ductwork for condensation or signs of water leakage.
🛠️ 7 Ways to Fix Water Stains on Ceiling
Once you’ve identified the cause of the water stain, addressing it promptly can prevent further damage and restore the aesthetic appeal of your ceiling. Here are effective methods to fix water stains on ceilings:
1. Repair Roof Leaks
If the stain is due to a roof leak, repair or replace damaged shingles, flashing, or seals around vents and chimneys. Consider hiring a professional roofer for complex repairs.
2. Fix Plumbing Issues
For plumbing leaks, repair or replace faulty pipes, fittings, or fixtures. Use pipe sealants or plumber’s tape as necessary. Ensure proper insulation around pipes to prevent future condensation.
3. Improve Ventilation
Increase ventilation in high-humidity areas by installing exhaust fans in bathrooms and kitchens. Use dehumidifiers to reduce moisture levels if necessary.
4. Clean Gutters and Downspouts
Regularly clean gutters and downspouts to prevent water overflow and ensure proper drainage away from your home’s foundation and walls.
5. Seal Cracks and Gaps
Seal cracks in walls, ceilings, and around windows and doors to prevent water intrusion. Use caulk or sealant appropriate for the surface material.
6. Repaint or Touch Up
After addressing the underlying issue, allow the ceiling to dry completely. Repaint or touch up the affected area with a stain-blocking primer followed by ceiling paint to restore its appearance.
7. Monitor Regularly
Periodically check for new water stains or signs of moisture to catch potential issues early and prevent extensive damage.
👨🔧 Professional Assistance
For complex issues such as extensive roof repairs, major plumbing overhauls, or mold remediation, it’s advisable to consult with licensed professionals. They can provide expert assessment, repairs, and advice to ensure long-term solutions and prevent recurrence of water stains on your ceiling.
🙌 Protect Your Home from Ceiling Water Stains with Secured Roofing and Restorations
Water stains on ceilings are more than just cosmetic issues; they often indicate serious underlying problems that need immediate attention. At Secured Roofing and Restorations, our expert team understands the common causes of these issues and employs effective repair strategies to protect your home from water damage. With our proactive maintenance and early detection services, we ensure the integrity and aesthetics of your home’s ceilings are preserved for years to come. Trust Secured Roofing and Restorations for all your roofing needs. Contact us today to safeguard your home and maintain a healthy indoor environment!
How Long Does A Roof Last? (Maintenance Tips, Materials…)
Written by : Dev Team
8 minutes read
Few investments come close to being as significant as your roof. A well-maintained roof provides shelter, protects your home from the elements, and contributes to the overall aesthetics of your property. But how long does a roof really last? The lifespan of a roof can vary widely based on several factors including the materials used, the quality of installation, and the level of maintenance it receives. In this comprehensive guide, we will answer the question, “How long does a roof last?”, offer essential maintenance tips, and other helpful recommendations, like:
- Lifespan of different roofing materials
- 7 Essential Maintenance Tips for Prolonging Roof Life
- 6 Factors Affecting Roof Longevity
- 5 Signs Your Roof Needs Replacement
- Choosing the Right Roofing Material for Your Needs
⏳ Lifespan of Different Roofing Materials
The type of roofing material you choose is one of the most critical factors in determining how long your roof will last. Here is an overview of the expected lifespan of some common roofing materials:
Asphalt Shingles
Asphalt shingles are the most popular roofing material in the United States due to their affordability and ease of installation. There are two main types of asphalt shingles: 3-tab shingles and architectural shingles.
- 3-tab shingles: Typically last between 15 to 20 years.
- Architectural shingles: Offer a longer lifespan of 25 to 30 years due to their thicker, more durable design.
Wood Shingles and Shakes
Wood shingles and shakes provide a natural, rustic look and are usually made from cedar, redwood, or pine.
- Wood shingles: Generally last between 25 to 30 years.
- Wood shakes: Can last up to 35 to 40 years with proper maintenance.
Metal Roofing
Metal roofs are known for their durability and are available in various materials such as steel, aluminum, copper, and zinc.
- Steel and aluminum: Can last between 40 to 70 years.
- Copper and zinc: Offer an impressive lifespan of 70 to 100 years or more.
Clay and Concrete Tiles
Clay and concrete tiles are incredibly durable and are commonly used in Mediterranean-style homes.
- Clay tiles: Can last between 50 to 100 years.
- Concrete tiles: Offer a lifespan of 40 to 60 years.
Slate Roofing
Slate roofing is one of the longest-lasting roofing materials available, known for its elegance and longevity.
- Slate tiles: Can last between 75 to 200 years, depending on the quality of the slate.
Synthetic Roofing Materials
Synthetic roofing materials, such as rubber, plastic, and polymer, are designed to mimic the appearance of natural materials while offering increased durability.
- Synthetic shingles: Typically last between 20 to 50 years.
💡 7 Essential Maintenance Tips for Prolonging Roof Life
Proper maintenance is crucial for extending the lifespan of your roof, regardless of the material. Here are some essential maintenance tips to help you keep your roof in top condition:
1. Regular Inspections
Conduct regular roof inspections at least twice a year, preferably in the spring and fall. Look for signs of damage, such as missing or cracked shingles, rusted flashing, and clogged gutters.
2. Clean Your Gutters
Clogged gutters can cause water to back up and seep under your roofing materials, leading to leaks and water damage. Clean your gutters regularly to ensure proper drainage.
3. Remove Debris
Keep your roof free from debris, such as leaves, branches, and moss. Debris can trap moisture and cause deterioration of the roofing materials. Use a roof rake or a leaf blower to remove debris safely.
4. Trim Overhanging Branches
Overhanging branches can scrape and damage your roof, especially during storms. Trim back any branches that are close to your roof to prevent potential damage.
5. Address Repairs Promptly
If you notice any damage during your inspections, address it promptly. Small issues, such as a missing shingle or a minor leak, can quickly escalate into more significant problems if left unattended.
6. Check for Proper Ventilation
Proper attic ventilation is essential for maintaining the health of your roof. Ensure that your attic has adequate ventilation to prevent heat and moisture buildup, which can lead to premature roof deterioration.
7. Ensure Proper Insulation
Proper insulation helps regulate your home’s temperature and reduces the strain on your roofing materials. Make sure your attic is well-insulated to prolong the life of your roof.
🏠 6 Factors Affecting Roof Longevity
Several factors can influence the lifespan of your roof, beyond the materials used and maintenance practices. Here are some key factors to consider:
1. Climate and Weather Conditions
The climate and weather conditions in your area play a significant role in determining how long your roof will last. For example, roofs in areas with extreme temperatures, heavy snowfall, or frequent storms may experience more wear and tear than those in milder climates.
2. Quality of Installation
The quality of the installation is critical to the longevity of your roof. Poor installation can lead to issues such as leaks, improper ventilation, and premature deterioration. Always hire a reputable and experienced roofing contractor to ensure your roof is installed correctly.
3. Roof Pitch and Design
The pitch and design of your roof can also impact its lifespan. Steeper roofs tend to shed water and snow more effectively, reducing the risk of water damage. Additionally, roofs with fewer valleys and complex features are less prone to leaks and other issues.
4. Material Quality
The quality of the roofing materials used can vary significantly. Investing in high-quality materials may have a higher upfront cost but can result in a longer-lasting roof and fewer repairs over time.
5. Ventilation and Insulation
As mentioned earlier, proper ventilation and insulation are crucial for maintaining the health of your roof. Ensure your attic has adequate ventilation and insulation to prevent heat and moisture buildup, which can lead to premature roof deterioration.
6. Regular Maintenance
Regular maintenance is essential for prolonging the life of your roof. By conducting regular inspections, cleaning your gutters, and addressing repairs promptly, you can prevent small issues from becoming major problems.
⚠️ 5 Signs Your Roof Needs Replacement
Even with proper maintenance, there will come a time when your roof needs to be replaced. Here are some signs that it may be time for a new roof:
1. Age of the Roof
If your roof is approaching the end of its expected lifespan based on the materials used, it may be time to consider a replacement.
2. Frequent Repairs
If you find yourself constantly repairing your roof, it may be more cost-effective to invest in a new roof rather than continuing to patch up an aging one.
3. Visible Damage
Visible damage, such as cracked or missing shingles, sagging, or extensive granule loss, can indicate that your roof is nearing the end of its lifespan.
4. Leaks and Water Damage
Frequent leaks and water damage inside your home can be a sign that your roof is no longer providing adequate protection.
5. Moss and Algae Growth
While moss and algae growth can often be cleaned, persistent growth can indicate underlying issues with moisture retention and may be a sign that your roof needs to be replaced.
👇 Choosing the Right Roofing Material for Your Needs
When it comes time to replace your roof, choosing the right roofing material is crucial. Here are some factors to consider when selecting a roofing material:
Climate
Consider the climate in your area when choosing a roofing material. For example, metal roofs are excellent for areas with heavy snowfall, while clay tiles are ideal for hot, dry climates.
Budget
Your budget will play a significant role in determining the type of roofing material you choose. While high-end materials such as slate and metal can be more expensive, they often offer longer lifespans and lower maintenance costs.
Aesthetic Preferences
The appearance of your roof can significantly impact the overall look of your home. Choose a roofing material that complements your home’s architectural style and enhances its curb appeal.
Durability
Consider the durability of the roofing material and how it will stand up to the elements in your area. High-quality materials may have a higher upfront cost but can save you money in the long run by reducing the need for repairs and replacements.
Maintenance Requirements
Different roofing materials have varying maintenance requirements. Consider how much time and effort you are willing to invest in maintaining your roof when selecting a material.
🙌 Secured Roofing and Solar: Ensuring Longevity and Quality for Your Roof
The lifespan of your roof hinges on materials, installation quality, and maintenance. At Secured Roofing and Solar, we use top-quality materials and ensure flawless installation for long-lasting roofs. Choosing us means regular maintenance and prompt repairs, extending your roof’s life. We guide you in selecting the best roofing materials based on climate, budget, and durability. Our services include inspections, repairs, and proper ventilation, ensuring your roof’s longevity. Trust Secured Roofing and Solar for all your roofing needs. Contact us today for a consultation and protect your home with our expertise!
20 Things to Know About Roof Financing
Written by : Secured Roofing and Restorations
7 minutes read

A roof replacement or repair is often one of the most significant investments a homeowner can make. The cost of a new roof can range from a few thousand to tens of thousands of dollars, depending on the materials, size, and complexity of the project. Given the substantial expense, understanding your financing options is crucial. Here are 20 essential things to know about roof financing to help you make an informed decision, broken down into these categories:
- Assess and Plan
- Financing Options
- Financial Considerations
- Due Diligence
💵 20 Things To Know About Roof Financing
Navigating the financial aspects of roofing projects can be daunting for many homeowners. In this section, we will explore 20 essential things you need to know about roof financing to help you make informed decisions and manage your budget effectively:
- Understanding loan options
- Exploring government incentives
- Securing the best financing for your roofing needs
We’ll cover everything you need to manage your roofing project finances efficiently.
1. Assess Your Roofing Needs
Before diving into financing options, it’s vital to accurately assess your roofing needs. Determine whether you need a complete roof replacement, a partial repair, or just minor maintenance. A thorough inspection by a professional roofer can provide clarity. Understanding the extent of the work required will help you budget appropriately and choose the right financing solution.
2. Calculate the Total Cost

Understanding the total cost of your roofing project is crucial. This includes not only the materials and labor but also any additional expenses such as permits, inspections, and potential unforeseen issues. Getting multiple quotes from reputable contractors can give you a better idea of the price range and help you avoid unexpected costs.
3. Evaluate Your Financial Situation
Take a close look at your current financial situation before committing to any financing option. Consider your income, savings, credit score, and existing debt. A clear understanding of your financial health will guide you in choosing a financing option that you can comfortably manage without overextending yourself.
4. Explore Home Equity Loans and Lines of Credit
Both home equity loans and home equity lines of credit (HELOCs) are popular financing options for large home improvement projects, including roofing. A home equity loan or a home equity line of credit allows you to borrow against the equity in your home, often at lower interest rates than personal loans or credit cards. However, keep in mind that these loans use your home as collateral, so defaulting on payments could put your home at risk.
5. Consider Personal Loans
Personal loans are another financing option to consider. These loans are unsecured, meaning they don’t require collateral, but they typically come with higher interest rates compared to home equity loans. Personal loans are a good choice if you have a strong credit score and prefer not to use your home as collateral.
6. Look into Roofing Company Financing
Many roofing companies offer their own financing options or partner with financial institutions to provide financing plans for their customers. These plans can range from short-term loans to more extended payment plans, often with competitive interest rates. Be sure to compare the terms and conditions with other financing options to ensure you’re getting a good deal.
7. Investigate Government Programs
In some cases, government programs may be available to help finance your roofing project. These programs often offer low-interest loans or grants for home improvements, particularly for energy-efficient upgrades. Check with your local government or the U.S. Department of Housing and Urban Development (HUD) for potential opportunities.
8. Review Insurance Coverage
If your roof has been damaged due to a storm or other covered events, your homeowner’s insurance policy may cover part or all of the repair costs. Review your policy carefully and contact your insurance provider to understand what is covered and the process for filing a claim. This could significantly reduce the amount you need to finance.
9. Understand Interest Rates and Terms
Interest rates and loan terms can vary widely depending on the type of financing you choose and your creditworthiness. It’s crucial to understand the annual percentage rate (APR), repayment period, monthly payment amount, and any potential fees or penalties. Comparing these factors across different financing options will help you find the most cost-effective solution.
10. Consider Zero-Interest Financing Offers
Some roofing companies and financial institutions offer zero-interest financing for a limited period. While these offers can be attractive, it’s essential to read the fine print. Ensure you understand the terms, such as the duration of the zero-interest period and what happens if you miss a payment or don’t pay off the loan within the promotional period.
11. Plan for Unexpected Costs
Roofing projects can sometimes uncover additional issues, such as structural damage or hidden leaks, that need to be addressed. It’s wise to set aside a contingency fund to cover any unexpected expenses that may arise during the project. This will prevent you from having to secure additional financing or dip into your savings unexpectedly.
12. Seek Professional Financial Advice

If you’re unsure about which financing option is best for your situation, consider seeking advice from a financial advisor. A professional can help you evaluate your options, understand the long-term implications of each choice, and select the financing solution that aligns with your financial goals.
13. Improve Your Credit Score
Your credit score plays a significant role in determining the interest rates and terms you’re eligible for when financing a roofing project. If your credit score is less than ideal, take steps to improve it before applying for financing. This might include paying down existing debt, correcting any errors on your credit report, and making timely payments on your current accounts.
14. Budget for Repayments
Once you’ve secured financing, it’s crucial to budget for the repayments. Ensure that your monthly payments fit comfortably within your budget to avoid financial strain. Consider setting up automatic payments to avoid missing any due dates and potentially damaging your credit score.
15. Read the Fine Print
Before signing any financing agreement, read the fine print thoroughly. Ensure you understand all the terms and conditions, including any fees, penalties, and the total cost of the loan over time. If anything is unclear, ask for clarification from the lender or a financial professional.
16. Consider Refinancing Options
If you already have a loan or mortgage, refinancing could be an option to consider. Refinancing can allow you to take advantage of lower interest rates or better terms, potentially saving you money in the long run. However, be aware of any closing costs or fees associated with refinancing.
17. Research Tax Benefits
In some cases, roof repairs or replacements, particularly those that improve energy efficiency, may qualify for tax credits or deductions. Consult with a tax professional to understand any potential tax benefits and how they can impact your overall financing strategy.
18. Evaluate Long-Term Savings
While the upfront cost of a new roof can be high, consider the long-term savings it can provide. A new, energy-efficient roof can reduce your energy bills, increase your home’s value, and potentially lower your insurance premiums. Factor these savings into your overall financial planning.
19. Compare Multiple Offers
Don’t settle for the first financing offer you receive. Take the time to compare multiple offers from different lenders and roofing companies. This will give you a better understanding of the available options and help you find the best terms and rates for your situation.
20. Stay Informed and Updated
Finally, stay informed about the latest trends and updates in roofing and home improvement financing. New products, interest rates, and government programs can change over time, and staying updated can help you make the best decision for your roofing project.
🙌 Financing Your Roofing Project Made Easy with Secured Roofing and Restorations
Financing a roofing project can seem daunting, but with the right information and careful planning, you can find a solution that fits your needs and budget. At Secured Roofing and Restorations, our team is committed to guiding you through the process with expertise and transparency. We help you understand your options, evaluate your financial situation, and provide professional advice to ensure your home remains protected for years to come. Trust Secured Roofing and Restorations for all your roofing needs. Contact us today for a consultation!
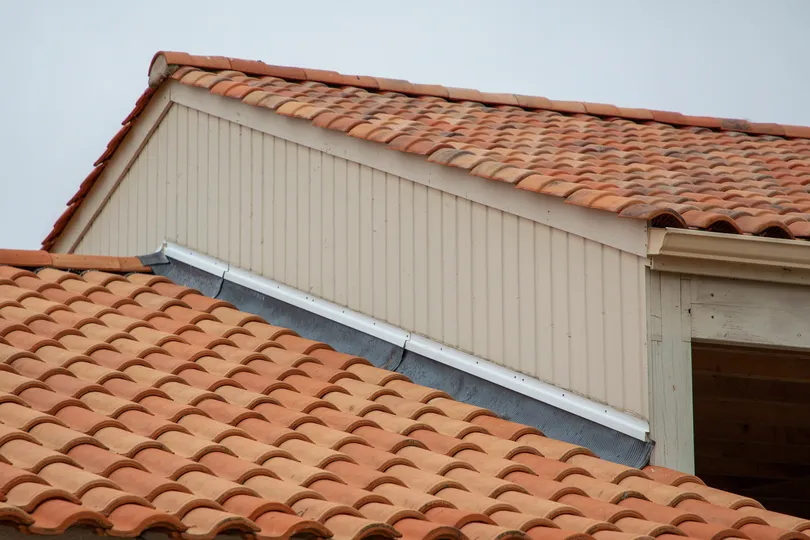
Parts of A Roof: Homeowners Comprehensive Guide (2024)
Written by : Secured Roofing and Restorations
9 minutes read

In order to best understand the structure and functionality of a home, one of the most critical components is the roof. A well-maintained roof not only protects your home from the elements but also enhances its aesthetic appeal and overall value. This comprehensive guide for 2024 will walk you through the various parts of a roof, helping you become more familiar with this essential aspect of homeownership, including:
- Roof decking
- Underlayment
- Roof flashing
- Roofing material
- Roof vents
- Roof valleys
- Roof eaves
- Roof ridge
- Roof gables
- Roof dormers
- Roof hips
- Roof gutters and downspouts
🏠 12 Parts of a Roof Every Homeowner Should Know About
Understanding the fundamental components of your roof can help you make informed decisions about maintenance and repairs. In this section, we will explore the 12 critical parts of a roof that every homeowner should be familiar with to ensure their home’s protection and longevity.
1. Roof Decking (Sheathing)
The roof decking, or sheathing, is the foundation of your roof. Typically made of plywood or oriented strand board (OSB), the decking provides structural support and a base for other roofing materials. It covers the rafters and serves as the surface to which the roofing materials are attached. Proper installation and maintenance of the decking are crucial, as it needs to be sturdy enough to support the weight of the roofing materials and withstand weather conditions.
Importance of Roof Decking
- Structural Support: Ensures the roof’s overall stability and integrity.
- Attachment Point: Provides a secure base for underlayment and roofing materials.
- Protection: Acts as a barrier against moisture and pests.
2. Underlayment
The underlayment is a protective layer installed directly on top of the roof decking. It acts as an additional barrier against water infiltration. There are two main types of underlayment: asphalt-saturated felt and synthetic underlayment. The choice of underlayment depends on the roofing material and climate conditions in your area.
Types of Underlayment
- Asphalt-Saturated Felt: Traditional option, effective but less durable than synthetic.
- Synthetic Underlayment: Modern choice, offers superior water resistance and longevity.
Benefits of Underlayment
- Waterproofing: Protects the roof decking from moisture.
- Protection: Provides an extra layer of defense against leaks and damage.
- Energy Efficiency: Can contribute to better insulation and energy savings.
3. Roof Flashing
Roof flashing is a material, usually metal, used to direct water away from critical areas of the roof, such as joints, valleys, and intersections. Flashing is essential for preventing leaks and ensuring that water flows properly off the roof. Common types of flashing include step flashing, valley flashing, and drip edge.
Types of Roof Flashing
- Step Flashing: Used where the roof meets a vertical surface, such as a wall or chimney.
- Valley Flashing: Installed in roof valleys to channel water away.
- Drip Edge: Placed along the edges of the roof to prevent water from seeping under the shingles.
Importance of Roof Flashing
- Leak Prevention: Critical for preventing water infiltration at vulnerable points.
- Durability: Protects against weather-related wear and tear.
- Aesthetic: Enhances the roof’s appearance by providing clean lines and edges.
4. Roofing Material
The roofing material is the outermost layer of the roof and the most visible. It protects the home from the elements and contributes significantly to its aesthetic appeal. There are various types of roofing materials, each with its own advantages and disadvantages.
Common Roofing Materials
- Asphalt Shingles: Popular for their affordability and ease of installation.
- Metal Roofing: Known for durability and energy efficiency.
- Tile Roofing: Offers a distinctive look and long lifespan.
- Wood Shingles/Shakes: Provides a natural and rustic appearance.
- Slate Roofing: Premium option, known for its beauty and longevity.
Factors to Consider
- Climate: Some materials perform better in certain climates.
- Cost: Budget considerations play a significant role in material selection.
- Durability: Lifespan and maintenance requirements vary by material.
- Aesthetic: Choose a material that complements the style of your home.
5. Roof Vents
Roof ventilation is crucial for maintaining the longevity and efficiency of your roof. Proper ventilation helps regulate temperature and moisture levels in the attic, preventing issues such as mold growth, ice dams, and premature aging of roofing materials. There are different types of roof vents, including ridge vents, soffit vents, and gable vents.
Types of Roof Vents
- Ridge Vents: Installed along the ridge line of the roof for continuous ventilation.
- Soffit Vents: Located under the eaves, allow cool air to enter the attic.
- Gable Vents: Positioned on the gable ends of the house, provide additional airflow.
Benefits of Roof Ventilation
- Temperature Regulation: Keeps the attic cool in summer and reduces heating costs in winter.
- Moisture Control: Prevents condensation and mold growth.
- Prolonged Roof Life: Reduces the risk of damage to roofing materials.
6. Roof Valleys
Roof valleys are the areas where two roof planes intersect, creating a V-shaped channel. They are critical for directing water off the roof and into the gutters. Proper installation and maintenance of roof valleys are essential to prevent leaks and water damage.
Types of Roof Valleys
- Open Valleys: Exposed metal flashing channels water off the roof.
- Closed Valleys: Roofing material covers the valley, providing a seamless look.
- Woven Valleys: Shingles from both roof planes are woven together for added protection.
Importance of Roof Valleys
- Water Management: Ensures effective water runoff and prevents pooling.
- Leak Prevention: Properly installed valleys are essential for preventing leaks.
- Aesthetic: Can be designed to blend with the overall look of the roof.
7. Roof Eaves
The eaves are the edges of the roof that overhang the walls of the house. They play a crucial role in protecting the home’s exterior from water damage by directing rainwater away from the walls. Eaves can also add to the architectural style of the home.
Components of Roof Eaves
- Fascia: The vertical finishing edge that connects the roof to the rafters.
- Soffit: The underside of the eaves, often ventilated to provide airflow to the attic.
Benefits of Roof Eaves
- Water Protection: Keeps rainwater away from the walls and foundation.
- Ventilation: Soffit vents contribute to proper attic ventilation.
- Aesthetic Appeal: Enhances the overall look and style of the home.
8. Roof Ridge
The roof ridge is the horizontal line where two roof planes meet at the top. It is the highest point of the roof and often features a ridge vent for ventilation. The ridge is crucial for maintaining the structural integrity of the roof and ensuring proper water runoff.
Components of Roof Ridge
- Ridge Cap: The material covering the ridge, typically matching the roofing material.
- Ridge Vent: Installed along the ridge to allow for continuous airflow.
Importance of Roof Ridge
- Structural Support: Maintains the roof’s shape and stability.
- Ventilation: Ridge vents help regulate attic temperature and moisture levels.
- Aesthetic: Provides a clean, finished look to the roof.
9. Roof Gables

Gables are the triangular portions of the wall that extend from the eaves to the peak of the roof. They are most commonly seen in homes with gable roofs, where two roof planes slope downward from a central ridge. Gables can significantly impact the architectural style of a home.
Types of Gable Roofs
- Front Gable: The gable faces the front of the house.
- Side Gable: The gable faces the side of the house.
- Cross Gable: Two or more gable roof sections intersect.
Benefits of Roof Gables
- Aesthetic Appeal: Adds character and style to the home.
- Attic Space: Can provide additional attic space or storage.
- Ventilation: Gable vents can enhance attic ventilation.
10. Roof Dormers
Dormers are structures that project from the roof, typically featuring a window. They add space, light, and ventilation to the upper levels of a home. Dormers come in various styles, each contributing to the home’s architectural design.
Types of Dormers
- Gable Dormer: Features a gable roof and adds vertical space.
- Shed Dormer: Has a single sloping roof, providing more interior space.
- Hip Dormer: Features a hip roof, adding a stylish and functional element.
Advantages of Dormers
- Increased Space: Adds headroom and usable space to upper floors.
- Natural Light: Enhances the amount of natural light entering the home.
- Ventilation: Improves airflow and ventilation in upper rooms.
11. Roof Hips
Roof hips are the external angles formed where two roof slopes meet. They are common in hip roofs, where all sides slope downwards towards the walls. Hips are essential for the roof’s structural integrity and water runoff.
Components of Roof Hips
- Hip Rafters: Support the intersection of roof planes.
- Hip Shingles: Cover the hips, usually matching the roofing material.
Importance of Roof Hips
- Structural Stability: Provides additional support and strength to the roof.
- Water Management: Ensures effective water runoff from all sides of the roof.
- Aesthetic: Adds to the symmetrical and balanced look of the roof.
12. Roof Gutters and Downspouts
Gutters and downspouts are critical components for managing water runoff from the roof. Gutters are installed along the eaves, collecting rainwater and directing it to the downspouts, which then channel the water away from the home’s foundation.
Benefits of Gutters and Downspouts
- Water Management: Prevents water from pooling around the foundation.
- Protection: Reduces the risk of water damage to the roof, walls, and foundation.
- Maintenance: Helps keep the roof and exterior of the home in good condition.
Maintenance Tips
- Regular Cleaning: Remove debris to prevent clogs and ensure proper water flow.
- Inspections: Check for damage or leaks and repair as needed.
- Proper Slope: Ensure gutters are correctly sloped for effective water drainage.
🙌 Comprehensive Roof Care with Secured Roofing and Restorations: Your Guide to a Safe and Beautiful Home
Understanding the various parts of a roof is essential for any homeowner. At Secured Roofing and Restorations, we recognize that each component plays a vital role in protecting your home from the elements, maintaining its structural integrity, and enhancing its aesthetic appeal. Our team is committed to providing top-notch regular maintenance and timely repairs to extend the life of your roof and prevent costly damage. By familiarizing ourselves with the different parts of your roof and their functions, we ensure that you make informed decisions about roofing materials, maintenance, and repairs, keeping your home safe, comfortable, and beautiful for years to come.
As you care for your home in 2024 and beyond, trust Secured Roofing and Restorations as your go-to experts. Whether you’re planning a roof replacement, tackling maintenance tasks, or simply looking to better understand your home’s structure, our comprehensive knowledge and dedicated service will empower you to take the best possible care of your roof. Contact us today to schedule a consultation and experience peace of mind with Secured Roofing and Restorations.
25 Benefits of Composition Shingles on Your Roof
Written by : Secured Roofing and Restorations
9 minutes read
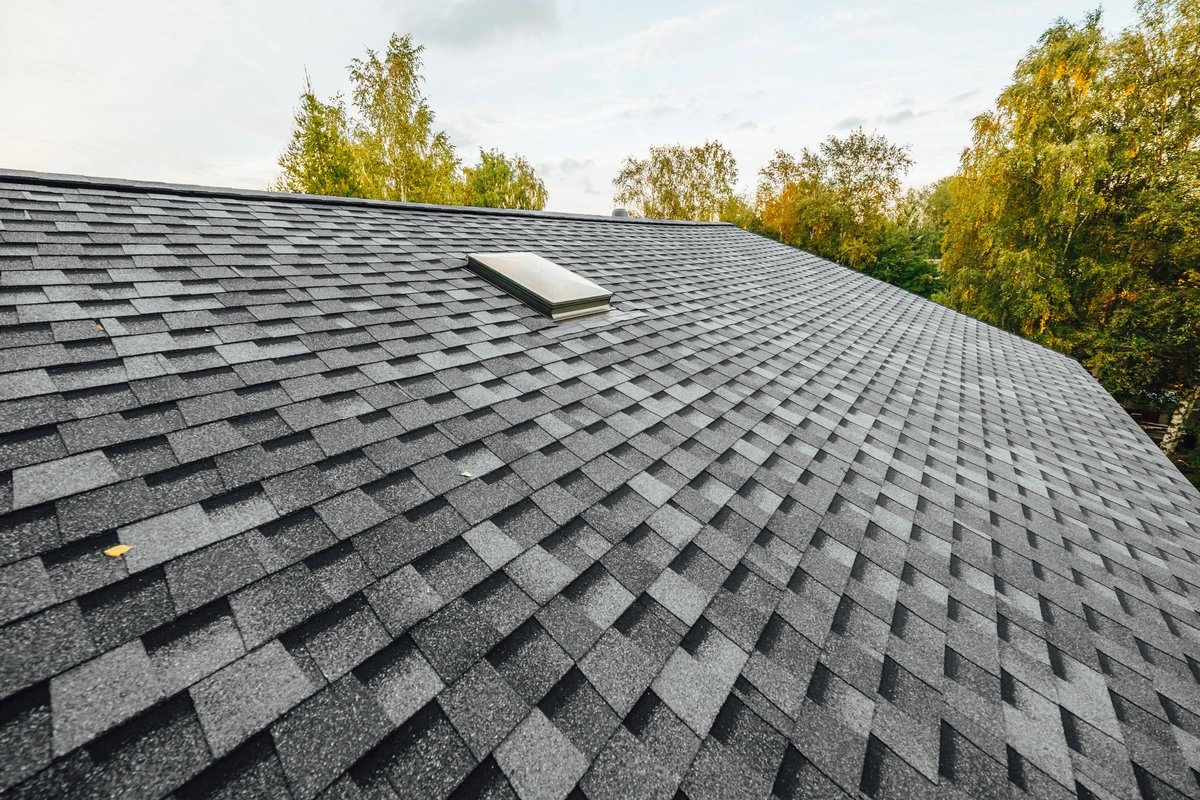
When it comes to selecting roofing materials, homeowners have a variety of options, each with its unique advantages and disadvantages. One of the most popular choices is composition shingles, also known as asphalt shingles. This type of roofing material has gained widespread popularity due to its affordability, durability, and aesthetic versatility. In this comprehensive guide, we will explore the numerous benefits of composition shingles, including these types of beneficial themes:
- Cost and Efficiency
- Design and Customization
- Durability and Protection
- Environmental and Community Factors
- Energy and Warranty
✅ 25 Benefits of Composition Shingles
Composition shingles are a popular roofing choice for many homeowners due to their numerous advantages. In this section, we will delve into 25 distinct benefits that make composition shingles an excellent option for your roofing needs. From durability to cost-effectiveness, discover why this versatile material continues to be a top pick.
1. Cost-Effectiveness
One of the primary benefits of composition shingles is their cost-effectiveness. Compared to other roofing materials like metal, slate, or tile, composition shingles are significantly more affordable. This makes them an excellent option for homeowners who want to achieve a high-quality roof without breaking the bank. Additionally, the installation process for composition shingles is relatively straightforward, which can further reduce labor costs.
Key Benefits:
- Cost-effective compared to metal, slate, or tile
- Affordable option for high-quality roofing
- Straightforward installation process
- Reduced labor costs
2. Versatility in Design
Composition shingles come in a wide range of colors, styles, and textures, allowing homeowners to achieve the exact look they desire for their home. Whether you prefer a traditional, rustic, or modern aesthetic, there is a composition shingle to match your vision. This versatility in design makes it easier to complement the architectural style of your home and enhance its curb appeal.
3. Durability and Longevity
Modern composition shingles are designed to withstand harsh weather conditions, including heavy rain, strong winds, and even hail. Many high-quality shingles come with warranties that last up to 30 years or more, providing homeowners with peace of mind. The durability of composition shingles ensures that your roof will remain intact and functional for many years, protecting your home and its contents from the elements.
4. Ease of Installation
The installation process for composition shingles is relatively simple and straightforward compared to other roofing materials. This ease of installation not only reduces labor costs but also shortens the overall time required to complete a roofing project. Many roofing contractors are experienced in working with composition shingles, ensuring a smooth and efficient installation process.
5. Energy Efficiency
Many composition shingles are designed with reflective properties that help reduce heat absorption from the sun. This can significantly lower the temperature inside your home, reducing the need for air conditioning and ultimately lowering your energy bills. Energy-efficient shingles are often labeled as “cool roofs” and can contribute to a more comfortable living environment, especially during the hot summer months.
6. Low Maintenance Requirements
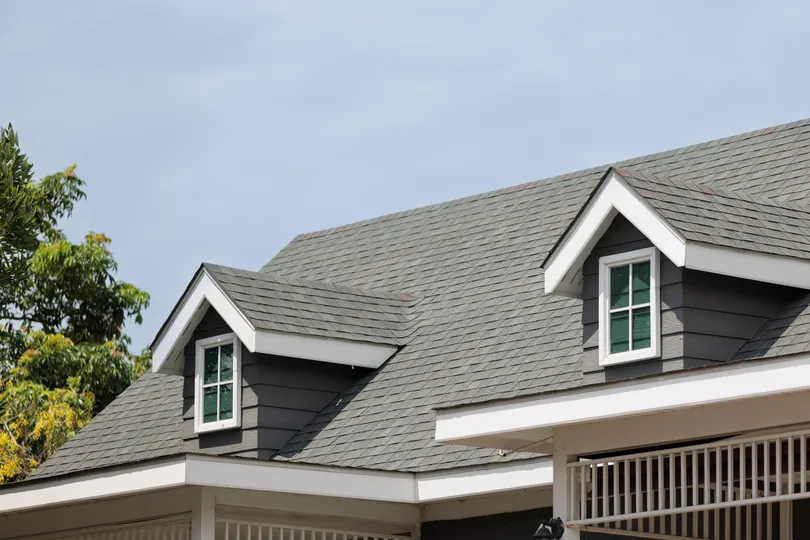
One of the standout benefits of composition shingles is their low maintenance requirements. Unlike some other roofing materials that may require regular cleaning, sealing, or repairs, composition shingles are relatively low-maintenance. Routine inspections and occasional minor repairs are usually sufficient to keep your roof in good condition, saving you time and money in the long run.
7. Fire Resistance
Composition shingles are typically made from a fiberglass mat coated with asphalt and mineral granules. This composition provides a high level of fire resistance, making them a safer choice for your home. Many composition shingles have Class A fire ratings, the highest rating available, which means they offer excellent protection against fire hazards.
8. Environmental Friendliness
Many homeowners are increasingly concerned about the environmental impact of their choices, and roofing materials are no exception. Composition shingles can be an environmentally friendly option, especially when made from recycled materials. Additionally, at the end of their lifespan, composition shingles can be recycled again, reducing waste and contributing to a more sustainable future.
9. Excellent Warranty Options
Manufacturers of composition shingles often offer extensive warranties that cover defects and performance issues for a significant period. These warranties can range from 20 years to a lifetime, depending on the brand and product line. Having a robust warranty provides homeowners with confidence in their investment and ensures long-term protection for their roof.
10. Improved Home Value
A well-maintained and aesthetically pleasing roof can significantly enhance the value of your home. Prospective buyers often look for homes with durable and attractive roofing, and composition shingles can provide just that. By choosing high-quality composition shingles, you can increase your home’s resale value and appeal to potential buyers.
11. Resistance to Algae and Moss
Many composition shingles are treated with special coatings that make them resistant to algae and moss growth. This is particularly beneficial in humid or shaded environments where these organisms are more likely to thrive. Algae and moss can cause discoloration and damage to your roof, so choosing shingles with built-in resistance can help maintain your roof’s appearance and integrity.
12. Impact Resistance
In areas prone to hailstorms or falling debris, impact-resistant shingles are a crucial consideration. Many composition shingles are designed to withstand impact from hail and other objects, reducing the risk of damage and extending the lifespan of your roof. This added durability can also lead to potential savings on homeowners’ insurance premiums.
13. Sound Insulation
Composition shingles can provide a degree of sound insulation, helping to reduce noise from external sources such as traffic, airplanes, and inclement weather. This can contribute to a quieter and more comfortable living environment, particularly in urban areas or homes located near busy roads.
14. Customizable Warranty Upgrades
Some manufacturers offer customizable warranty upgrades for composition shingles, allowing homeowners to tailor their coverage to suit their specific needs. These upgrades can include enhanced protection against wind damage, extended coverage for algae resistance, and more. This flexibility ensures that you can choose a warranty that provides the best possible protection for your roof.
15. Lightweight Material
Compared to heavier roofing materials like slate or tile, composition shingles are relatively lightweight. This makes them suitable for a wide range of roof structures without the need for additional structural support. The lightweight nature of composition shingles also simplifies the installation process and reduces the overall load on your home’s framework.
16. Ease of Repair
In the event of damage, composition shingles are relatively easy to repair or replace. Individual shingles can be removed and replaced without the need to overhaul the entire roof. This ease of repair is a significant advantage, as it allows for quick and cost-effective solutions to minor roofing issues.
17. Availability and Accessibility
Composition shingles are widely available and can be found at most home improvement stores and roofing supply companies. This accessibility ensures that homeowners can easily obtain the materials needed for their roofing project. Additionally, the widespread use of composition shingles means that many roofing contractors are familiar with their installation and maintenance, ensuring quality workmanship.
18. Aesthetic Appeal
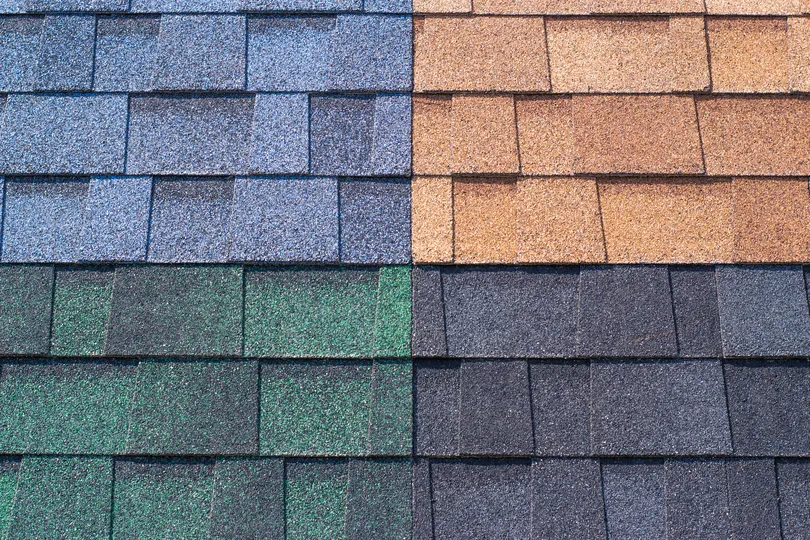
The aesthetic appeal of composition shingles cannot be overstated. With a wide range of colors, styles, and textures to choose from, homeowners can achieve a look that complements their home’s design and enhances its curb appeal. Whether you prefer the classic look of three-tab shingles or the dimensional appearance of architectural shingles, composition shingles offer endless design possibilities.
19. Mold and Mildew Resistance
Composition shingles are often treated with chemicals that make them resistant to mold and mildew growth. This is particularly important in humid climates where these issues are more prevalent. Mold and mildew can cause health problems and damage to your roof, so choosing shingles with built-in resistance can help protect your home and family.
20. Versatile Application
Composition shingles are suitable for a wide range of roof pitches and styles, making them a versatile choice for various architectural designs. Whether you have a steeply pitched roof or a more moderate slope, composition shingles can be effectively installed to provide reliable protection and aesthetic appeal.
21. Enhanced UV Protection
Many composition shingles are designed with UV-resistant properties that help protect against the sun’s harmful rays. Prolonged exposure to UV rays can cause roofing materials to deteriorate over time, leading to premature aging and damage. UV-resistant shingles help maintain the integrity and appearance of your roof, ensuring long-lasting performance.
22. Quick Installation
The straightforward installation process of composition shingles allows for quick project completion, minimizing disruptions to your daily life. This is particularly advantageous for homeowners who need to replace their roof quickly due to damage or wear. A faster installation process means you can enjoy the benefits of your new roof sooner.
23. Customizable Features
Some manufacturers offer customizable features for composition shingles, such as enhanced wind resistance, impact resistance, and algae resistance. These features allow homeowners to tailor their roofing materials to meet the specific demands of their environment and personal preferences, ensuring optimal performance and longevity.
24. Trusted Performance
Composition shingles have been a trusted roofing material for decades, with a proven track record of performance and reliability. This long history of use has allowed manufacturers to continually improve and refine their products, resulting in high-quality shingles that meet the needs of modern homeowners.
25. Community Standards Compliance
In some neighborhoods and housing communities, there may be specific standards or guidelines for roofing materials. Composition shingles are often a compliant choice, meeting the requirements of homeowners’ associations and local building codes. This ensures that your roofing project adheres to community standards and maintains the aesthetic harmony of the area.
🙌 Benefits of Composition Shingles and Why You Should Choose Secured Roofing and Restorations
In conclusion, composition shingles offer a multitude of benefits that make them an excellent choice for homeowners seeking a durable, cost-effective, and versatile roofing solution. At Secured Roofing and Restorations, our expert team is dedicated to helping you experience these advantages firsthand. From our affordability and ease of installation to the aesthetic appeal and environmental friendliness of our roofing options, we provide a comprehensive package of benefits. Whether you’re replacing an old roof or building a new home, trust Secured Roofing and Restorations to protect and enhance your property for years to come. Contact us today to schedule a consultation and discover why we’re the team you can rely on for all your roofing needs!
Roof Rejuvenation Cost: Budgeting Tips for Homeowners
Written by : Secured Roofing and Restorations
7 minutes read

A well-maintained roof is crucial for protecting your home from the elements and ensuring its longevity. Over time, roofs can suffer from wear and tear, leading to the need for rejuvenation. Roof rejuvenation is a cost-effective way to extend the life of your roof without the need for a full replacement. However, understanding the costs involved and how to budget for this project is essential for homeowners. In this article, we will discuss the influencing roof rejuvenation cost factors and provide practical budgeting tips to help you manage your expenses, including:
- Understanding roof rejuvenation
- 6 factors influencing roof rejuvenation costs
- 10 budgeting tips for roof rejuvenation
🤔 Understanding Roof Rejuvenation

What is Roof Rejuvenation?
Roof rejuvenation is a process that involves restoring the existing roof to its optimal condition. This can include cleaning, repairing minor damages, and applying protective coatings to enhance the roof’s durability and appearance. The goal is to extend the lifespan of the roof while maintaining its functionality and aesthetics.
Benefits of Roof Rejuvenation
- Cost Savings: Roof rejuvenation is significantly cheaper than a full roof replacement. It allows homeowners to address issues without the high costs associated with new roofing materials and extensive labor.
- Extended Lifespan: By addressing minor damages and applying protective treatments, roof rejuvenation can add several years to the life of your roof, delaying the need for a full replacement.
- Improved Energy Efficiency: A well-maintained roof can improve your home’s energy efficiency by providing better insulation and reducing heat transfer.
- Enhanced Curb Appeal: Rejuvenating your roof can restore its original appearance, boosting your home’s curb appeal and potentially increasing its value.
💸 6 Factors Influencing Roof Rejuvenation Costs
Several factors can influence the cost of roof rejuvenation. Understanding these variables will help you budget more effectively for your project.
1. Roof Size and Complexity
The size and complexity of your roof are major determinants of the cost. Larger roofs require more materials and labor, increasing the overall expense. Additionally, roofs with complex designs, multiple slopes, or intricate features can be more challenging to rejuvenate, leading to higher costs.
2. Roofing Material
The type of roofing material you have will impact the cost of rejuvenation. Common roofing materials include asphalt shingles, metal, tile, and wood. Each material has different maintenance requirements and costs associated with rejuvenation. For example, asphalt shingles are generally less expensive to rejuvenate than tile or metal roofs.
3. Condition of the Roof
The current condition of your roof will affect the cost of rejuvenation. If your roof has extensive damage or requires significant repairs, the cost will be higher. Minor repairs and cleaning will be less expensive than addressing structural issues or replacing damaged sections.
4. Labor Costs
Labor costs can vary depending on your location and the complexity of the rejuvenation project. It’s essential to obtain multiple quotes from reputable roofing contractors to ensure you get a fair price for the work.
5. Protective Coatings and Treatments
Applying protective coatings and treatments is a key part of the roof rejuvenation process. The type and quality of the coatings used can impact the cost. High-quality coatings that offer better protection and longevity may be more expensive but can provide better value in the long run.
6. Additional Services
Additional services, such as gutter cleaning, insulation upgrades, or roof inspections, can add to the overall cost of roof rejuvenation. These services may be necessary to ensure your roof is in optimal condition and functioning efficiently.
💡 10 Budgeting Tips for Roof Rejuvenation
Proper budgeting is essential to ensure your roof rejuvenation project stays on track and within your financial means. Here are some practical tips to help you budget effectively:
1. Assess Your Roof’s Condition
Before you start budgeting, it’s crucial to assess the condition of your roof. Conduct a thorough inspection or hire a professional to identify any damages or areas that need attention. Understanding the extent of the work required will help you estimate costs more accurately.
2. Research Costs in Your Area
Research the average costs of roof rejuvenation in your area. Prices can vary significantly based on location, so obtaining local estimates will give you a better idea of what to expect. Online resources, local roofing contractors, and homeowner associations can provide valuable insights into regional pricing.
3. Obtain Multiple Quotes
Get quotes from multiple roofing contractors to compare prices and services. Ensure that the quotes are detailed and include all aspects of the rejuvenation process, such as labor, materials, protective coatings, and additional services. This will help you make an informed decision and choose a contractor that offers the best value for your money.
4. Prioritize Essential Repairs
If your budget is limited, prioritize essential repairs and maintenance tasks. Focus on addressing immediate issues, such as leaks or damaged shingles, to prevent further damage and costly repairs in the future. You can always plan for additional enhancements or upgrades at a later date when your budget allows.
5. Consider Financing Options
If the cost of roof rejuvenation exceeds your budget, consider financing options. Many roofing contractors offer financing plans or payment options that allow you to spread the cost over time. Additionally, home improvement loans or lines of credit can provide the funds needed to complete the project without straining your finances.
6. Plan for Contingencies
When budgeting for roof rejuvenation, it’s essential to plan for contingencies. Unexpected issues may arise during the project, leading to additional costs. Setting aside a contingency fund of around 10-15% of the total project cost can help you handle any unforeseen expenses without disrupting your budget.
7. Take Advantage of Seasonal Discounts
Some roofing contractors offer seasonal discounts or promotions, especially during off-peak times of the year. Scheduling your roof rejuvenation project during these periods can help you save money. Be sure to inquire about any available discounts when obtaining quotes from contractors.
8. Invest in High-Quality Materials
While it may be tempting to choose cheaper materials to reduce costs, investing in high-quality materials can provide better value in the long run. Quality materials and protective coatings offer superior durability and longevity, reducing the need for frequent repairs and maintenance.
9. Maintain Regular Roof Maintenance
Regular roof maintenance is essential for preventing costly repairs and extending the life of your roof. Schedule routine inspections and maintenance tasks, such as cleaning gutters, removing debris, and checking for signs of damage. Proactive maintenance can help you identify issues early and address them before they become major problems.
10. Leverage Homeowner’s Insurance
Check with your homeowner’s insurance provider to see if any aspects of roof rejuvenation are covered under your policy. Some insurance policies may cover repairs or maintenance related to storm damage or other incidents. Understanding your coverage can help you offset some of the costs associated with roof rejuvenation.
🙌 Rejuvenate and Protect Your Roof with Secured Roofing and Restorations
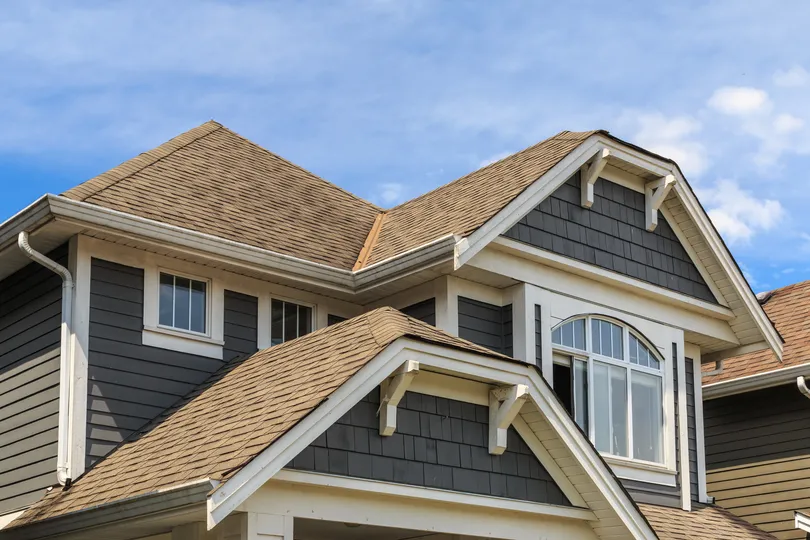
Roof rejuvenation is a valuable investment that extends the life of your roof, improves your home’s energy efficiency, and enhances its curb appeal. At Secured Roofing and Restorations, we understand the importance of maintaining a well-functioning roof, and our experienced team is dedicated to providing top-notch service tailored to meet your unique needs. By working with us, you can trust that we will assess your roof’s condition thoroughly, offer transparent and competitive quotes, and prioritize essential repairs to ensure a successful project.
Don’t leave your roofing needs to chance. Contact Secured Roofing and Restorations today to experience the benefits of working with professionals who care about the quality and longevity of your home. Let us help you rejuvenate your roof without breaking the bank. Call us now for a free consultation!