


Articles
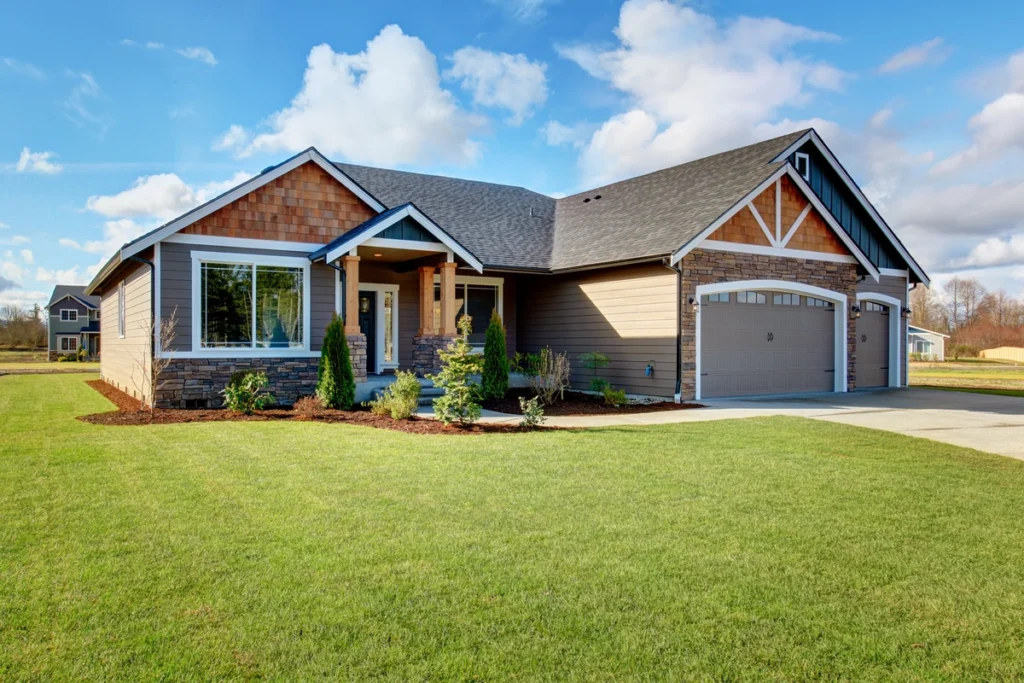
What is Average Cost of Roof Replacement? (2024 Update)
 Written by : Secured Roofing and Restorations
 8 minutes read
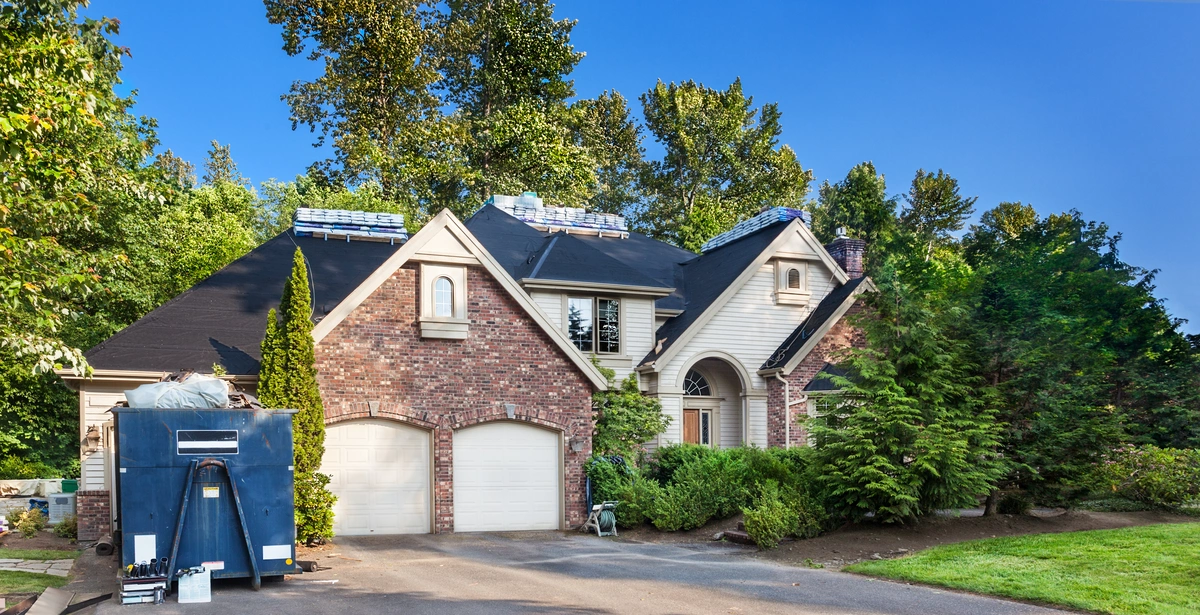

A roof is one of the most critical components of any building. It protects the structure from the elements, contributes to energy efficiency, and plays a significant role in the overall aesthetic appeal of the home. Over time, even the best-maintained roofs will need replacement due to wear and tear. Understanding the average cost of roof replacement in 2024 is essential for homeowners planning this significant investment. This guide will discuss the average cost of roof replacement, including:
- 8 factors influencing roof replacement costs
- Costs of different roofing materials
- Regional cost variations
- 8 additional expenses to consider
- Tips for reducing roof replacement costs
🤔 8 Factors Influencing Roof Replacement Costs
Several factors contribute to the overall cost of replacing a roof. These include:
1. Roof Size
The size of the roof is the most significant determinant of replacement cost. Roofers typically charge per square foot or per roofing square (a 10-foot by 10-foot area). The larger the roof, the more materials and labor are required, thus increasing the cost.
2. Roofing Material
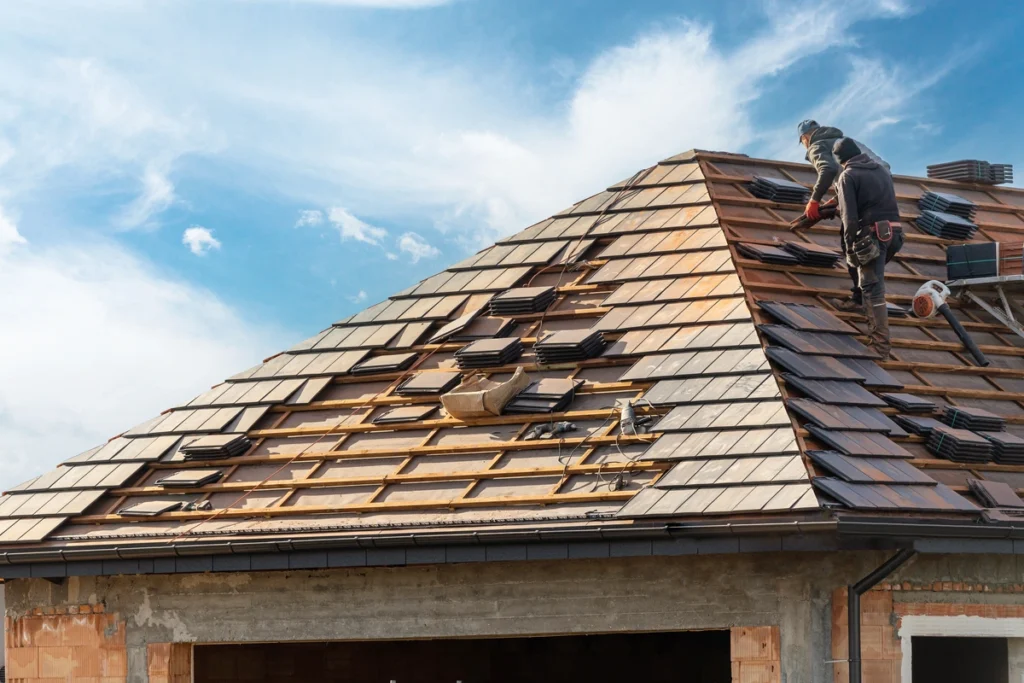
The type of roofing material you choose dramatically affects the cost. There are various materials available, each with its own price range, durability, and aesthetic appeal. Common roofing materials include asphalt shingles, metal, wood shingles, tile, and slate.
3. Roof Complexity
The complexity of the roof design also impacts the cost. Roofs with multiple slopes, gables, valleys, and other intricate architectural features require more labor and materials, making them more expensive to replace than simple, flat roofs.
4. Labor Costs
Labor costs vary based on location, the complexity of the job, and the roofer’s expertise. Experienced and highly skilled roofers may charge more, but their work often results in better quality and fewer issues in the long run.
5. Geographic Location
The cost of roof replacement can vary significantly depending on where you live. Factors such as local labor rates, material availability, and regional climate conditions play a role in determining the overall cost.
6. Roof Removal
If the existing roof needs to be removed before installing a new one, this will add to the overall cost. Roof removal involves additional labor and disposal fees for the old roofing material.
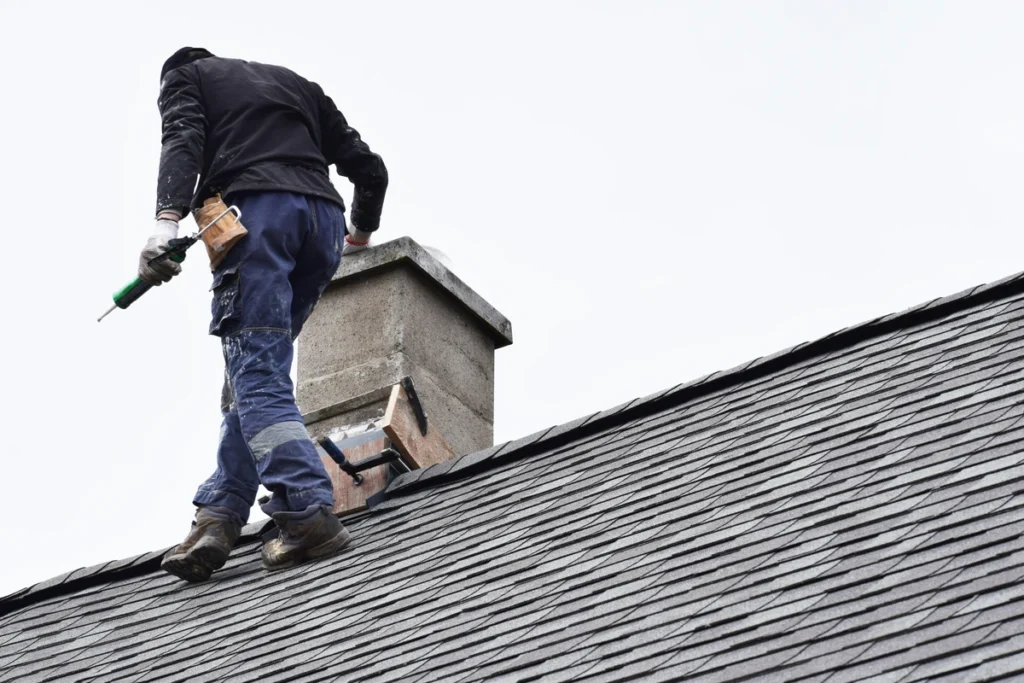
7. Permits and Inspections
Depending on local building codes, you may need to obtain permits and undergo inspections during the roof replacement process. These can add to the overall cost.
8. Additional Features
Features such as skylights, chimneys, and ventilation systems can increase the complexity and cost of roof replacement. These elements require special attention and additional materials.
💵 Cost of Different Roofing Materials
Different roofing materials come with various costs and benefits. Here’s an overview of the average costs associated with some common roofing materials in 2024:
Asphalt Shingles
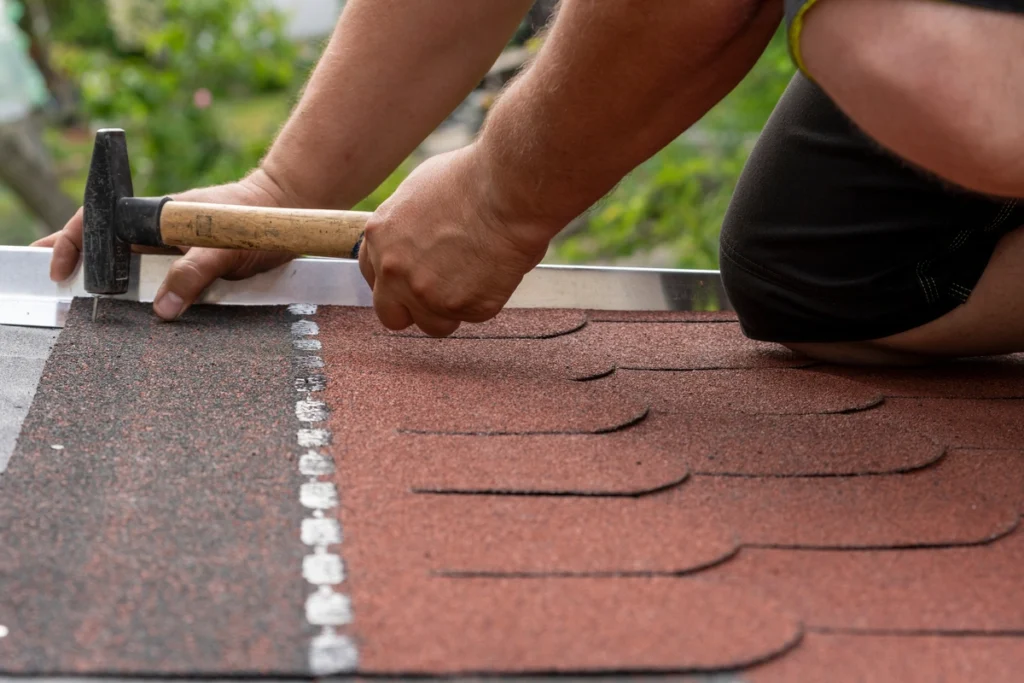
Asphalt shingles are the most popular roofing material due to their affordability and ease of installation. They come in various styles and colors. The average cost for asphalt shingle roof replacement ranges from $5,000 to $10,000 for a standard 2,000 square foot home.
Metal Roofing
Metal roofs are known for their durability and energy efficiency. They are available in various metals such as aluminum, steel, and copper. The average cost for metal roofing ranges from $10,000 to $25,000, depending on the type of metal and complexity of the roof design.
Wood Shingles and Shakes
Wood shingles and shakes offer a natural, rustic appearance. They are typically made from cedar or redwood. The average cost for wood shingle roof replacement ranges from $10,000 to $20,000.
Tile Roofing
Tile roofs, made from clay or concrete, are durable and offer a distinctive look. They are commonly used in Mediterranean and Spanish-style homes. The average cost for tile roofing ranges from $15,000 to $30,000.
Slate Roofing
Slate roofs are highly durable and provide a classic, elegant appearance. They are one of the most expensive roofing options. The average cost for slate roof replacement ranges from $20,000 to $40,000.
Synthetic Roofing
Synthetic roofing materials, such as synthetic slate or rubber shingles, mimic the appearance of natural materials but are often more affordable and easier to install. The average cost for synthetic roofing ranges from $12,000 to $25,000.
🌎 Regional Cost Variations
Roof replacement costs can vary significantly depending on the region. Here’s a look at some regional cost variations in 2024:
Northeast
The Northeast, including states like New York and Massachusetts, tends to have higher labor costs and stricter building codes. The average cost of roof replacement in this region ranges from $8,000 to $25,000.
Midwest
The Midwest, including states like Illinois and Ohio, generally has lower labor costs compared to the Northeast. The average cost of roof replacement in this region ranges from $6,000 to $18,000.
South
The South, including states like Texas and Florida, experiences a wide range of weather conditions, from intense heat to hurricanes. The average cost of roof replacement in this region ranges from $7,000 to $22,000.
West
The West, including states like California and Washington, has diverse climates and varying labor costs. The average cost of roof replacement in this region ranges from $8,000 to $25,000.
💰 8 Additional Expenses to Consider
In addition to the primary factors and regional variations, several other expenses can influence the overall cost of roof replacement:
1. Roof Inspection
A professional roof inspection can identify underlying issues that may not be visible from the ground. The cost of a roof inspection ranges from $100 to $500.
2. Roof Repair
If the existing roof has damage that needs to be repaired before replacement, this will add to the overall cost. Repair costs vary depending on the extent of the damage and the materials needed.
3. Roof Underlayment
Roof underlayment, such as felt or synthetic material, provides an additional layer of protection between the roofing material and the roof deck. The cost of underlayment ranges from $0.50 to $2.00 per square foot.
4. Flashing
Flashing is used to prevent water infiltration at joints and intersections, such as around chimneys and skylights. The cost of flashing ranges from $200 to $500, depending on the extent of the work needed.
5. Ventilation
Proper roof ventilation is essential for extending the life of the roof and improving energy efficiency. The cost of adding or upgrading ventilation ranges from $300 to $1,000.
6. Gutters
Replacing or upgrading gutters during a roof replacement project can help protect your home from water damage. The cost of new gutters ranges from $1,000 to $2,500.
7. Waste Disposal
Disposing of the old roofing material and debris can add to the overall cost. Waste disposal fees range from $200 to $600.
8. Warranty
Purchasing a warranty for the new roof can provide peace of mind and protect against future issues. The cost of a roofing warranty ranges from $500 to $2,000.
💡 Tips for Reducing Roof Replacement Costs
While roof replacement is a significant investment, there are ways to reduce costs without compromising on quality:
- Get Multiple Quotes: Obtain quotes from several reputable roofing contractors to compare prices and services. This can help you find the best deal and ensure you’re getting a fair price.
- Choose the Right Time: Scheduling your roof replacement during the off-season (typically late fall or early spring) can sometimes result in lower labor costs, as contractors may have more availability and offer discounts.
- Opt for Durable Materials: Investing in durable, long-lasting materials may have a higher upfront cost but can save money in the long run by reducing the need for future repairs or replacements.
- Perform Regular Maintenance: Regular roof maintenance, such as cleaning gutters and inspecting for damage, can extend the life of your roof and prevent costly issues from developing.
- Consider Financing Options: Explore financing options, such as home equity loans or roofing financing programs, to spread the cost of roof replacement over time and make it more manageable.
- Check for Warranties and Insurance: Ensure that your roofing contractor offers a warranty on their work and check your homeowner’s insurance policy for coverage that may help offset the cost of roof replacement due to storm damage or other covered events.
🙌 Transform Your Home with Secured Roofing and Restorations
Replacing a roof is a significant investment that demands careful planning and consideration. At Secured Roofing and Restorations, we understand the factors that influence roof replacement costs, from the various roofing materials available to regional variations. Our expertise allows homeowners to make informed decisions and budget effectively. While the average cost of roof replacement in 2024 ranges from $5,000 to $40,000, numerous factors can impact the final price.
Our team at Secured Roofing and Restorations is dedicated to helping you reduce costs by providing multiple quotes and offering advice on regular maintenance, making roof replacement a more affordable and manageable project. Investing in a high-quality roof with us not only protects your home but also enhances its value and aesthetic appeal for years to come.
Choose Secured Roofing and Restorations for your roofing needs and experience exceptional service and unmatched expertise. Contact us today for a free inspection and let us help you safeguard your home with a top-tier roof!
Metal Roof Insulation: Why Does It Matter?
Written by : Secured Roofing and Restorations
8 minutes read
Metal roofs are gaining popularity due to their durability, energy efficiency, and sleek modern appearance. However, a crucial component that often gets overlooked in the installation and maintenance of metal roofs is insulation. Proper insulation can dramatically affect the performance and lifespan of a metal roof, influencing everything from energy efficiency to noise reduction. In this comprehensive guide, we will cover metal roof insulation, including:
- The importance of insulating a metal roof
- 5 types of metal roof insulation
- 5 factors to consider when choosing insulation
- Installation tips and best practices
❗️ The Importance of Insulating a Metal Roof

- One of the primary benefits of metal roof insulation is improved energy efficiency. Metal roofs, by themselves, are excellent at reflecting solar radiation. This reflective property can help keep your home cooler during the hot summer months. However, without proper insulation, the conductive nature of metal can allow heat to transfer into your home, reducing the overall cooling efficiency.
- Proper insulation acts as a barrier that reduces heat transfer, keeping your home cooler in the summer and warmer in the winter. This translates to lower energy bills as your HVAC system won’t have to work as hard to maintain a comfortable temperature.
Condensation Control:
- Condensation is a common issue in metal roofing systems, especially in climates with high humidity or significant temperature fluctuations. When warm, moist air from inside the home rises and meets the cooler metal surface of the roof, condensation can form. Over time, this moisture can lead to problems such as mold growth, rust, and structural damage.
- Insulation plays a vital role in preventing condensation by creating a thermal break between the warm air inside and the cool metal roof. This thermal barrier helps maintain a more consistent temperature, reducing the likelihood of condensation forming on the underside of the roof.
Noise Reduction:
- Another significant benefit of metal roof insulation is noise reduction. Metal roofs can be noisier than other roofing materials, especially during heavy rain, hailstorms, or when debris like branches fall on the roof. Proper insulation can dampen these noises, providing a quieter and more comfortable indoor environment.
Improved Comfort:
- Insulation helps regulate the indoor temperature by reducing heat transfer through the roof. This means your home will be more comfortable throughout the year. In the summer, insulation keeps the heat out, and in the winter, it retains the warmth generated inside, creating a more stable and pleasant living environment.
Extended Roof Lifespan:
- By preventing condensation and reducing thermal stress on the metal roof, insulation can extend the lifespan of your roofing system. Moisture and temperature fluctuations can lead to the expansion and contraction of the metal, which over time, may cause wear and tear. Insulation helps mitigate these effects, contributing to the longevity of the roof.
🏠 5 Types of Metal Roof Insulation
There are several types of insulation materials suitable for metal roofs, each with its own set of advantages and disadvantages. Here’s a look at some of the most common options:
1. Fiberglass Insulation
Fiberglass insulation is one of the most widely used insulation materials for metal roofs. It consists of fine glass fibers and is available in rolls, batts, and loose-fill forms. Fiberglass insulation is popular due to its affordability, ease of installation, and good thermal performance.
Pros:
- Affordable
- Easy to install
- Good thermal and acoustic performance
Cons:
- Can be irritating to skin and lungs if not handled properly
- Loses effectiveness if compressed
2. Spray Foam Insulation
Spray foam insulation is a versatile option that can be sprayed directly onto the underside of the metal roof. It expands to fill gaps and create a seamless barrier, providing excellent thermal resistance and air sealing.
Pros:
- Excellent thermal performance
- Air sealing properties
- Reduces condensation risk
Cons:
- More expensive than other insulation types
- Requires professional installation
3. Rigid Foam Insulation
Rigid foam insulation, typically made from polystyrene, polyurethane, or polyisocyanurate, comes in panels that can be cut to fit and installed between the roof framing. It offers high R-values and good moisture resistance.
Pros:
- High R-value per inch
- Moisture resistant
- Durable
Cons:
- More expensive than fiberglass
- Can be challenging to install in tight spaces
4. Reflective Insulation
Reflective insulation, also known as radiant barriers, consists of a reflective foil layer that reflects radiant heat away from the roof. It’s often used in conjunction with other insulation types to enhance thermal performance.
Pros:
- Effective at reflecting radiant heat
- Lightweight and easy to install
- Can be used with other insulation types
Cons:
- Limited thermal resistance by itself
- Requires an air gap to be effective
5. Insulated Panels
Insulated metal panels (IMPs) are prefabricated panels that integrate metal skins with a foam core. These panels provide excellent insulation and structural strength and can be used for both roof and wall applications.
Pros:
- High insulation value
- Structural strength
- Quick installation
Cons:
- Higher upfront cost
- Limited design flexibility
🤨 5 Factors to Consider When Choosing Insulation

Choosing the right insulation for your metal roof involves considering several factors, including your climate, budget, and specific needs. Here are some key considerations to keep in mind:
1. R-Value
The R-value measures the insulation’s thermal resistance. A higher R-value indicates better insulating properties. The recommended R-value for your insulation will depend on your climate and local building codes. Colder climates typically require higher R-values to maintain energy efficiency.
2. Moisture Resistance
Moisture resistance is crucial in preventing condensation and potential damage to the roofing system. Materials like spray foam and rigid foam offer better moisture resistance compared to fiberglass.
3. Installation Method
Consider whether you’ll be installing the insulation yourself or hiring a professional. Some materials, like spray foam, require professional installation, while others, like fiberglass batts, can be installed by a skilled DIYer.
4. Budget
Your budget will play a significant role in determining the type of insulation you choose. While some options like spray foam and insulated panels offer superior performance, they come at a higher cost. Balancing performance with affordability is key.
5. Noise Reduction Needs
If noise reduction is a priority, consider insulation materials that offer good acoustic performance. Fiberglass and spray foam are both effective at dampening sound.
💡 Installation Tips and Best Practices
Proper installation is critical to ensuring that your metal roof insulation performs effectively. Here are some tips and best practices to follow:
- Seal All Gaps and Cracks: Before installing insulation, make sure to seal any gaps, cracks, or openings in the roof structure. This helps prevent air leaks and improves the overall thermal performance of the insulation.
- Use Vapor Barriers: In climates where condensation is a concern, consider using a vapor barrier in conjunction with your insulation. Vapor barriers help prevent moisture from penetrating the insulation and causing problems.
- Maintain Proper Ventilation: Proper ventilation is essential to prevent moisture buildup and ensure the longevity of the roofing system. Make sure your roof has adequate ventilation to allow for air circulation and moisture control.
- Follow Manufacturer Instructions: Always follow the manufacturer’s instructions for the specific insulation material you are using. This ensures that you achieve the best performance and avoid any potential issues.
- Consider Professional Installation: While some insulation materials can be installed by homeowners, others, like spray foam, require professional expertise. Hiring a professional ensures that the insulation is applied correctly and performs as expected.
🙌 Maximize Your Home’s Efficiency with Expert Metal Roof Insulation from Secured Roofing and Restorations
Metal roof insulation is a crucial component that significantly impacts the energy efficiency, comfort, and durability of your home. Understanding the benefits and different types of insulation allows you to make an informed decision that best suits your needs and budget. Whether you choose fiberglass, spray foam, rigid foam, reflective insulation, or insulated panels, proper installation and maintenance are key for optimal performance.
At Secured Roofing and Restorations, we specialize in providing top-quality insulation solutions tailored to enhance your home’s comfort and energy efficiency. Our expert team understands the importance of protecting your roofing system from potential damage caused by condensation and temperature fluctuations. With our extensive experience and dedication to excellence, we ensure that your metal roof performs at its best for years to come.
As the popularity of metal roofs continues to rise, it’s essential to choose the right insulation and the right team to install it. With Secured Roofing and Restorations, you can trust that your investment will pay off in the long run, providing you with a durable, efficient, and comfortable roofing solution. Contact us today to schedule a consultation and discover why we are the preferred choice for all your roofing needs!
Hip Roof vs Gable Roof: Cost, Benefits & More
Written by : Secured Roofing and Restorations
7 minutes read

Two of the most popular roof styles you might consider are hip roofs and gable roofs. Each style has its own unique advantages and disadvantages, influencing factors such as cost, durability, aesthetic appeal, and suitability for various climates. In this guide, we’ll explore the differences between a hip roof vs gable roof, including:
- Understanding hip roofs
- Understanding gable roofs
- Cost comparison
- Climate considerations
- Aesthetic and architectural compatibility
- Energy efficiency
- Customization and design flexibility
- Maintenance and longevity
- Final considerations
🤔 Understanding Hip Roofs

Design and Structure
A hip roof features slopes on all four sides, which are of equal length and come together at the top to form a ridge. The design is characterized by its inward slope on all sides, making it sturdier and more stable than some other roof types. This design minimizes the risk of wind damage and is particularly suitable for regions prone to high winds and hurricanes.
Benefits of Hip Roofs
- Stability and Durability: The inward slopes on all sides make hip roofs highly stable, capable of withstanding high winds and heavy snowfall. This makes them an ideal choice for areas with harsh weather conditions.
- Aesthetic Appeal: Hip roofs offer a classic and elegant look that can enhance the curb appeal of any home. They blend well with various architectural styles and provide a uniform appearance.
- Additional Living Space: The sloping sides of a hip roof can be used to create additional living space in the form of a loft or attic, adding value to your home.
- Efficient Drainage: The design allows for efficient water and snow runoff, reducing the risk of leaks and water damage.
Drawbacks of Hip Roofs
- Complexity and Cost: Hip roofs are more complex to design and build than gable roofs, often resulting in higher construction costs.
- Reduced Ventilation: The design can limit ventilation options, potentially leading to higher cooling costs in warm climates.
🤔 Understanding Gable Roofs
Design and Structure
A gable roof consists of two sloping sides that meet at a ridge, forming a triangular shape known as a gable at each end. This simple design is one of the most common roofing styles and is often seen in traditional and modern architecture.
Benefits of Gable Roofs
- Cost-Effectiveness: Gable roofs are relatively simple and inexpensive to design and construct, making them a cost-effective option for many homeowners.
- Maximized Space: The steep slopes of a gable roof create ample space beneath the roof, which can be used for attic storage or converted into additional living space.
- Ventilation and Natural Light: The design allows for excellent ventilation and the incorporation of windows, skylights, or vents, enhancing natural light and airflow.
- Ease of Maintenance: The simple design of gable roofs makes them easier to inspect and maintain, reducing long-term maintenance costs.
Drawbacks of Gable Roofs
- Vulnerability to Wind Damage: Gable roofs can be more susceptible to wind damage, especially if not properly braced. High winds can create a wind uplift effect, potentially causing structural damage.
- Water Runoff Issues: In areas with heavy rainfall, the simple design can lead to water runoff issues, potentially causing leaks if not adequately managed.
💰 Cost Comparison
Initial Construction Costs
- Hip Roofs: Due to their complex design and additional materials required, hip roofs tend to be more expensive to construct. The added stability and aesthetic appeal come at a higher price, typically ranging from $8 to $12 per square foot.
- Gable Roofs: Gable roofs are generally less expensive to build, with costs ranging from $6 to $9 per square foot. The simplicity of the design reduces labor and material costs.
Long-Term Costs
- Hip Roofs: While the initial construction cost is higher, hip roofs can offer long-term savings through reduced maintenance and repair costs. Their stability and efficient drainage system contribute to their longevity.
- Gable Roofs: Lower initial costs may be offset by higher maintenance and repair expenses, particularly in areas prone to high winds or heavy rainfall. Proper maintenance is crucial to avoid issues related to wind uplift and water damage.
❄️ Climate Considerations
Hip Roofs
Hip roofs are well-suited for regions with extreme weather conditions. Their sturdy design can withstand high winds, heavy snowfall, and hurricanes. The inward slopes reduce the chances of wind uplift and offer better resistance to water and snow accumulation.
Gable Roofs
Gable roofs are ideal for regions with moderate climates. Their design allows for effective ventilation and natural light, making them suitable for warm and dry areas. However, in regions prone to high winds or heavy rainfall, additional bracing and proper water runoff management are essential to prevent damage.
🏠 Aesthetic and Architectural Compatibility
Hip Roofs
Hip roofs are versatile and complement a wide range of architectural styles, including Colonial, Tudor, and Mediterranean. Their uniform appearance and elegant design can enhance the visual appeal of any home, adding to its market value.
Gable Roofs
Gable roofs are equally versatile and popular in various architectural styles, such as Cape Cod, Georgian, and Victorian. Their simple, clean lines offer a classic look that can be easily customized with dormers, gables, and other architectural elements.
⚡️ Energy Efficiency
Hip Roofs
The inward slopes of hip roofs can create a more compact and energy-efficient structure. Proper insulation and ventilation are crucial to maximize energy efficiency, particularly in warm climates where cooling costs can be significant.
Gable Roofs
Gable roofs offer excellent ventilation options, which can help regulate indoor temperatures and reduce energy costs. The inclusion of vents, skylights, and windows can enhance natural airflow and light, contributing to a more energy-efficient home.
🎨 Customization and Design Flexibility
Hip Roofs
Hip roofs can be customized with various features such as dormers, skylights, and different roofing materials. The complex design allows for creative architectural elements, providing a unique and personalized look.
Gable Roofs
Gable roofs offer a high degree of customization with features like cross gables, dormers, and overhangs. The straightforward design makes it easier to incorporate various architectural elements, enhancing the overall aesthetic and functionality of the roof.
🛠️ Maintenance and Longevity
Hip Roofs
Hip roofs are known for their durability and low maintenance requirements. The design minimizes the risk of wind and water damage, contributing to their long lifespan. Regular inspections and proper maintenance can further extend their longevity.
Gable Roofs
Gable roofs require regular maintenance to ensure their structural integrity, particularly in areas with harsh weather conditions. Proper bracing and water runoff management are essential to prevent damage and extend the roof’s lifespan.
🤨 Final Considerations
Choosing between a hip roof and a gable roof depends on various factors, including your budget, climate, aesthetic preferences, and long-term maintenance considerations. Both styles offer unique advantages and can enhance the value and appeal of your home. Here’s a quick summary to help you decide:
- Cost: Gable roofs are generally more cost-effective initially, while hip roofs may offer long-term savings through reduced maintenance.
- Stability and Durability: Hip roofs are ideal for regions with extreme weather conditions due to their sturdiness and efficient water runoff.
- Aesthetic Appeal: Both styles are versatile and can complement various architectural designs, though hip roofs tend to have a more elegant and uniform appearance.
- Space and Ventilation: Gable roofs provide more attic space and better ventilation options, making them suitable for warm and dry climates.
Ultimately, the choice between a hip and gable roof should be based on a thorough assessment of your specific needs and preferences. Consulting with a professional roofing contractor can provide valuable insights and help you make the best decision for your home.
🙌 Choosing the Perfect Roof: Expert Guidance from Secured Roofing and Restorations
In conclusion, both hip and gable roofs have their distinct advantages and disadvantages. At Secured Roofing and Restorations, we understand the nuances of each roofing style and are committed to helping you make a well-informed decision that fits your budget, climate considerations, and aesthetic preferences. Our experienced team is dedicated to providing the highest quality service, ensuring that whether you choose the stability and elegance of a hip roof or the simplicity and versatility of a gable roof, your investment enhances the beauty, functionality, and value of your home for years to come.
Trust our experts at Secured Roofing and Restorations to guide you through every step of the process. Contact us today for a consultation and let us help you achieve the perfect roof for your home!
DIY Roof Shingle Repair Guide for Homeowners
Written by : Secured Roofing and Restorations
6 minutes read

The roof is one of the most critical components to keep in good shape. It protects your home from the elements, and any damage left unrepaired can lead to significant issues such as leaks, mold growth, and structural damage. While some roofing problems require professional intervention, many shingle repairs can be handled by homeowners with a bit of know-how and the right tools. This DIY roof shingle repair guide will walk you through:
- Understanding your roof
- Identifying shingle damage
- Safety first
- Tools and materials
- 4 step shingle repair guide
- Additional tips for roof maintenance
- When to call a professional
🤔 Understanding Your Roof
Before diving into repairs, it’s essential to understand the structure and components of your roof. Most residential roofs are covered with asphalt shingles, which are popular due to their durability, affordability, and ease of installation. Here’s a quick breakdown of the components of a shingle roof:
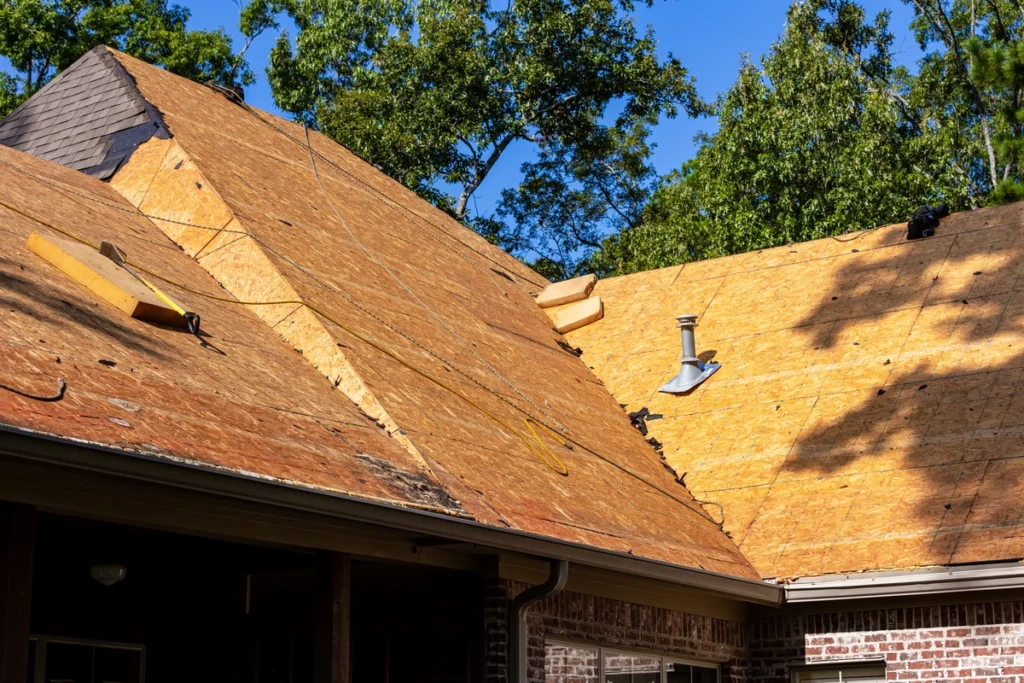
- Decking: The structural base, usually made of plywood or OSB (oriented strand board), to which shingles are attached.
- Underlayment: A water-resistant or waterproof barrier placed between the decking and shingles to provide additional protection against moisture.
- Shingles: The outermost layer that protects your home from weather. Asphalt shingles are the most common, but there are also options like wood, metal, and slate.
- Flashing: Metal strips installed around roof intersections, chimneys, vents, and other protrusions to prevent water seepage.
- Drip Edge: Metal edging that helps control the flow of water away from your fascia and protects the edges of your roof.
🔎 Identifying Shingle Damage
Regular roof inspections are crucial to catch damage early. Here are some common signs of shingle damage to look out for:
- Cracked or Broken Shingles: Caused by weathering, impact, or extreme temperatures.
- Missing Shingles: Often a result of strong winds or severe weather conditions.
- Curling or Buckling Shingles: Indicative of poor ventilation, improper installation, or old age.
- Granule Loss: Noticeable when shingle granules accumulate in gutters, indicating the shingles are wearing out.
- Moss or Algae Growth: While more of a cosmetic issue, it can retain moisture and cause damage over time.
- Leaks or Water Stains: Inside the attic or on ceilings, pointing to possible roof leaks.
⚠️ Safety First
Before starting any roof repair, prioritize safety. Roof work can be hazardous, so take the following precautions:
- Use a Sturdy Ladder: Ensure it’s on a flat, stable surface and extends at least three feet above the roof edge.
- Wear Safety Gear: Non-slip shoes, gloves, and a safety harness if the roof is steep or high.
- Check the Weather: Avoid working on the roof during wet, windy, or excessively hot conditions.
- Have a Helper: If possible, have someone assist you or at least keep an eye out for your safety.
🛠️ Tools and Materials Needed
Gather the necessary tools and materials before starting your repair. Here’s a basic list:
- Roofing Nails: Galvanized roofing nails to prevent rust.
- Hammer or Nail Gun: For securing shingles.
- Flat Pry Bar: To remove damaged shingles.
- Utility Knife: For cutting shingles.
- Replacement Shingles: Matching the existing shingles as closely as possible.
- Roofing Cement or Sealant: To seal edges and repair minor cracks.
- Chalk Line: For straight cuts and alignment.
- Measuring Tape: To ensure accurate cuts and placement.
💡 4 Step Shingle Repair Guide
Repairing damaged shingles is crucial for maintaining the integrity of your roof. Follow our 4 Step Shingle Repair Guide to effectively address shingle damage and extend the life of your roofing system.
1. Removing Damaged Shingles
Start by removing the damaged shingles. Here’s how:
- Locate the Damaged Shingle: Identify the shingle that needs replacement.
- Lift the Shingles Above: Use the flat pry bar to carefully lift the shingles above the damaged one. This exposes the nails holding the damaged shingle.
- Remove the Nails: Pry out the nails with the pry bar or hammer.
- Slide Out the Damaged Shingle: Once the nails are removed, slide the damaged shingle out.
2. Preparing the Area
Before installing the new shingle, prepare the area:
- Check for Additional Damage: Inspect the decking and underlayment for any signs of damage.
- Clean the Area: Remove any debris or old roofing cement.
3. Installing the New Shingle
Now, it’s time to install the new shingle:
- Cut the New Shingle to Size: If necessary, use the utility knife to trim the shingle to fit.
- Position the Shingle: Slide the new shingle into place, ensuring it aligns with the existing shingles.
- Nail the Shingle: Secure the shingle with galvanized roofing nails, placing them just above the shingle tabs.
- Seal the Edges: Apply roofing cement under the edges of the shingles above to secure them and prevent water infiltration.
4. Final Inspection
After replacing the shingle, perform a final inspection:
- Check Alignment: Ensure the new shingle aligns correctly with the surrounding shingles.
- Test for Securement: Gently tug on the new shingle to ensure it’s securely fastened.
- Seal Any Gaps: Apply additional roofing cement if there are any gaps or loose edges.
👉 Additional Tips for Roof Maintenance
Regular maintenance can extend the life of your roof and prevent costly repairs. Here are some tips:
- Clean Gutters: Regularly clean your gutters to prevent water backup and roof damage.
- Trim Overhanging Branches: Prevent branches from rubbing against the roof and causing damage.
- Inspect After Storms: Check your roof after severe weather for any signs of damage.
- Address Minor Issues Promptly: Fixing small problems quickly can prevent them from becoming major issues.
🧑🔧 When to Call a Professional
While many shingle repairs can be done by homeowners, some situations require professional expertise:
- Extensive Damage: Large areas of missing or damaged shingles.
- Structural Issues: Sagging roof or significant leaks.
- Complex Roofs: Steep or high roofs that are challenging to navigate.
- Recurrent Problems: Persistent issues despite DIY repairs.
Hiring a professional roofer ensures that extensive or complex repairs are done correctly and safely.
🙌 Protect Your Home with Expert Roofing Solutions from Secured Roofing and Restorations
Repairing roof shingles yourself can be a cost-effective and satisfying project. However, for the best results and long-term protection of your home, trust the experts at Secured Roofing and Restorations. Our team brings the right tools, materials, and knowledge to tackle any roofing issue, ensuring the job is done safely and effectively. Regular maintenance and prompt attention to damage are crucial for keeping your roof in top condition—and that’s exactly what we provide.
By choosing Secured Roofing and Restorations, you’re partnering with professionals who prioritize your safety and the longevity of your roof. Let us handle the hard work while you enjoy peace of mind knowing your home is protected for years to come.
Contact us today to schedule a consultation and discover why we are the team you want for all your roofing needs. Secure your roof, secure your home!
4 Types of Roof Underlayment And Installation Tips
Written by : Secured Roofing and Restorations
7 minutes read

Roof underlayment plays a crucial role in protecting your home from water damage and ensuring the longevity of your roofing system. It’s a water-resistant or waterproof barrier material installed directly onto your roof deck before the roofing material, such as shingles, tiles, or metal panels. Choosing the right type of roof underlayment and proper installation is vital to the overall performance of your roof. This article discusses the various types of roof underlayment, including:
- The 4 types of roof underlayment
- Choosing the right underlayment
- 10 installation tips for roof underlayment
- Additional considerations
👉 4 Types of Roof Underlayment

Understanding the different types of roof underlayment is essential for making an informed decision about your roofing system. Each type offers unique benefits and considerations, ensuring you can choose the best option for your home’s specific needs.
1. Asphalt-Saturated Felt
Asphalt-saturated felt is one of the oldest and most traditional types of roof underlayment. It is made from a combination of organic or fiberglass base soaked in asphalt. Available in two standard weights, 15-pound and 30-pound, this type is popular for its affordability and ease of installation.
Pros:
- Cost-effective
- Readily available
- Provides a good barrier against water
Cons:
- Can tear easily
- Less durable compared to synthetic options
- Can absorb moisture and wrinkle
2. Synthetic Underlayment
Synthetic underlayment is a newer, more advanced option that has gained popularity due to its superior performance characteristics. Made from polypropylene or polyethylene, synthetic underlayment is lightweight, durable, and resistant to tears and UV damage.
Pros:
- Highly durable and long-lasting
- Resistant to tearing and weather damage
- Lightweight and easy to handle
- Excellent water resistance
- Does not absorb moisture
Cons:
- More expensive than asphalt-saturated felt
- Requires careful installation to avoid damage
3. Rubberized Asphalt
Rubberized asphalt underlayment is a premium option that offers superior water resistance and durability. It typically comes with a peel-and-stick backing that makes installation easier and ensures a tight seal around nails and other roof penetrations.
Pros:
- Excellent waterproofing capabilities
- Self-sealing around nails and fasteners
- Highly durable and long-lasting
- Resistant to extreme temperatures
Cons:
- Higher cost
- Requires careful installation to ensure proper adhesion
4. Self-Adhered Membranes
Self-adhered membranes are a type of underlayment that includes a sticky backing, allowing them to adhere directly to the roof deck. This provides an added layer of protection against water infiltration.
Pros:
- Strong adhesive properties for a secure installation
- Excellent water resistance
- Can provide an extra layer of insulation
Cons:
- More expensive than traditional options
- Can be more challenging to install properly
🏠 Choosing the Right Underlayment

Selecting the appropriate underlayment for your roof depends on several factors, including your climate, the type of roofing material, and your budget. Here are some considerations to help guide your decision:
- Climate: In regions with heavy rainfall or snowfall, a more durable and water-resistant underlayment, such as synthetic or rubberized asphalt, is advisable. For milder climates, asphalt-saturated felt may suffice.
- Roofing Material: Certain roofing materials, like metal or tile, may require specific types of underlayment to perform optimally. Always consult the manufacturer’s recommendations.
- Budget: While synthetic and rubberized asphalt underlayments offer superior performance, they are also more expensive. Weigh the long-term benefits against the initial cost to determine the best option for your budget.
- Installation Complexity: Some underlayments are easier to install than others. If you’re doing the installation yourself, consider an underlayment that is user-friendly and requires minimal specialized tools or techniques.
💡 10 Installation Tips for Roof Underlayment
Proper installation of roof underlayment is crucial to ensure its effectiveness. Below are some general tips to help you achieve a successful installation:
1. Prepare the Roof Deck
Before installing any underlayment, ensure the roof deck is clean, dry, and free of debris. Remove any old nails, staples, or roofing materials that could damage the underlayment.
2. Install Drip Edge
Begin by installing a drip edge along the eaves and rakes of the roof. The drip edge helps direct water away from the roof and into the gutters, preventing water damage to the roof deck and fascia.
3. Start from the Bottom
Always start installing the underlayment from the bottom edge of the roof and work your way up. This ensures that each subsequent layer overlaps the one below, providing better water protection.
4. Overlap Layers Properly
Overlap each row of underlayment by at least 2 inches horizontally and 6 inches vertically. This helps create a continuous barrier against water infiltration.
5. Secure the Underlayment
Use roofing nails or staples to secure the underlayment to the roof deck. Be sure to follow the manufacturer’s recommendations for spacing and placement of fasteners. For self-adhered membranes, ensure the adhesive is properly activated by pressing the material firmly onto the deck.
6. Pay Attention to Valleys and Penetrations
Valleys, roof penetrations (such as vents and chimneys), and other vulnerable areas require special attention. Use additional layers of underlayment or specialized flashing materials to ensure these areas are well-protected against water infiltration.
7. Install Ice and Water Shield
In colder climates, consider installing an ice and water shield along the eaves, valleys, and around roof penetrations. This self-adhered membrane provides extra protection against ice dams and wind-driven rain.
8. Avoid Wrinkles and Bubbles
Ensure the underlayment lies flat and smooth against the roof deck. Wrinkles and bubbles can create pathways for water to penetrate, compromising the underlayment’s effectiveness.
9. Work Safely
Roof work can be dangerous, so take appropriate safety precautions. Use proper fall protection equipment, work on a stable and dry surface, and avoid working in adverse weather conditions.
10. Follow Manufacturer Guidelines
Always refer to the manufacturer’s installation guidelines for the specific type of underlayment you are using. Each product may have unique requirements and recommendations to ensure optimal performance.
🤨 Additional Considerations
When evaluating roof underlayment options, it’s important to consider additional factors such as ventilation, regular inspections, and installation. These considerations can greatly impact the performance and longevity of your roofing system.
- Proper Ventilation: Adequate roof ventilation is essential for the longevity and performance of your roofing system. Proper ventilation helps regulate temperature and moisture levels in the attic, preventing issues such as mold growth, wood rot, and ice dams. Ensure your roof has sufficient intake and exhaust vents to promote good airflow.
- Inspect Regularly: Regular inspections of your roof and underlayment are crucial to catch potential issues early. Look for signs of damage, such as tears, wrinkles, or water stains, and address them promptly to prevent further damage.
- Professional Installation: While some homeowners may choose to install underlayment themselves, professional installation is often recommended, especially for more complex or premium products like synthetic or rubberized asphalt underlayment. Professional roofers have the experience and tools necessary to ensure a proper and effective installation.
🙌 Secure Your Home’s Future with Expert Roofing Solutions from Secured Roofing and Restorations
Choosing the right type of roofing underlayment and ensuring its proper installation are critical steps in protecting your home from water damage and extending the life of your roofing system. At Secured Roofing and Restorations, we specialize in this exact process. Whether you opt for traditional asphalt-saturated felt, advanced synthetic underlayment, or premium rubberized asphalt, our team has the expertise to guide you through the benefits and installation requirements of each type. We understand the importance of factors like climate, roofing material, and budget in making the best decision for your home.
With our experienced professionals and a commitment to quality, Secured Roofing and Restorations delivers reliable and durable roofing solutions that stand the test of time. Don’t leave your roofing needs to chance—trust the experts who prioritize your home’s protection and longevity.
Contact us today to schedule a consultation and take the first step towards a secure and lasting roof!
What Is Roof Rejuvenation? (Benefits, Process & More)
Written by : Secured Roofing and Restorations
9 minutes read
Roof rejuvenation is a relatively new concept in the home improvement industry, offering homeowners an alternative to traditional roof replacement. As roofs age, they naturally deteriorate due to exposure to weather elements, debris, and time. Roof rejuvenation aims to restore the roof’s condition, extending its lifespan and enhancing its performance. This article explores the concept of roof rejuvenation, including:
- Understanding roof rejuvenation
- 5 benefits of roof rejuvenation
- The roof rejuvenation process
- When to consider roof rejuvenation
- Roof rejuvenation vs roof replacement
- Choosing a roof rejuvenation service
🤔 Understanding Roof Rejuvenation
Roof rejuvenation is a maintenance technique designed to revitalize aging roofs. Unlike roof replacement, which involves removing the old roof and installing a new one, rejuvenation focuses on restoring the existing roof’s integrity. This process typically involves applying a specialized treatment to the roof’s surface, which penetrates the shingles and restores their flexibility, durability, and waterproofing properties.
The primary goal of roof rejuvenation is to extend the life of the roof by addressing common issues such as:
- Brittleness
- Granule loss
- Leaks
By restoring the roof’s original properties, rejuvenation can delay the need for costly replacements and provide homeowners with a cost-effective solution to maintain their roofs.
✅ 5 Benefits of Roof Rejuvenation
Roof rejuvenation offers numerous benefits, making it an attractive option for homeowners looking to preserve their roofs. Here are some of the key advantages:
1. Cost Savings
One of the most significant benefits of roof rejuvenation is cost savings. Replacing a roof can be a substantial financial burden, often costing thousands of dollars. In contrast, roof rejuvenation is a fraction of the cost of a full replacement. By extending the life of the existing roof, homeowners can avoid the high expenses associated with new roof installation.
2. Extended Roof Lifespan
Roof rejuvenation can significantly extend the lifespan of an aging roof. By restoring the flexibility and durability of the shingles, the roof can continue to protect the home effectively for many more years. This extension can be particularly beneficial for roofs that are nearing the end of their expected lifespan but are still structurally sound.
3. Improved Energy Efficiency
A well-maintained roof plays a crucial role in a home’s energy efficiency. Over time, aging roofs can develop gaps, cracks, and other issues that allow heat to escape in the winter and enter in the summer. Roof rejuvenation treatments often include sealing these gaps and improving the roof’s insulation properties, leading to better energy efficiency and reduced utility bills.
4. Environmental Benefits
Roof rejuvenation is an environmentally friendly option compared to roof replacement. Replacing a roof generates a significant amount of waste, as the old shingles and materials must be disposed of. Rejuvenation, on the other hand, involves treating the existing roof, reducing the amount of waste sent to landfills and conserving natural resources.
5. Enhanced Curb Appeal
An aging roof can detract from a home’s overall appearance. Roof rejuvenation treatments often include cleaning and restoring the roof’s surface, resulting in a more attractive and well-maintained appearance. This improved curb appeal can increase the home’s value and make it more appealing to potential buyers if the homeowner decides to sell.
🛠️ The Roof Rejuvenation Process
The roof rejuvenation process involves several steps to ensure the roof is thoroughly restored and protected. While the specific methods may vary depending on the product and service provider, the general process includes the following steps:
- Inspection and Assessment: The first step in the roof rejuvenation process is a thorough inspection and assessment of the roof’s condition. A professional roofer will evaluate the roof for signs of damage, wear, and other issues that may need to be addressed. This assessment helps determine if the roof is a good candidate for rejuvenation and identifies any necessary repairs before the treatment is applied.
- Cleaning: Before applying any treatment, the roof must be cleaned to remove dirt, debris, moss, algae, and other contaminants. A clean roof surface ensures that the rejuvenation treatment can penetrate the shingles effectively. Cleaning is typically done using specialized equipment, such as pressure washers or soft washing systems, depending on the roof’s material and condition.
- Repairs: If the inspection reveals any damaged or deteriorated areas, these must be repaired before applying the rejuvenation treatment. Common repairs may include replacing broken or missing shingles, sealing leaks, and fixing flashing issues. Addressing these problems ensures that the rejuvenation treatment can work effectively and prolong the roof’s life.
- Application of Rejuvenation Treatment: Once the roof is clean and any necessary repairs are made, the rejuvenation treatment is applied. This treatment usually consists of a bio-based or petroleum-based solution that penetrates the shingles and restores their flexibility, durability, and waterproofing properties. The application method can vary, but it often involves spraying the treatment onto the roof’s surface.
- Curing and Inspection: After the treatment is applied, it needs time to cure and fully penetrate the shingles. This curing period can vary depending on the product and weather conditions. Once the treatment has cured, a final inspection is conducted to ensure that the roof is fully restored and protected.
🤨 When to Consider Roof Rejuvenation
Roof rejuvenation is not suitable for every roof, and certain conditions must be met for it to be effective. Here are some factors to consider when deciding if roof rejuvenation is a viable option:
- Age of the Roof: Roof rejuvenation is most effective for roofs that are 10-20 years old. Roofs in this age range are often showing signs of wear but are still structurally sound. Younger roofs typically do not require rejuvenation, while older roofs may be too deteriorated for the treatment to be effective.
- Condition of the Roof: The roof’s condition is a critical factor in determining if rejuvenation is appropriate. Roofs with extensive damage, severe leaks, or structural issues may not be suitable candidates. A professional roofer can assess the roof’s condition and recommend the best course of action.
- Type of Roofing Material: Roof rejuvenation is primarily used for asphalt shingle roofs, which are the most common type of residential roofing material. Other roofing materials, such as metal, tile, or wood, may not be compatible with rejuvenation treatments. It’s essential to consult with a roofing professional to determine if your roof’s material is suitable for rejuvenation.
- Climate and Weather Conditions: The local climate and weather conditions can impact the effectiveness of roof rejuvenation. Roofs in regions with extreme weather, such as frequent hailstorms, heavy snowfall, or intense heat, may experience more wear and tear. These conditions can affect the roof’s ability to absorb the rejuvenation treatment and its long-term performance.
🏚️ Roof Rejuvenation vs. Roof Replacement
When deciding between roof rejuvenation and roof replacement, it’s essential to weigh the pros and cons of each option. Here are some key differences to consider:
- Cost: Roof rejuvenation is significantly more cost-effective than roof replacement. While rejuvenation treatments can range from a few hundred to a few thousand dollars, roof replacement often costs several thousand dollars or more, depending on the size and complexity of the roof.
- Time and Disruption: Roof rejuvenation is a quicker and less disruptive process compared to roof replacement. Rejuvenation treatments can typically be completed in a day or two, while roof replacement can take several days to weeks. Rejuvenation also produces less noise and mess, minimizing the disruption to the household.
- Longevity: While roof rejuvenation can extend the life of an existing roof by several years, it does not provide the same longevity as a new roof. A roof replacement offers a fresh start with a new warranty and can last 20-30 years or more, depending on the material.
- Environmental Impact: Roof rejuvenation has a lower environmental impact compared to roof replacement. Rejuvenation reduces waste and conserves resources by treating the existing roof rather than removing and disposing of old materials. This makes it a more sustainable option for environmentally conscious homeowners.
- Suitability: Roof rejuvenation is suitable for roofs that are still in relatively good condition but showing signs of aging. In contrast, roof replacement is necessary for roofs with severe damage, extensive leaks, or structural issues. A professional roofer can help determine which option is best based on the roof’s condition and the homeowner’s needs.
🧑🔧 Choosing a Roof Rejuvenation Service
Selecting a reputable roof rejuvenation service is crucial to ensure the treatment is effective and long-lasting. Here are some tips for choosing the right service provider:
- Research and Reviews: Research local roof rejuvenation services and read customer reviews to gauge their reputation and quality of work. Look for companies with positive feedback and a history of satisfied customers.
- Experience and Expertise: Choose a service provider with experience and expertise in roof rejuvenation. Experienced professionals are more likely to perform thorough inspections, identify necessary repairs, and apply the treatment correctly.
- Warranty and Guarantees: Inquire about the warranty and guarantees offered by the service provider. A reputable company should stand behind their work and provide a warranty on the rejuvenation treatment. This can give homeowners peace of mind and confidence in the service.
- Certifications and Licensing: Ensure the service provider is licensed and certified to perform roof rejuvenation. Proper licensing indicates that the company adheres to industry standards and regulations, ensuring quality and safety.
- Detailed Estimates: Request detailed estimates from multiple service providers to compare costs and services. A comprehensive estimate should outline the inspection, cleaning, repairs, treatment application, and any additional costs. This can help homeowners make an informed decision based on their budget and needs.
🙌 Revitalize Your Roof: Extend Its Life with Secured Roofing and Restorations’s Expert Rejuvenation Services
Roof rejuvenation is a valuable maintenance technique that offers numerous benefits for homeowners looking to extend the life of their roofs. By restoring the flexibility, durability, and waterproofing properties of aging shingles, rejuvenation can delay the need for costly replacements, improve energy efficiency, enhance curb appeal, and provide environmental benefits.
At Secured Roofing and Restorations, we specialize in the roof rejuvenation process, which includes detailed inspection, thorough cleaning, necessary repairs, and the application of a specialized treatment to revitalize your roof. While not suitable for every roof, rejuvenation can be a cost-effective and sustainable solution for roofs that are still in relatively good condition but showing signs of aging.
When you choose Secured Roofing and Restorations, you’re choosing a team with years of experience, a commitment to quality, and a reputation for excellence. Our expert team ensures that every step of the rejuvenation process is handled with the utmost care and professionalism. We help you weigh the pros and cons compared to roof replacement, evaluate your roof’s age and condition, and provide recommendations tailored to your specific needs. Protect your investment and ensure your roof continues to perform effectively for years to come. Contact us at Secured Roofing and Restorations today for a free inspection and discover how we can extend the life of your roof!
3 Different Types Of Metal Roofing (Homeowners Guide)
Written by : Secured Roofing and Restorations
5 minutes read
Your roof is like the number one protector of your home, keeping you safe and dry from the elements. But just like anything else, it needs a little TLC to stay in tip-top shape. Roof cleaning might not be the most glamorous task, but it’s an essential part of home maintenance. Here are some handy tips to make the job a breeze!
Inside this blog:
- The 6 best tips for thorough roof cleaning
- Details under each tip to help homeowners
Keep reading to learn everything you need to know about proper roof cleaning so your home can stay in tip top shape!
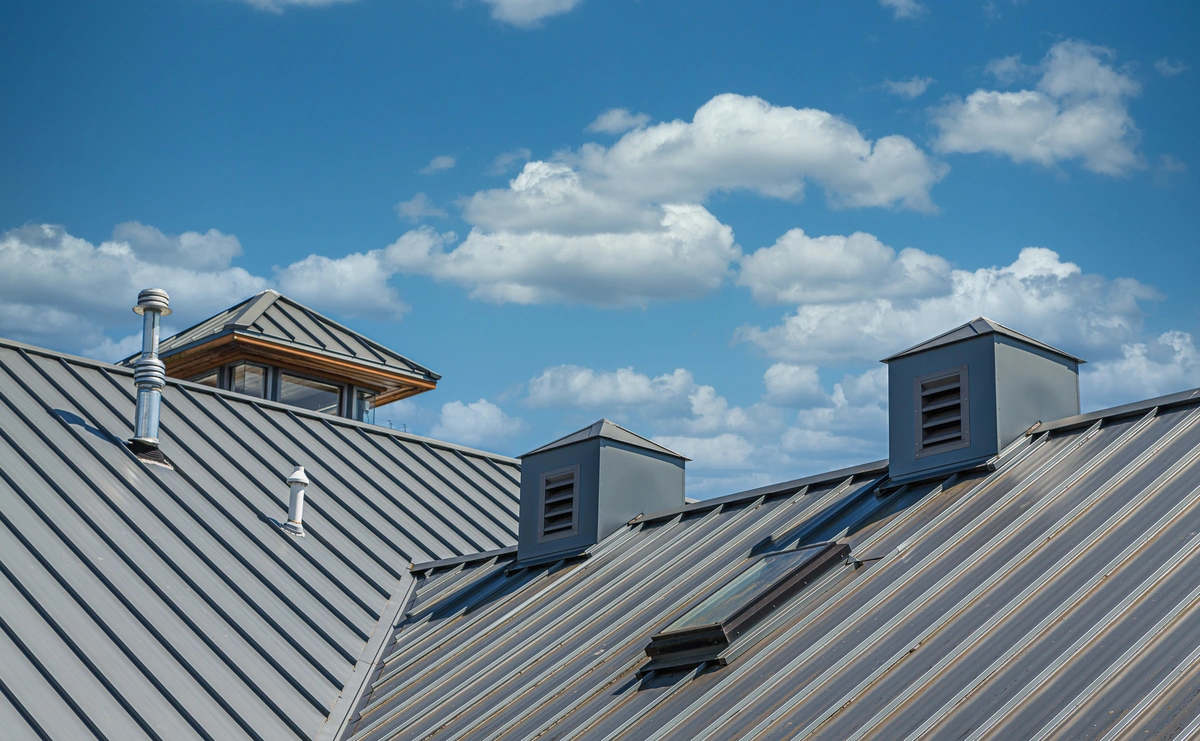
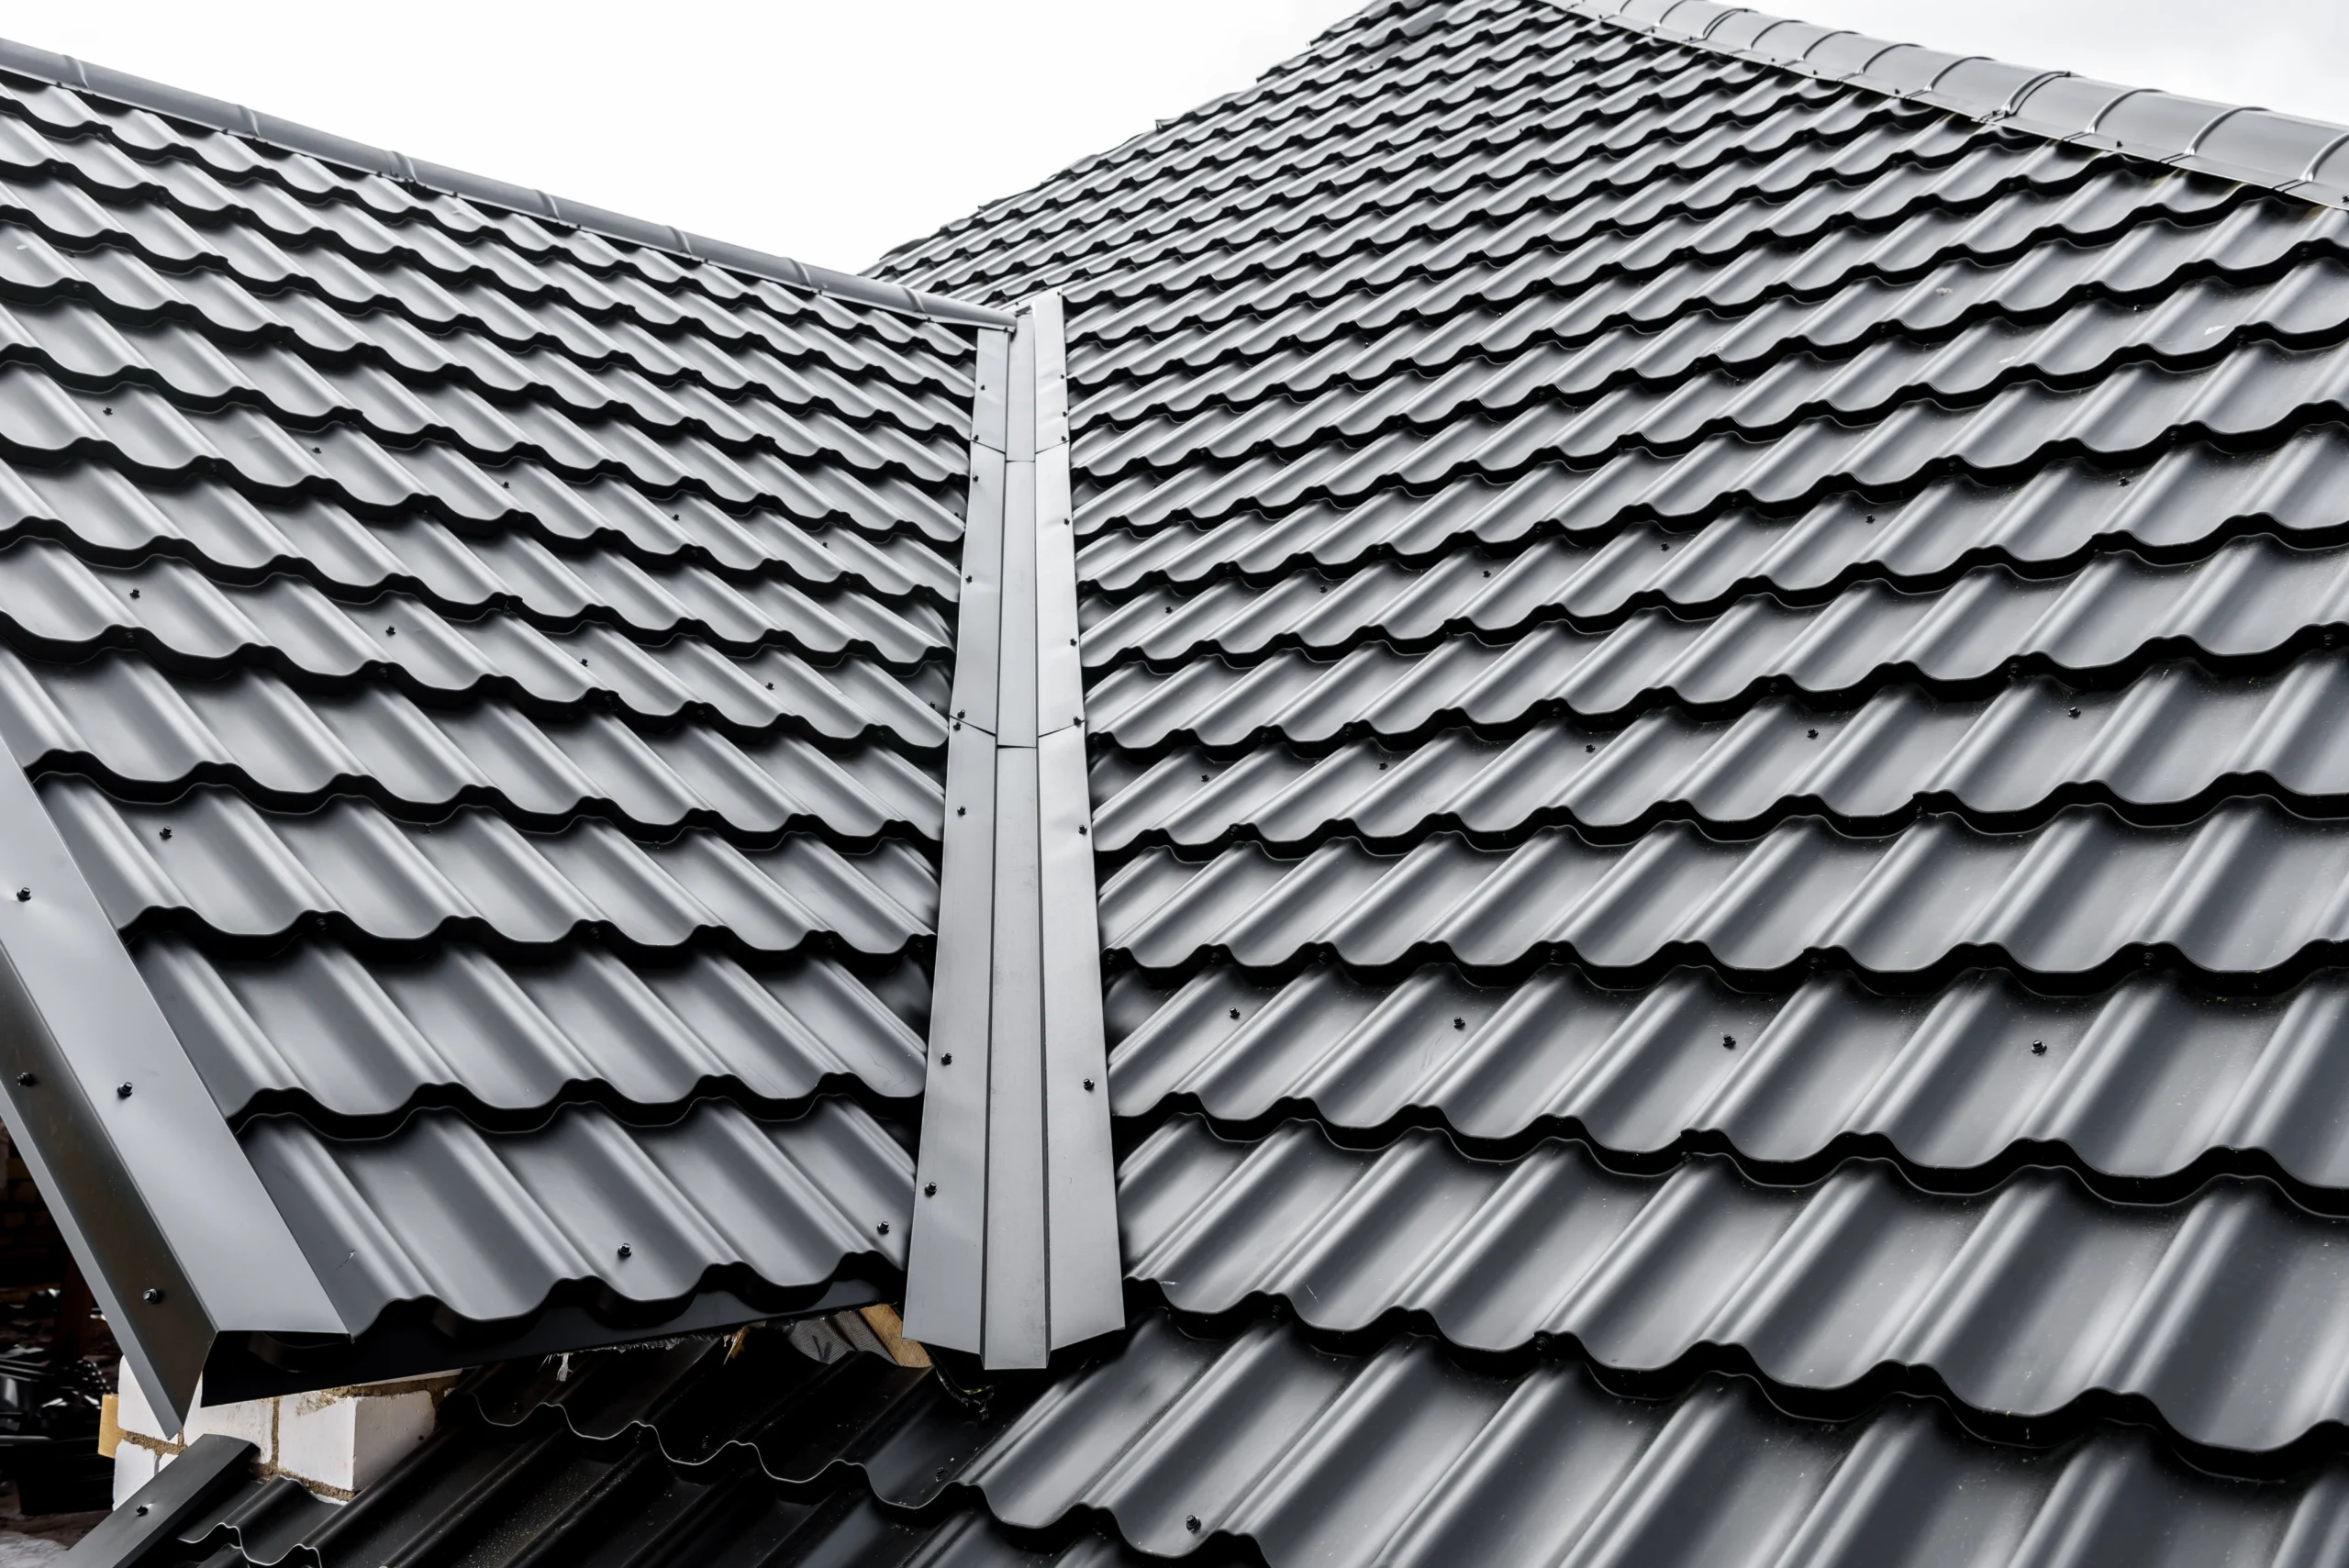
1. Standing Seam Metal Roofing
Standing seam metal roofing is one of the most common types of metal roofing systems. Here’s what you need to know:
Design
Standing seam roofs not only offer exceptional durability but also boast a sleek and modern appearance. The vertical panels with raised seams create a clean and streamlined look that enhances the overall aesthetics of your home. With their interlocking design, these roofs provide a seamless barrier against rain, snow, and wind, keeping your home safe and dry year-round.
Materials
When it comes to materials, standing seam roofs offer versatility and customization options to match your home’s style and architectural preferences. Whether you prefer the classic appeal of steel, the lightweight properties of aluminum, or the timeless elegance of copper, there’s a material choice to suit every homeowner’s taste.
Additionally, the availability of various color and finish options allows you to personalize your roof to complement the overall look of your home.
Durability
Standing seam roofs are renowned for their exceptional durability and longevity. Built to withstand the harshest weather conditions, these roofs can endure heavy rains, strong winds, and even hailstorms without succumbing to damage.
With proper maintenance, such as regular inspections and minor repairs, standing seam roofs can last anywhere from 40 to 70 years, providing homeowners with peace of mind and long-term protection for their investment.
2. Metal Shingle Roofing
Metal shingle roofing combines the durability of metal with the aesthetic appeal of traditional shingles. Here’s what you should know:
Appearance
Metal shingles are designed to emulate the appearance of traditional roofing materials like asphalt, wood, or slate shingles, giving your home a classic and timeless look. Whether you prefer the rustic charm of wood or the elegant appeal of slate, metal shingles can replicate the aesthetic of your choice while providing the durability and strength of metal.
Installation
Installing metal shingles is a straightforward process that involves overlapping rows, similar to traditional shingles. However, unlike asphalt shingles, metal shingles offer superior longevity and weather resistance, ensuring your roof remains sturdy and reliable for years to come. With proper installation techniques, metal shingles can withstand harsh weather conditions and protect your home from the elements.
Cost
While metal shingles may come with a higher initial cost compared to traditional asphalt shingles, they offer significant cost savings over the long term. Their durability and longevity mean you’ll spend less on repairs and replacements over the lifespan of your roof.
Additionally, metal shingles can increase the resale value of your home, providing a return on your investment should you decide to sell in the future.
3. Corrugated Metal Roofing
Corrugated metal roofing is a versatile and cost-effective option for residential and commercial properties. Here’s what you need to know:
Design
Corrugated metal panels are characterized by their distinctive ridges and grooves, which not only enhance the roof’s strength and stability but also allow for thermal expansion and contraction, reducing the risk of warping or damage over time. This design feature ensures that the roof remains durable and reliable, even in fluctuating weather conditions.
Applications
While corrugated metal roofing has long been favored for agricultural buildings, warehouses, and industrial structures due to its durability and affordability, it has increasingly become a popular choice for residential roofing applications as well. Homeowners appreciate its versatility, as it can complement a variety of architectural styles, from modern to rustic, and its ability to withstand the elements.
Affordability
One of the main advantages of corrugated metal roofing material is its affordability compared to other types of metal roofing. Its relatively low cost makes it an attractive option for homeowners on a budget who still want the durability and longevity of metal roofing.
Additionally, its low maintenance requirements mean that homeowners can save on upkeep costs over the lifespan of the roof, further enhancing its cost-effectiveness.
A Metal Roof Overview
Regardless of the metal roofing materials you choose, it’s clear that this cutting-edge roofing offers durability, longevity, and energy efficiency. It can last 50 years or more and withstand harsh weather like rain and wind.
Metal roofs are also fire-resistant and environmentally friendly because they’re often made from recycled materials and can be recycled again. Plus, they come in various styles and colors to match any home design.
However, metal roofing can be expensive upfront, and it may be noisy during heavy rain or hailstorms. Installation can also be tricky and requires professional help. Additionally, metal roofs can dent from hail or falling debris, and they may expand and contract, causing seams to loosen over time.
Choosing the Right Metal Roofing for Your Home
When it comes to selecting a metal roofing option for your home, consider factors such as durability, aesthetics, and budget. Whether you opt for standing seam, metal shingles, or corrugated metal roofing, you can enjoy the benefits of a long-lasting and low-maintenance roofing system that enhances the value and curb appeal of your home. Contact our team of expert contractors at Secured Roofing and Restorations today. We’ll answer all of your questions and customize an approach to tackle your project quickly and efficiently. Every one of our roofing experts is trained to provide the highest professional workmanship, personalized service, and to use only the best quality materials.
Roof Inspection Checklist for Homeowners (2024 Update)
Written by : Secured Roofing and Restorations
8 minutes read
As a homeowner, maintaining your roof is crucial to ensuring the overall health of your home. A well-maintained roof protects your property from the elements, enhances curb appeal, and can save you from costly repairs down the line. With 2024 bringing new advancements and insights into home maintenance, it’s time for an updated guide on roof inspections. This roof inspection checklist will help you spot potential issues early and keep your roof in top condition:
- Why regular roof inspections matter
- When to inspect your roof
- Precautions before you begin
- 7 part roof inspection checklist
- Professional roof inspections
- Maintaining your roof
- Addressing roof repairs
- Keep a roof maintenance journal
🤔 Why Regular Roof Inspections Matter
Before diving into the checklist, it’s important to understand why regular roof inspections are essential. Your roof is exposed to weather extremes, ranging from scorching summer heat to heavy snow and rain. Over time, these conditions can cause wear and tear, leading to potential leaks, structural damage, and decreased energy efficiency.
Regular inspections help:
- Identify minor issues before they become major problems.
- Extend the lifespan of your roof.
- Improve energy efficiency by ensuring proper insulation.
- Maintain your home’s value and aesthetic appeal.
📆 When to Inspect Your Roof
It’s recommended to inspect your roof at least twice a year, ideally in the spring and fall. Additionally, inspections should be conducted after severe weather events such as storms, heavy snowfall, or strong winds. These conditions can cause immediate damage that needs prompt attention.
⚠️ Safety First: Precautions Before You Begin
Roof inspections can be dangerous, so it’s vital to prioritize safety:
- Use proper equipment: Ensure you have a sturdy ladder and non-slip shoes.
- Avoid inspecting during wet or windy conditions.
- Consider professional help if you’re uncomfortable with heights or unsure about what to look for.
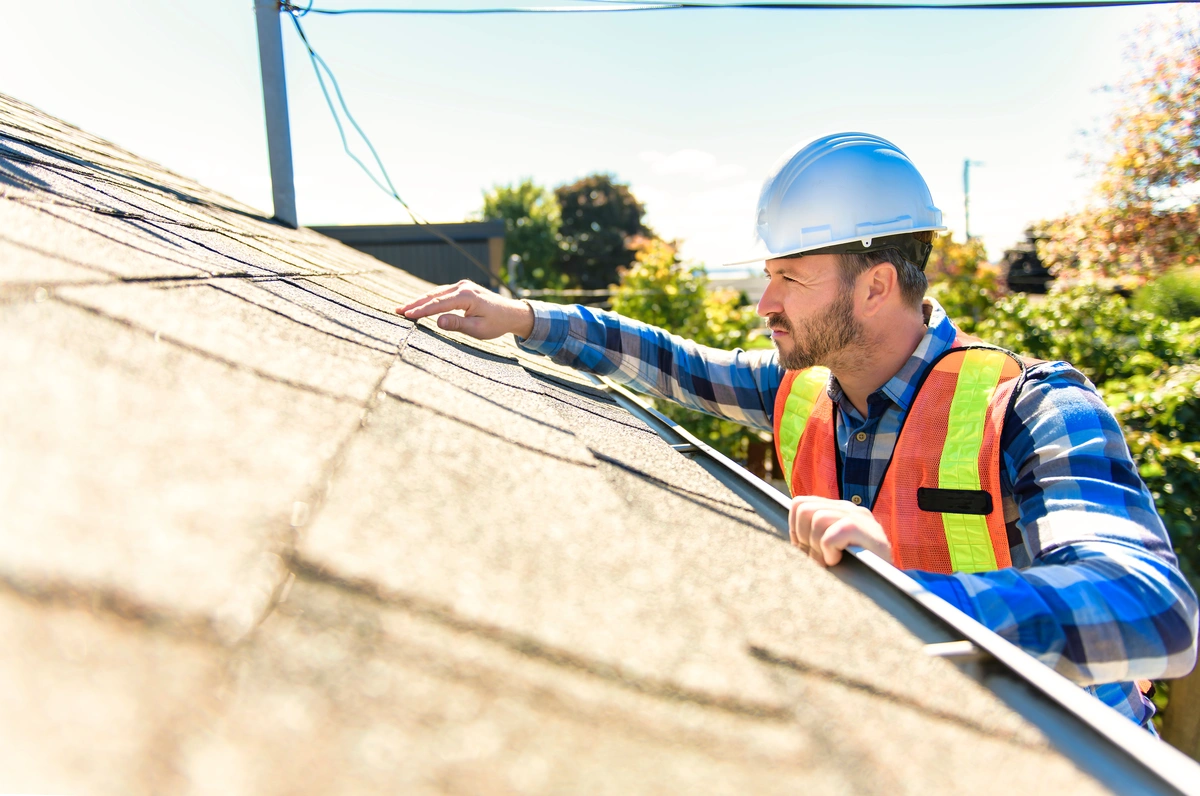
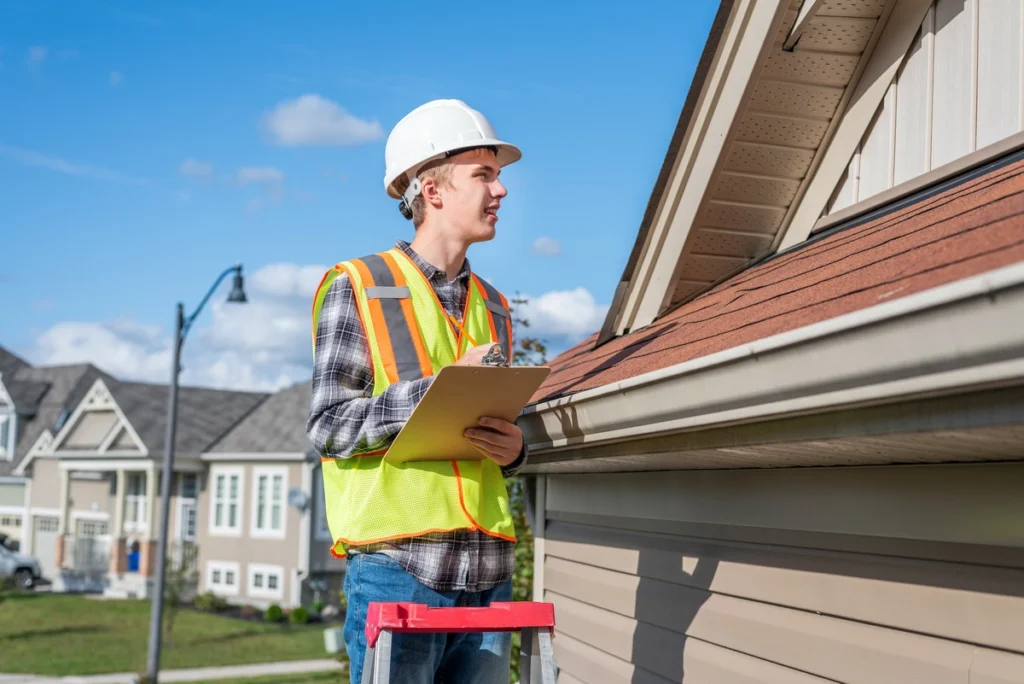
📋 7 Part Roof Inspection Checklist
Regular inspections are key to maintaining the integrity of your roof. Below is a comprehensive 7-part roof inspection checklist to help you identify potential issues before they become major problems.
1. Visual Inspection from the Ground
Before climbing onto the roof, start with a thorough visual inspection from the ground. Use binoculars if necessary.
- Shingles: Look for missing, cracked, or curled shingles. These can be a sign of aging or damage.
- Flashings: Inspect the metal pieces around chimneys, vents, and valleys. Damaged or missing flashings can lead to leaks.
- Gutters and Downspouts: Ensure they are securely attached and free from debris.
- Soffits and Fascia: Check for signs of rot, damage, or animal activity.
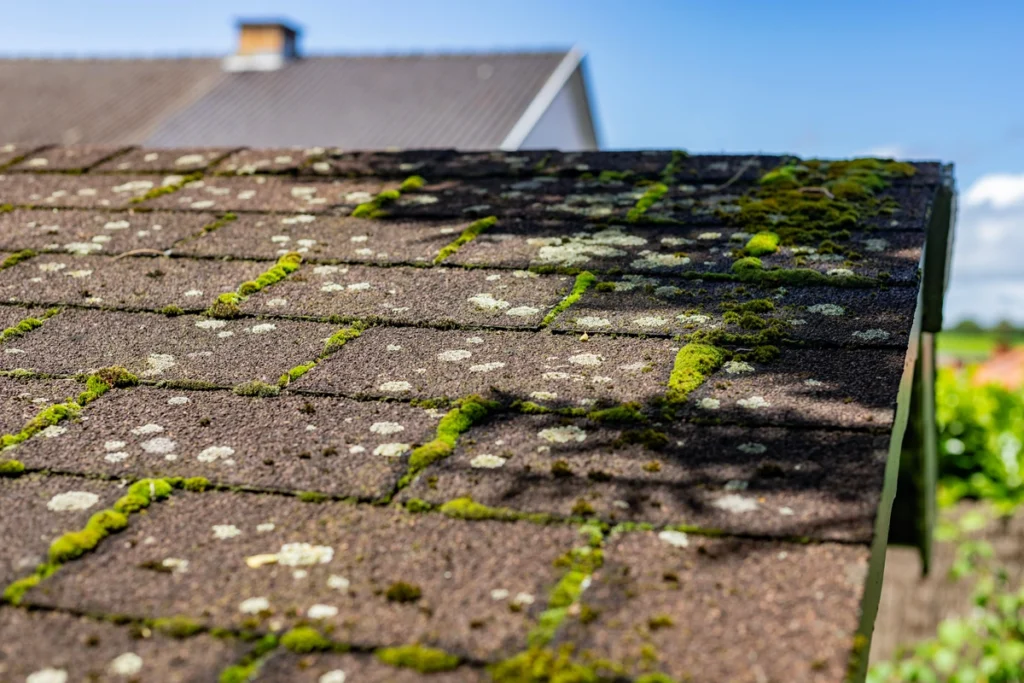
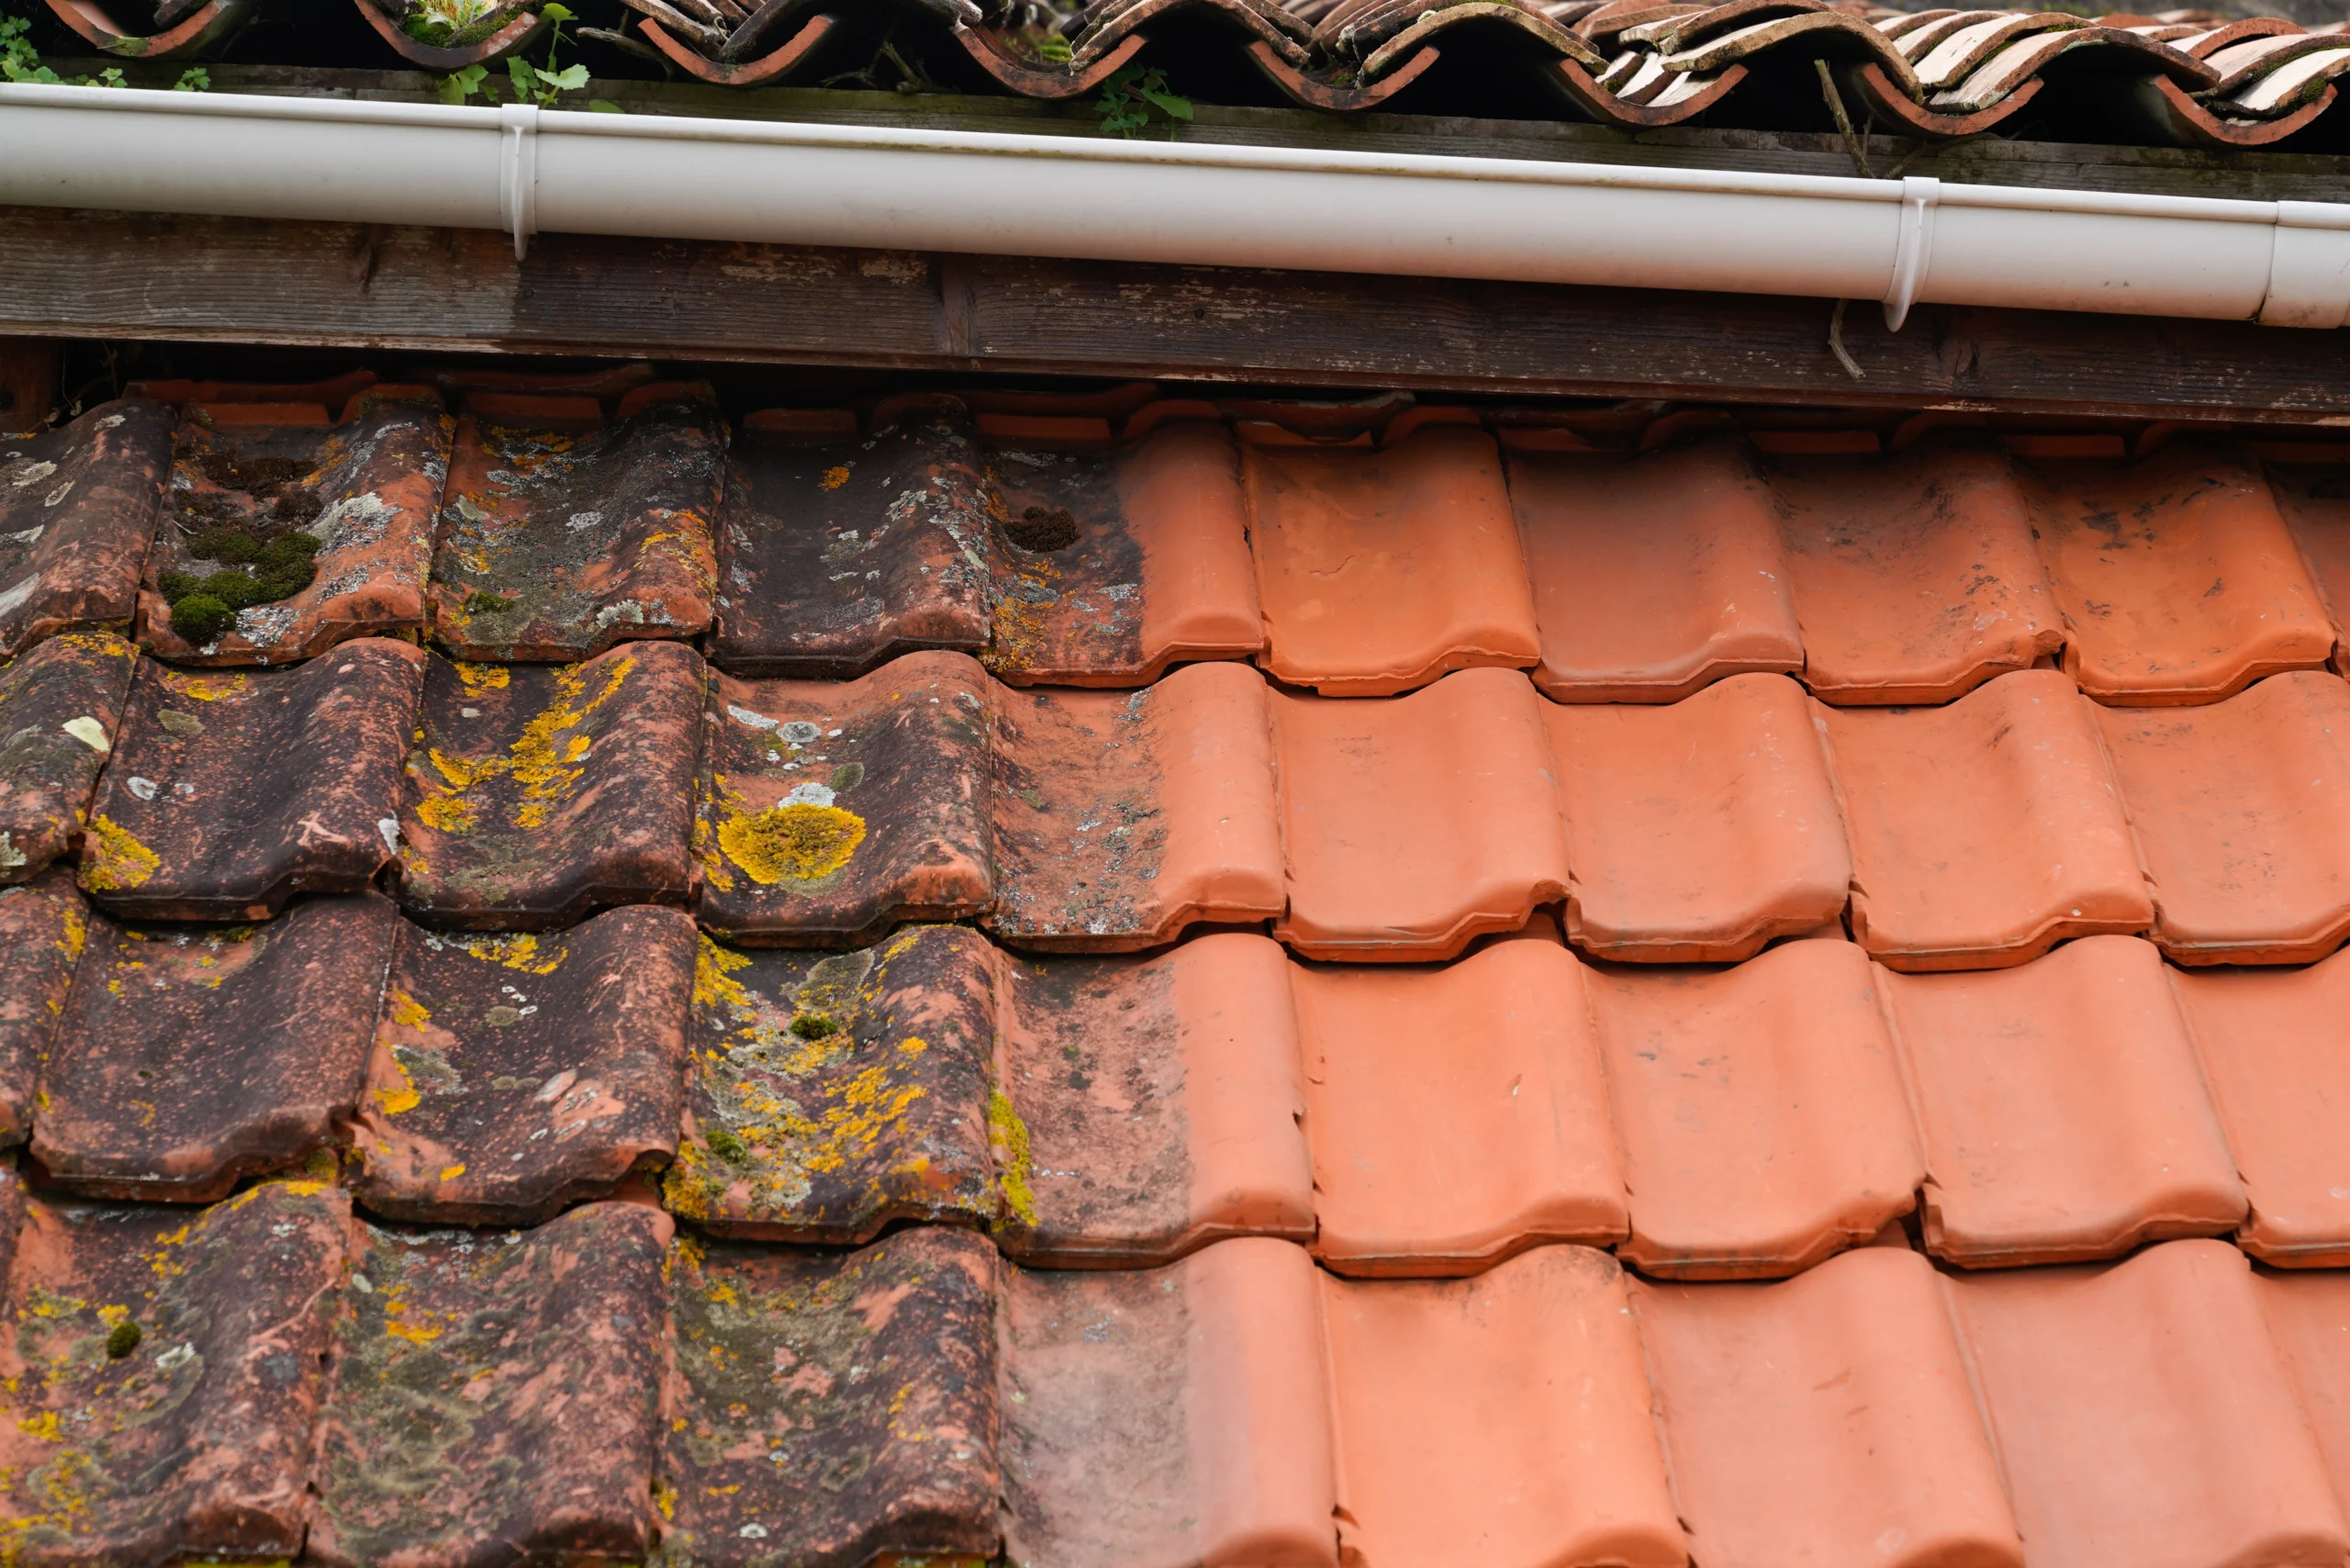
- Moss and Algae: Look for green or black streaks, which can indicate moss, algae, or mold growth.
2. Inspection on the Roof
If it’s safe to do so, climb onto the roof for a closer look.
- Shingles and Tiles: Examine for granule loss, especially in asphalt shingles. This appears as bald spots or excessive granules in gutters.
- Roof Valleys: These areas are prone to leaks, so check for debris, damage, or signs of water flow issues.
- Flashing: Ensure all flashings are intact and sealed properly. Pay close attention to areas around chimneys, vents, and skylights.
- Ventilation: Check that roof vents are unobstructed and functioning correctly. Proper ventilation prevents moisture buildup and extends the roof’s life.
- Seals and Caulking: Look for cracks or gaps in caulking around vents and pipes.
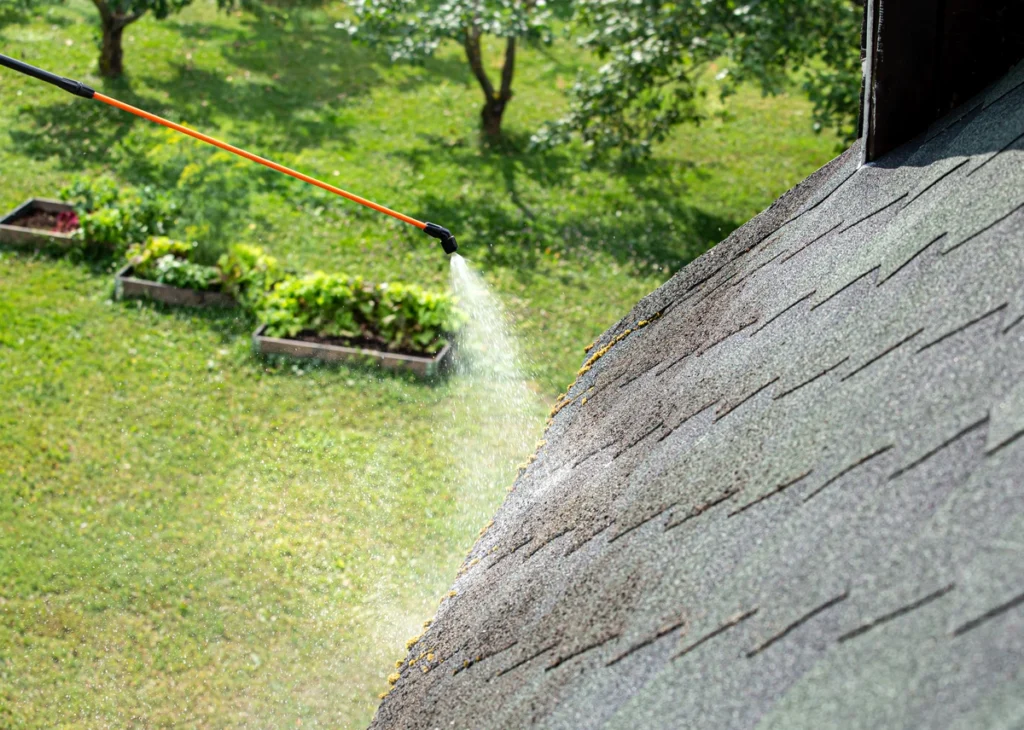
- Moss and Algae: Remove any moss or algae growth using a specialized cleaner. Be cautious not to damage the shingles while cleaning.
3. Interior Inspection
The condition of your roof can also be assessed from the inside of your home, particularly in the attic.
- Leaks and Water Stains: Look for water stains on the ceiling and walls, which can indicate a leak.
- Insulation: Check if the insulation is dry and intact. Wet insulation can indicate a roof leak.
- Ventilation: Ensure the attic has proper ventilation to prevent moisture buildup.
- Light Penetration: Turn off the lights in the attic and look for any sunlight coming through the roof. This can indicate holes or gaps in the roofing material.
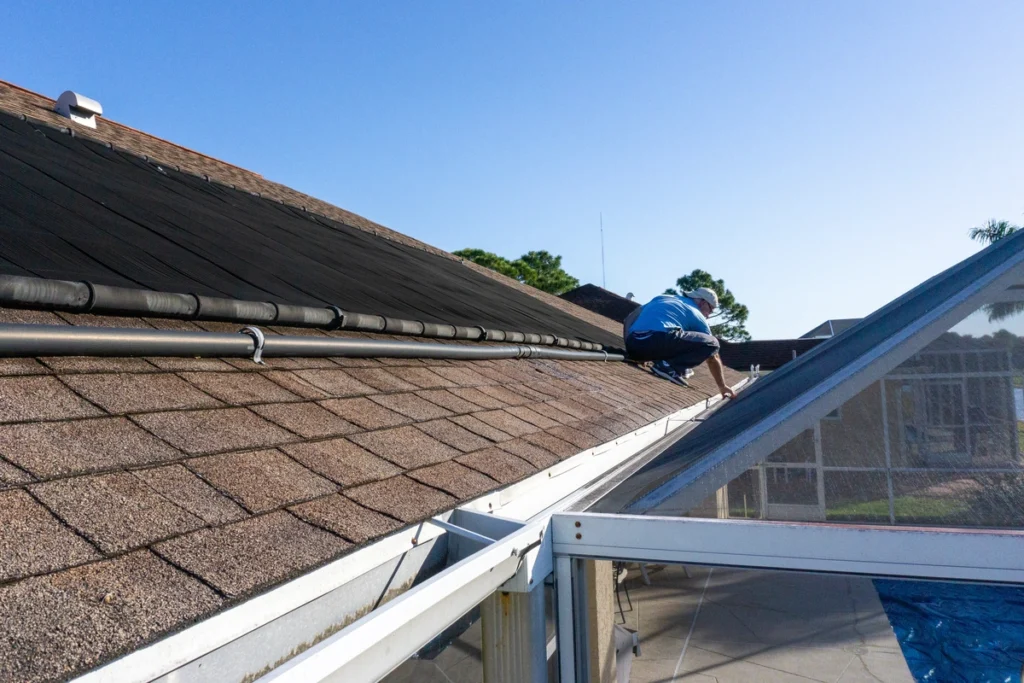
4. Gutters and Downspouts
Gutters play a crucial role in directing water away from your roof and home. Clogged or damaged gutters can lead to water damage.
- Clean Gutters: Remove leaves, twigs, and other debris.
- Check for Damage: Look for signs of rust, corrosion, or sagging.
- Downspout Placement: Ensure downspouts direct water away from your home’s foundation.
5. Chimney and Skylights
These features are common sources of roof leaks if not properly maintained.
- Chimney Inspection: Look for cracks, damaged bricks, or deteriorating mortar. Ensure the chimney cap is intact.
- Skylights: Check the seals around skylights for cracks or gaps. Inspect the glass for any signs of damage.
6. Flashing and Sealants
Flashing and sealants are critical for preventing leaks around roof penetrations.
- Inspect Flashing: Ensure all flashing is secure and free from rust or damage.
- Check Sealants: Look for dried or cracked sealants around vents, chimneys, and other roof penetrations. Reapply sealant if necessary.
7. Roof Accessories
Other roof accessories can also impact the overall health of your roof.
- Solar Panels: If you have solar panels, check for debris underneath and ensure they are securely attached.
- Satellite Dishes: Ensure satellite dishes are securely mounted and not causing any damage to the roof.
👷 Professional Roof Inspection
While DIY inspections are beneficial, hiring a professional roofer for an annual inspection is highly recommended. Professionals can identify issues that might be missed by an untrained eye and provide a detailed assessment of your roof’s condition.
Benefits of Professional Inspections
- Expertise: Professionals have the experience and knowledge to spot potential problems.
- Thoroughness: A professional inspection is often more comprehensive.
- Maintenance Plans: Many roofing companies offer maintenance plans that include regular inspections and minor repairs.
🏠 Maintaining Your Roof
Regular maintenance can extend the life of your roof and prevent costly repairs.
Tips for Roof Maintenance
- Clean Gutters Regularly: Keep gutters free of debris to prevent water damage.
- Trim Overhanging Branches: Trees can damage your roof during storms and provide a pathway for pests.
- Remove Moss and Algae: Use a roof-safe cleaner to remove moss and algae growth.
- Schedule Professional Inspections: Annual inspections by a professional can help catch issues early.
Common Roofing Materials and Their Maintenance
Different roofing materials require different maintenance approaches.
Asphalt Shingles
- Regular Inspections: Check for granule loss and damage.
- Clean Gutters: Prevent buildup of debris that can cause water damage.
Metal Roofs
- Check for Rust: Inspect for signs of rust or corrosion.
- Ensure Proper Sealing: Make sure all seams and fasteners are sealed properly.
Tile Roofs
- Inspect for Cracked Tiles: Replace any damaged tiles to prevent leaks.
- Clean Regularly: Remove debris to prevent water retention and damage.
Wood Shingles
- Treat for Mold and Rot: Regularly treat wood shingles to prevent mold, rot, and insect damage.
- Inspect for Splitting: Check for split or damaged shingles and replace them as needed.
🛠️ Addressing Roof Repairs
When you identify issues during an inspection, timely repairs are crucial. Delaying repairs can lead to more extensive damage and higher costs.
DIY vs. Professional Repairs
While minor repairs like replacing a few shingles or sealing small gaps can be DIY projects, major repairs should be handled by professionals. Attempting complex repairs without proper knowledge and tools can cause more harm than good.
Finding a Reliable Roofing Contractor
When hiring a professional for repairs, ensure they are:
- Licensed and Insured: Protect yourself by hiring a licensed and insured contractor.
- Experienced: Look for contractors with good reviews and a solid reputation.
- Transparent: They should provide clear estimates and explain the work needed.
📓 Keep a Roof Maintenance Journal
Keeping a detailed journal of your roof inspections and maintenance activities can be extremely beneficial. Record dates of inspections, any issues found, repairs made, and the names of contractors used. This log can help you track the condition of your roof over time and provide valuable information to professionals if needed.
By staying vigilant and proactive, you can ensure your roof remains in excellent condition, providing reliable protection and enhancing the value of your home. Here’s to a well-maintained roof and a secure, comfortable home in 2024 and beyond!
🙌 Ensure Your Home’s Longevity with Secured Roofing and Restorations
Regular roof inspections and maintenance are crucial for the longevity and health of your home. By following our updated 2024 checklist, you can spot potential issues early and take proactive steps to resolve them. While DIY inspections are useful, securing professional help ensures thorough assessments and tackles complex repairs.
At Secured Roofing and Restorations, our team of experts is dedicated to providing top-notch service. We bring years of experience, advanced tools, and a commitment to quality, ensuring your roof is in the best hands. Maintaining your roof not only protects your home but also gives you peace of mind, knowing you’re safeguarding your investment for years to come.
Don’t wait—contact Secured Roofing and Restorations today to schedule your comprehensive roof inspection and keep your home secure!
6 Helpful Tips For When You Are Doing Some Roof Cleaning
Written by : Secured Roofing and Restorations
6 minutes read
Your roof is like the number one protector of your home, keeping you safe and dry from the elements. But just like anything else, it needs a little TLC to stay in tip-top shape. Roof cleaning might not be the most glamorous task, but it’s an essential part of home maintenance. Here are some handy tips to make the job a breeze!
Inside this blog:
- The 6 best tips for thorough roof cleaning
- Details under each tip to help homeowners
Keep reading to learn everything you need to know about proper roof cleaning so your home can stay in tip top shape!
1. Safety First
Before you even think about climbing up onto your roof, make sure you have the right safety gear. A sturdy ladder, non-slip shoes, and a safety harness can help prevent accidents. Additionally, ensure that the ladder is placed on a stable surface and that it extends at least three feet beyond the edge of the roof for proper support. Taking these precautions is crucial to safeguarding yourself against potential falls or injuries while working on the roof.
Check the weather forecast before you start the roof cleaning process. Avoid working on your roof in rainy or windy conditions, as it can make surfaces slippery and increase the risk of falls. It’s also essential to consider the temperature and humidity levels, as certain cleaning solutions may be less effective or pose safety hazards in extreme weather conditions. By planning your roof cleaning on a clear and dry day, you can ensure optimal safety and effectiveness in removing debris and stains.
Let someone know you’ll be up on the roof, just in case anything goes wrong. Having a friend, family member, or neighbor aware of your rooftop activity can provide an extra layer of safety and support. In the event of an emergency or accident, having someone nearby who can assist or alert authorities can make all the difference. It’s always better to be safe than sorry when it comes to working at heights, so don’t hesitate to inform someone of your plans before tackling roof cleaning tasks. And, if you’re hesitant at all to do a DIY roof cleaning, reach out to professional roof cleaners.
2. Start With a Visual Inspection
Take a walk around your home and inspect your roof from the ground. Look for any visible signs of damage on your roofing material, such as missing or damaged asphalt shingles, moss or algae growth, or debris buildup in gutters. Pay attention to areas where the roof meets other structures, such as chimneys, vents, and skylights, as these areas are prone to leaks and damage.
Additionally, inspect the edges of the roof for any signs of sagging or deterioration, as this could indicate structural issues that require immediate attention.
If needed, use binoculars to get a closer look at hard-to-reach areas. Binoculars can help you spot potential issues that may not be visible from the ground, such as loose or damaged shingles or signs of water damage. Take note of any areas that may need special attention during cleaning, such as areas with heavy moss or algae growth or sections where debris has accumulated.
By thoroughly inspecting your roof shingles before cleaning, you can identify any areas that require repairs or additional maintenance to ensure the longevity and integrity of your roof.
3. Gather Your Tools and Cleaning Solutions
Before you head up to the roof, gather all the necessary tools and cleaning solutions. A soft-bristled brush, a garden hose with a spray nozzle, and a gentle cleaning solution such as mild detergent or a commercial roof cleaner are essential.
Avoid using harsh chemicals or engaging in pressure washing, as this can damage your roof’s surface and void your warranty.

4. Start With Gentle Cleaning Techniques
Begin by gently sweeping away any loose debris, such as leaves, twigs, or dirt, using a soft-bristled brush or broom. Work from the top of the roof down to avoid pushing debris into gutters or downspouts.
Once the surface is clear, use a garden hose with a gentle spray nozzle to rinse away any remaining dirt or grime. Avoid using high-pressure settings, as they can damage shingles or dislodge roofing materials.
5. Address Stubborn Stains and Growth
For stubborn stains or areas affected by moss, algae, or mildew, apply a mixture of water and mild detergent to the affected areas. Allow the solution to sit for a few minutes to loosen the stains.
Use a soft brush or sponge to gently scrub the stained areas, working in a circular motion. Rinse thoroughly with clean water to remove any residue.
6. Take Preventive Measures
After cleaning your roof, consider applying a preventive treatment, such as zinc or copper strips, to inhibit the growth of moss, algae, or mildew. These strips release metal ions that help prevent organic growth over time.
Regular maintenance, such as keeping gutters clean and trimming overhanging branches, can also help prevent debris buildup and minimize the need for frequent roof cleaning.
🌟 Bonus Tip: Consider hiring a professional roof cleaning service for a thorough and safe cleaning experience, especially for multi-story homes or roofs with steep pitches. They have the expertise and equipment to ensure your roof is cleaned effectively without causing damage.
🧹 A Healthy Home Has a Clean Roof
Regular roof cleaning is essential for maintaining the integrity and longevity of your home’s roof. By following these helpful tips, you can ensure that your roof stays clean and free from damage-causing debris, stains, and growths.
Remember to prioritize safety, use the right tools and cleaning solutions, and consider seeking professional assistance when needed. With proper care and maintenance, your roof will continue to protect your home for years to come, giving you peace of mind and saving you money on costly repairs in the long run. Contact our team of expert contractors at Secured Roofing and Restorations today. We’ll answer all of your questions and customize an approach to tackle your project quickly and efficiently. Every one of our roofing experts is trained to provide the highest professional workmanship, personalized service, and to use only the best quality materials.
Emergency Roof Repair: Expert Tips & Quick Fixes
Written by : Secured Roofing and Restorations
6 minutes read

When disaster strikes, and your roof is compromised, knowing how to handle emergency repairs can make all the difference. Whether it’s a fallen tree, heavy storm damage, or unexpected leaks, quick and effective action can protect your home from further damage. This comprehensive guide offers expert tips and quick fixes for emergency roof repair, including:
- Understanding the importance of emergency roof repairs
- Preparing for roof emergencies
- 4 immediate steps to take during a roof emergency
- 4 expert tips for common emergency roof repairs
- Long-term solutions and prevention
🤔 Understanding the Importance of Emergency Roof Repairs
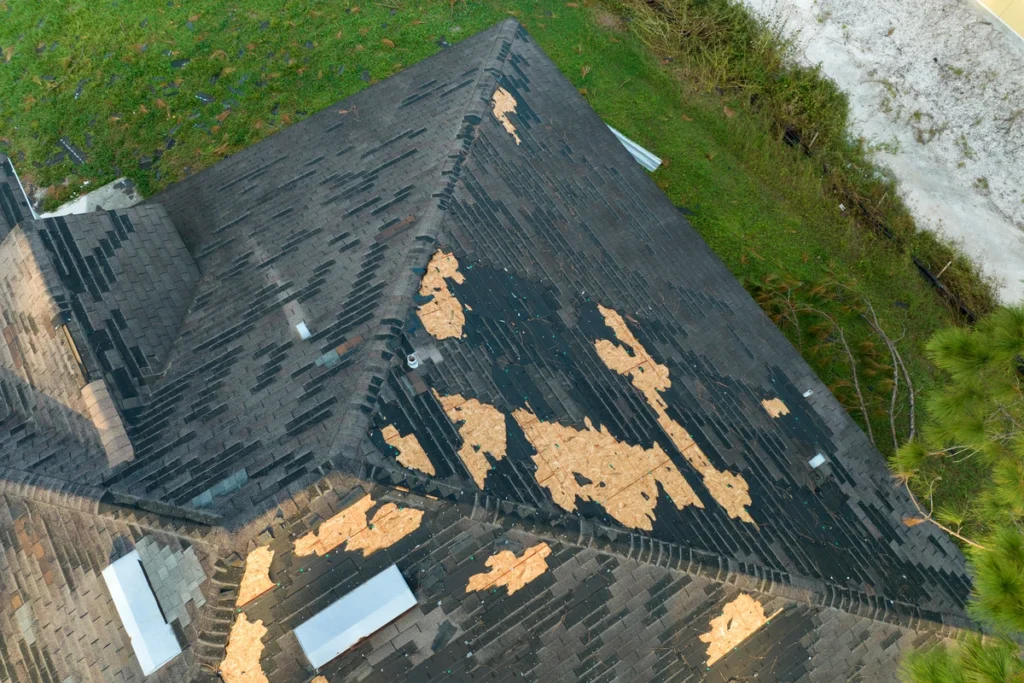
A damaged roof can lead to a myriad of problems, including water damage, mold growth, and structural instability. In an emergency, addressing these issues promptly can:
- Prevent Further Damage: Quick repairs can stop leaks and protect the interior of your home.
- Ensure Safety: Immediate action can prevent accidents caused by structural weaknesses.
- Save Money: Timely repairs can mitigate the need for extensive and costly repairs later on.
⚠️ Preparing for Roof Emergencies
Preparation is key to handling roof emergencies effectively. Here are some steps to ensure you’re ready:
Regular Inspections and Maintenance
- Schedule Inspections: Have your roof inspected by professionals at least twice a year, ideally in spring and fall.
- DIY Checks: Regularly inspect your roof for missing or damaged shingles, especially after severe weather.
- Clean Gutters: Ensure gutters are free of debris to prevent water backup and damage.
Emergency Kit
Prepare an emergency roof repair kit with the following items:
- Heavy-duty plastic sheeting or tarps
- Roofing nails or screws
- Roofing cement or adhesive
- Hammer or nail gun
- Utility knife
- Ladder
- Flashlight with extra batteries
- Safety gloves and goggles
🏠 4 Immediate Steps to Take During a Roof Emergency
When a roof emergency occurs, quick and calm action is essential. Here’s what you should do:
1. Ensure Safety First
- Evacuate if Necessary: If the damage is severe, evacuate the premises to ensure everyone’s safety.
- Turn Off Utilities: Shut off electricity and gas if there is a risk of water intrusion.
2. Assess the Damage
- Visual Inspection: From a safe distance, assess the damage. Look for obvious signs such as missing shingles, visible holes, or structural damage.
- Document the Damage: Take photos and notes for insurance purposes.
3. Temporary Repairs
Fixing Leaks
- Locate the Leak: Identify where the water is entering your home.
- Contain the Water: Place buckets or containers to catch the water inside your home.
- Apply a Tarp: Cover the damaged area with a tarp. Secure it with nails or screws and ensure it extends several feet beyond the damaged area.
Securing Loose Shingles
- Use Roofing Cement: Apply roofing cement under the loose shingles and press firmly.
- Nail Down Loose Shingles: Use roofing nails to secure any shingles that have partially detached.
4. Contact a Professional
After making temporary repairs, contact a professional roofer for a thorough assessment and permanent repair. Ensure they are licensed, insured, and have good reviews.
💡 4 Expert Tips for Common Emergency Roof Repairs
1. Dealing with Fallen Trees
A fallen tree can cause significant damage to your roof. Here’s how to handle it:
- Stay Safe: Avoid the damaged area and ensure no one is injured.
- Remove the Tree: Contact a professional tree removal service. Attempting to remove it yourself can be dangerous.
- Cover the Hole: Once the tree is removed, cover the hole with a tarp until professional repairs can be made.
2. Handling Severe Storm Damage
Severe storms can rip off shingles, cause leaks, and create structural damage. Here’s what to do:
- Inspect the Roof: After the storm, check for missing shingles, damaged flashing, and leaks.
- Quick Fixes: Apply tarps over large damaged areas and use roofing cement for minor repairs.
- Professional Help: Contact a roofing contractor to assess and repair storm damage comprehensively.
3. Fixing Wind Damage
High winds can lift and tear off shingles. For immediate fixes:
- Reattach Shingles: Use roofing nails and cement to reattach any loose shingles.
- Replace Missing Shingles: Temporarily cover the exposed area with a tarp until you can replace the shingles.
4. Addressing Ice Dams
Ice dams form when snow melts and refreezes at the roof edge, causing water to back up under shingles. To manage this:
- Remove Snow: Use a roof rake to remove snow from the roof edge.
- Install Heat Cables: Heat cables can help melt ice and prevent dams from forming.
- Ventilation and Insulation: Improve attic ventilation and insulation to prevent ice dams in the future.
💪 Long-Term Solutions and Prevention
Preventing future roof emergencies is just as important as addressing current ones. Secured Roofing and Restorations provides comprehensive long-term solutions and preventative measures to ensure your roof remains robust and resilient year-round.
- Invest in Quality Roofing Materials: Using high-quality materials can prevent many common roofing issues. Consider:
- Impact-Resistant Shingles: These can withstand hail and debris impacts.
- Metal Roofing: Durable and resistant to severe weather conditions.
- Proper Installation: Ensure your roof is installed by experienced professionals.
- Improve Roof Ventilation: Proper ventilation can prevent moisture buildup, ice dams, and heat damage. Ensure your attic has adequate ventilation through soffit and ridge vents.
- Regular Maintenance: Regular maintenance can extend the life of your roof and prevent emergencies:
- Clean Gutters and Downspouts: Prevent water buildup and ice dams.
- Trim Overhanging Branches: Reduce the risk of falling branches during storms.
- Check for Wear and Tear: Regularly inspect and repair minor issues before they become major problems.
- Emergency Roof Repair Plans: Consider signing up for an emergency roof repair plan with a trusted roofing contractor. These plans often include regular inspections, priority service, and discounted rates for emergency repairs.
🙌 Stay Safe and Secure: Expert Solutions for Roof Emergencies with Secured Roofing and Restorations
Dealing with a roof emergency can be stressful, but with the right knowledge and preparation, you can handle the situation effectively. Prioritize safety, make temporary repairs to prevent further damage, and contact a professional for permanent solutions. By maintaining your roof and being prepared for emergencies, you can protect your home and ensure its longevity. When facing a roof emergency, staying calm and taking swift action is crucial. Utilize the tips and quick fixes outlined in this guide to navigate through the initial crisis, and always consult with a professional to ensure your roof is properly repaired and maintained.
At Secured Roofing and Restorations, we are the team you want for your roofing needs. Our experts are equipped with the skills and experience to manage any emergency swiftly and efficiently. We prioritize your safety and the durability of your roof, offering both temporary fixes and long-term solutions tailored to your specific situation. Choose Secured Roofing and Restorations for peace of mind and top-notch service. Contact us today for a consultation and ensure your home is safeguarded against the unpredictable. Let us help you keep your family safe and secure!