


Articles
How Often Should You Get Your Roof Replaced?
 Written by : Secured Roofing and Restorations
 6 minutes read


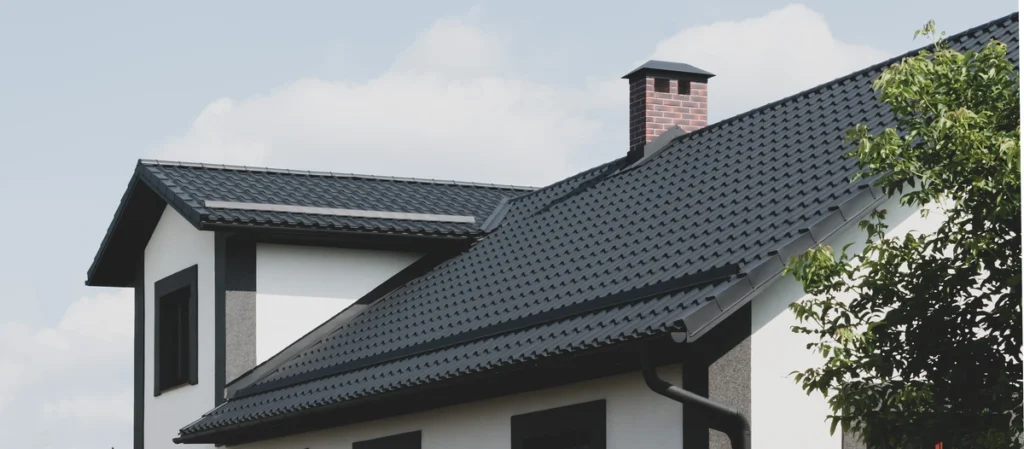
Determining “how often to replace roof materials” can be a complex question. This guide cuts through the uncertainty, highlighting key factors that dictate the necessity to replace your roof, from its age to the influence of the elements. Without overloading on details, you’ll learn the essential signs that point towards roof replacement and gain practical knowledge to maintain your roof’s longevity.
Inside this blog:
- Determining how often to replace roof materials
- Understanding durability and maintenance
- Choosing the best roofing material for your home
Determining How Often To Replace Roof Materials
When it comes to your roof, timing is everything. Knowing when to replace your roof can save you from costly repairs. Various factors influence this decision, including:
- The age of the roof
- Weather damage
- Current home improvement trends
- The choice of roofing materials, such as asphalt, wood, metal, and rubber, also plays a role due to their inherent life expectancies.
But how do you identify the subtle signs of deterioration that aren’t easily noticeable? This is where the expertise of a roofing contractor comes into play. A professional roofer can assess these signs and recommend when it’s time for a replacement. Regular maintenance and prompt attention to small repairs can also extend the life of a roof beyond its expected service term, possibly affecting the timing of a replacement.
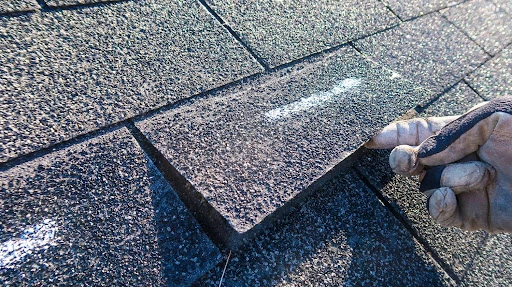
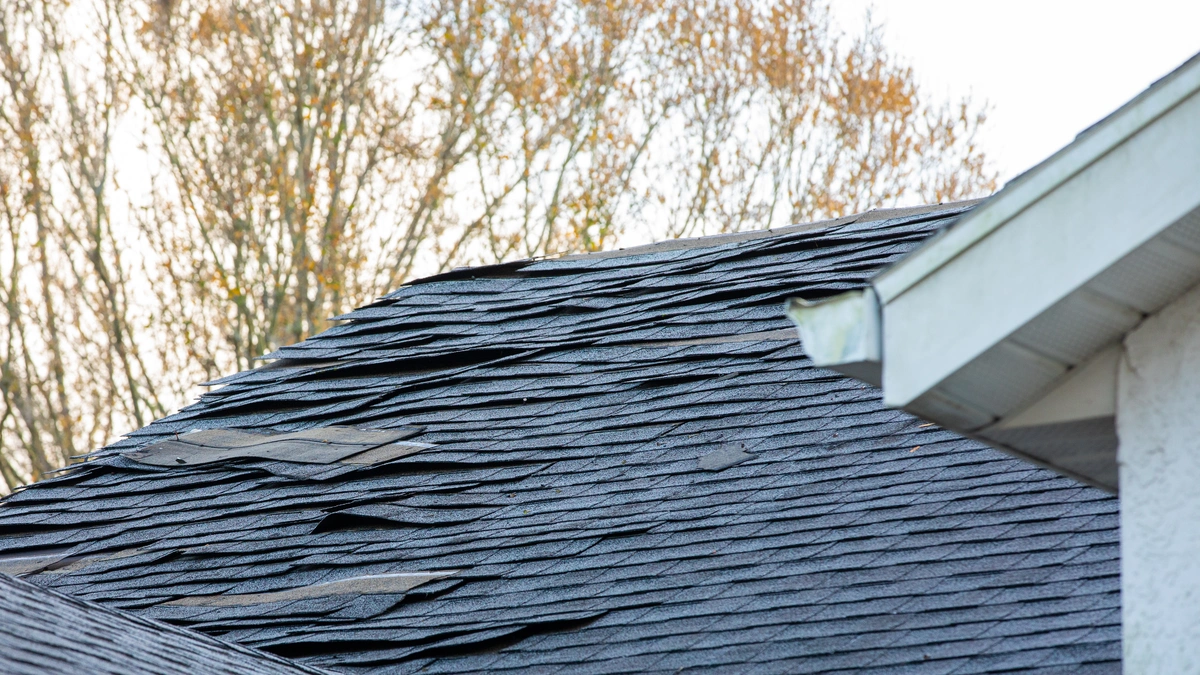
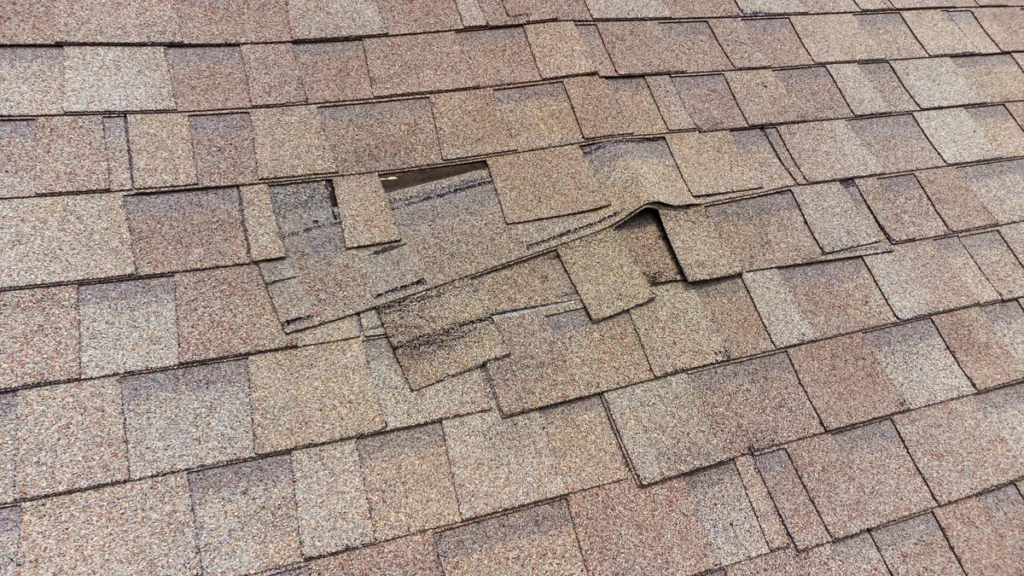
Recognizing When Your Roof’s Time Is Up
Most roofs have an average roof’s lifespan of 20 to 25 years, after which they typically need replacing. However, certain visible signs of damage can indicate that your roof may need to be replaced sooner. These include:
- Buckled, curled, or damaged shingles
- Rusted valleys
- Missing shingles or tabs
- An excessive amount of shingle granules in gutters
- Signs of water damage inside the home
Structural issues that may indicate the need for a roof replacement include:
- Moisture intrusion manifesting as moss, mold, or fungi on the roof surface
- Sagging boards
- Rotting boards
- A sagging roofline
Furthermore, an inspection of the attic revealing daylight through the roof boards is a clear sign of potential water entry points and a compromised roof structure in need of evaluation.
Understanding Durability and Maintenance
Understanding the lifecycle of a roof is crucial for proper maintenance and timely replacement. A roof’s lifespan is significantly influenced by:
- The type of roofing material
- Quality of installation
- Overall climate
- Regular maintenance performed
High-grade materials and compatibility of roofing system components are crucial for a quality roof installation that ensures durability and protection.
Moreover, the skill and professionalism of the roofing crew play a critical role in the longevity of the roof. Routine maintenance, including regular cleaning and damage checks, can prevent debris buildup, address damage signs promptly, and inhibit mold growth, all of which are essential to extend a roof’s lifespan.
The Impact of Regular Inspections on Roof Longevity
Regular roof inspections are key to maintaining your roof’s longevity. Annual inspections are recommended to ensure the energy efficiency of a home and to avoid premature replacement of metal roofs. The frequency of these inspections can vary depending on the material; composite, asphalt, and wooden shingle roofs typically require an inspection every three years, and tile roofs every five years.
During these inspections, you should check for damaged or streaked shingles, using binoculars if necessary, to spot potential problems without having to climb the roof. It’s also crucial to check areas like the attic for leaks, water stains, and structural damage as signs of internal roof water damage.
Observing the roof after severe weather events is an important practice, as missing shingles or granules can signal the urgent need for repair or replacement.
Making Repairs vs. Full Replacement
Deciding between making repairs or opting for a full roof replacement is a common dilemma for homeowners. Roof repair involves addressing a small, isolated portion of the roof or fixing other issues without removing the entire roof. On the other hand, a replacement entails removing the entire visible area of the roof to expose the deck, which may involve repairs to structural components before installing a new roof.Minor to moderate roof damages, such as leaks or missing shingles in a confined area, can often be resolved with repairs, while more significant damage affecting a larger portion of the roof might require you to replace the roof. While repair is generally less expensive and quicker to complete compared to a full roof replacement, it’s vital to consider the long-term implications, as replacement often becomes a more economically sound solution when taking into account the roof’s age and the severity of damage.

Choosing the Best Roofing Material for Your Home
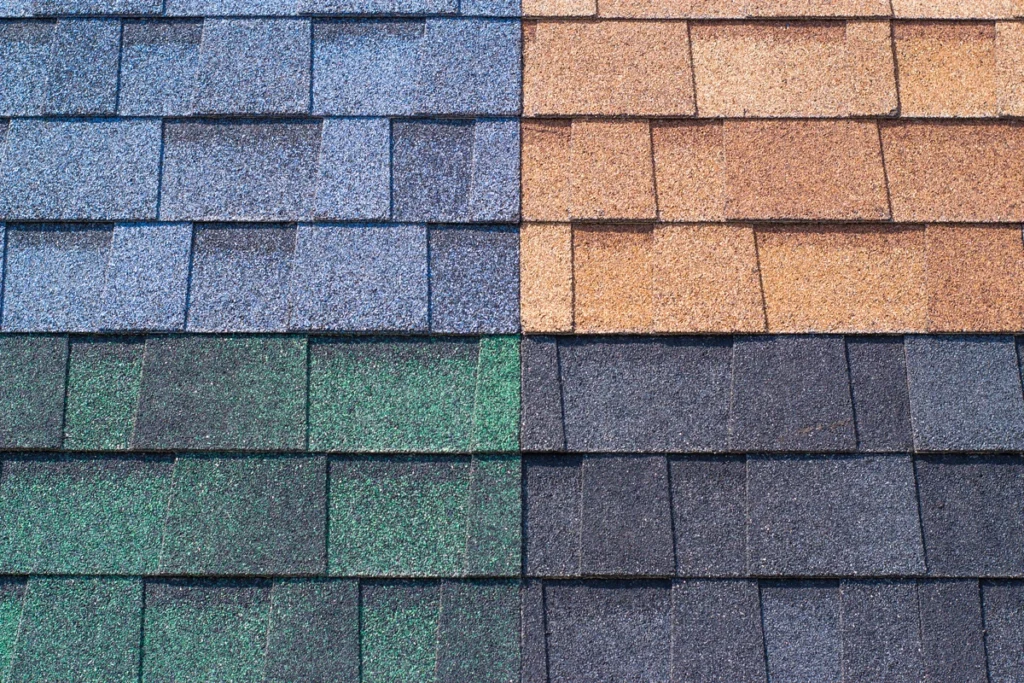
Choosing the best roofing material for your home is an important decision that affects both the lifespan of your roof and the overall costs of roof replacement. Costs vary greatly between different roofing materials, such as:
- Asphalt shingles
- Concrete
- Metal
This is an important consideration for budgeting. The longevity of roofing materials is influenced by their lifecycle stages, including:
- Extraction
- Manufacturing
- Installation
- Maintenance
- Disposal
Some materials, like metal and clay tiles, can often be recycled at the end of their life, reducing environmental waste and influencing repair or replacement decisions.
Finding a Trustworthy Contractor
Finding a trustworthy contractor involves several steps. Firstly, verify that they possess the necessary licenses, offer warranties on their materials and workmanship, and have a local physical office with an area code phone number indicative of local operations.
Investigate the contractor’s history by:
- Reading recent online reviews
- Checking their standing on the Better Business Bureau
- Requesting references from recent jobs to validate their reliability and quality of work.
Let Us Handle Your Roof Placement
Understanding when and how to replace your roof is vital in maintaining the value and safety of your home. From recognizing the signs of damage to understanding how weather conditions affect your roof’s lifespan, each factor plays a significant role in the longevity of your roof. By being proactive in your roof care, you can ensure that your roof remains durable and reliable.When it’s time to get a new roof, contact Secured Roofing. We’ll make sure that your roof provides the protection your home deserves.
How To Shingle A Roof In 3 Steps (Homeowners Guide)
Written by : Secured Roofing and Restorations
6 minutes read

Need a straightforward guide on how to shingle a roof? This clear, step-by-step tutorial will take you through the entire process, from selecting the proper tools and materials, to perfectly laying each shingle for a durable finish. Safety is vital, so you’ll also learn essential precautions to keep yourself protected on the job. By following these instructions, your roof will be ready to weather any storm.
Inside this blog:
- Essential Tools and Materials
- Shingle Installation Process
- Safety Tips and Precautions
Essential Tools and Materials
Having the proper tools is the first step to a successful job. Essential hand tools for applying shingles include a roofing nail gun, roofing hammer or hatchet, and chalk line tools for alignment. Cutting tools such as roofing blades or utility knives and reciprocating saws will help with trimming and shaping shingles.
Roofing nails, specifically 1-1/4-in. zinc-coated nails, play a vital role in securely fastening shingles to the roof, ensuring they hold in adverse weather conditions. Hammer tackers or staplers are employed for attaching felt underlayment, and a caulking gun aids in applying roofing cement for waterproofing and additional shingle security.
Preparing Your Roof
Roof preparation is a necessary step before beginning the shingle installation process. This involves removing old shingles, repairing damaged roof decking, and installing underlayment and drip edge. These steps ensure your new roof will have a solid, well-prepared base to rest upon, ensuring longevity and durability.
When it comes to precision in measurements, our company ensures that every product we manufacture is accurate up to about a half inch. This level of accuracy guarantees that our customers receive high-quality products that meet their specific requirements.
Removing Old Shingles
The first step in preparing your roof involves removing the old shingles. Start by prying off the ridge cap shingles using a pry bar. Once that’s done, use a roofing shovel to remove the remaining old shingles. This tool is specifically designed for this task, making the process much more manageable.
While you’re at it, ensure all stray felt fasteners and nails are cleared from the roof surface. This step is vital as it ensures a smooth surface for the new shingles, preventing any potential damage or puncturing. Just like a painter needs a clean canvas, a roofer needs a clean roof deck.
Shingle Installation Process In 3 Steps
With the preparation of the roof deck complete, we can proceed to the central process, which is installing roof shingles. This includes laying starter shingles, installing shingles in rows, and shingling around roof structures. Each step requires precision and patience, so let’s get started.
1. Laying Starter Shingles
Starting at the bottom edge of the roof, we begin with the installation of the starter shingles. These shingles are the first layer, providing a solid base for subsequent layers and ensuring proper sealing along the eaves of a roof. They prevent water from leaking through the seams of the shingles placed over them, crucial in protection against water infiltration.
Moreover, correctly laid starter shingles along the eaves prevent wind uplift, safeguarding the roof against wind damage. So, ensuring they’re correctly installed at the bottom edge of the roof is vital for preventing water leakage and wind damage.
2. Installing Shingles in Rows
Once the starter shingles are laid, the next step is to install the shingles in rows. Here’s how:
- Use a chalk line to mark straight lines across the roof deck, ensuring straight shingle rows.
- To prevent leaks, stagger the seams between the shingles by cutting the first shingle of every other row to a different length.
- The second row of shingles should be offset by 6 inches compared to the first row.
- The third row should align with the first row.
Each shingle should be secured with the proper number and pattern of nails as outlined by the shingle manufacturer, typically four to six nails per shingle. Once the top edge is nailed down, the adhesive strip on the shingle helps in sealing that shingle to the one beneath it. This process should be repeated until all rows are completed.
3. Shingling Around Roof Structures
In most cases, your roof will have structures like vents and skylights, and shingling around these structures requires special attention. Here’s how to install roof shingles around them:
- Start by running a self-stick underlayment, covering the front and side wall, and overlapping sidewall underlayment.
- Install roof shingles up to the front wall, cut dormer flashing, and nail it to the wall and shingles.
- For corners, make a cut in the first step flashing, run a bead of sealant, bend the step flashing onto the dormer flashing, and nail it to the wall.
- Install shingles over the flashing and continue this process with each row of roof shingles.
During the installation of skylights or vents, apply roof sealant along the underside of the flashing to secure it and prevent water infiltration. This step is crucial as it ensures a watertight seal around these structures, preventing potential water damage.
Safety Tips and Precautions
Throughout the shingle installation process, safety should always be at the forefront. This includes:
- Wearing a hard hat
- Wearing roofing shoes with soft soles and steel toes
- Wearing proper gloves and eye protection
- Using safety harnesses attached to roof anchors
- Ensuring ladders extend at least three feet above the point of support for safe access to the roof.
When working near power lines, follow these safety guidelines to avoid falling debris:
- Use a wooden or fiberglass ladder
- Maintain three points of contact while climbing
- Face the ladder while climbing
- Ensure that the ladder is stable and level
- Do not use the top rung as a step
By following these guidelines, you can ensure your safety when working near power lines, especially when they run in a straight line vertically.
Maintaining a clean and organized worksite is key for safety and to ensure that children and pets cannot access the workspace. Safety is not just a precaution, it is a necessity!
We’re a Reliable Roofing Provider
The complexities of shingle installation can seem daunting, but with the right knowledge and care, it is a task that can be accomplished with precision and confidence. Remember, your roof is your home’s first defense against the elements. Ensuring it’s properly shingled not only adds to its aesthetic appeal, but significantly increases its lifespan.Does your roof need repair? If so, we’re here to help. Contact Secured Roofing to get extensive roofing services!
Roof Vent Installation: How To Install A Roof Vent (2024)
Written by : Secured Roofing and Restorations
5 minutes read
Wondering how to install a roof vent and why it matters for your home? Roof vent installation improves air flow, controls attic temperature, and protects against moisture damage. This guide breaks down the installation process step by step, providing the know-how you need to get the job done right, with practical tips and safety advice.
Inside this blog:
- Understanding roof ventilation
- Selecting the right vent for your roof
- Preparing for a successful installation
- Step-by-step roof vent installation
Understanding Roof Ventilation and Its Importance

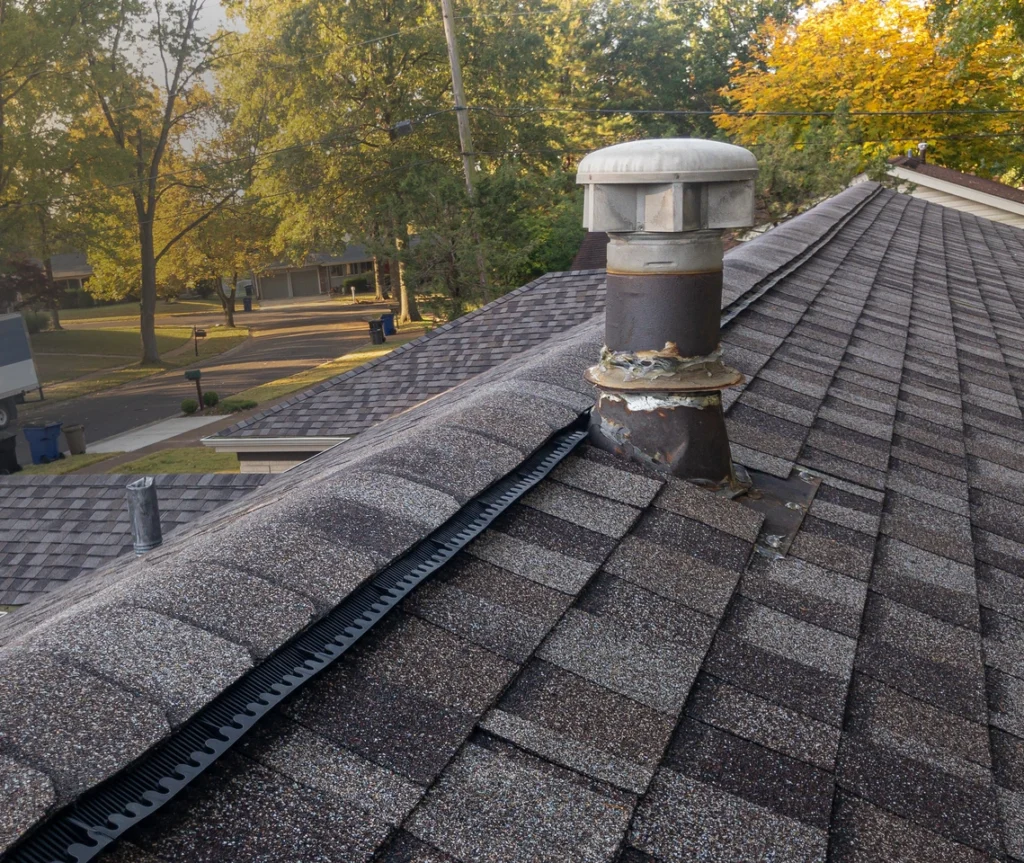
When you think of a well-functioning home, ventilation might not be the first thing that comes to mind. Yet, it’s the silent hero working round the clock to ensure your home’s health. A roof vent serves as a critical component in this process, facilitating air circulation, regulating attic temperature, and thwarting moisture accumulation. The symphony of a well-ventilated roof can prevent a cacophony of damage, from rot to structural maladies, ensuring your abode remains in tip-top shape through scorching summers.
Overlooking the need for a roof vent is like setting a welcome mat for trouble at your doorstep. Poor ventilation is the unseen culprit behind mold, wood rot, and an array of structural damages due to unmanaged heat and moisture. If you’re seeking to prolong the life of your roofing materials and avoid shingle damage from excessive heat, proper ventilation is non-negotiable.
3 Types of Roof Vents Explained
Roof vents come in a variety of types, each with a distinct role in your home’s architectural framework. Here are the different types of roof vents:
1) Box Vents:
These are the sentinels at the peak of your roof, allowing hot air and moisture to bid farewell from the highest gathering point.
2) Soffit Vents:
These are the unsung heroes installed under the eaves, ensuring a steady influx of cool air while shielding against weather and debris.
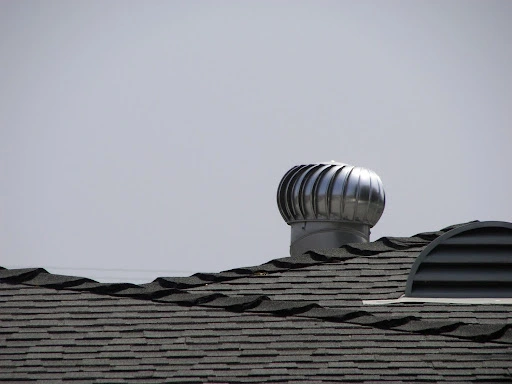
3) Ridge Vents:
These span the roof’s apex and provide an exit route for warm air, harmoniously paired with soffit vents for optimal performance. Roof ridge vents are a popular choice for their efficiency in releasing hot air from the attic.
The Consequences of Poor Ventilation
Neglecting proper ventilation is a gamble that can cost you dearly. The absence of effective air circulation sets the stage for:
- Structural damage
- Mold, an invisible threat that thrives on condensation
- Roofing materials suffering
- Energy bills rise as your HVAC system works overtime to compensate for the imbalance.
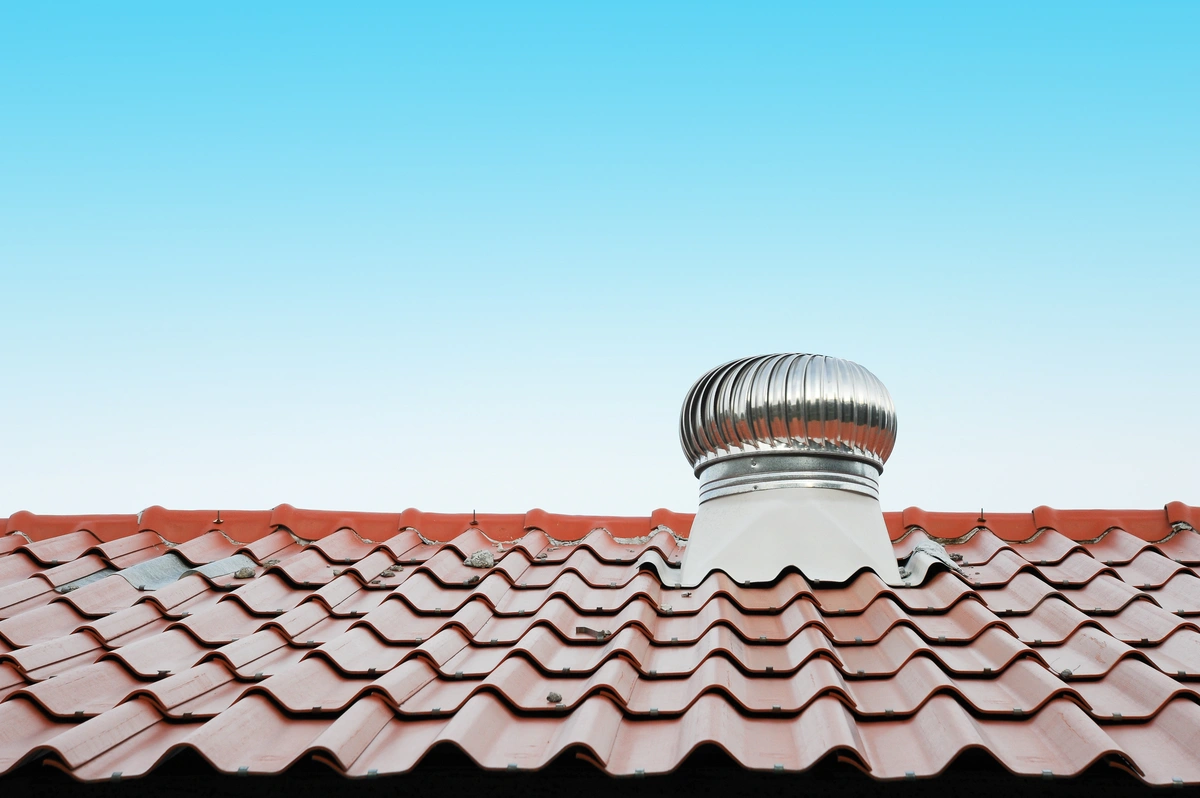
Selecting the Right Vent for Your Roof
Selecting the appropriate vent isn’t a uniform decision. Your local weather patterns and the design of your roof are the twin factors guiding your choice. For those residing in breezy locales, wind turbines can be the ideal pick, using the wind to ventilate your attic space effectively. Alternatively, power vents may be the solution for hotter climates or homes in dire need of robust ventilation, proactively expelling hot air from the attic.
Aligning with your home’s design and climatic demands ensures that your chosen vent type will work efficiently, keeping your attic well-aerated.
Preparing for a Successful Roof Vent Installation
As you prepare for installation, planning sets the foundation. Here are the steps to follow:
- Gather all necessary materials and tools.
- Assess the roof’s condition and plan for a navigable worksite.
- Ensure that you’re well-acquainted with the power tools and construction principles that will come into play.
Safety cannot be an afterthought. By following these steps, you can ensure a seamless vent installation.
Step-by-Step Roof Vent Installation
With preparations complete, the stage is set for the main act: it’s time to install a roof vent. Here are the steps to follow:
- Begin by marking the vent location from the serenity of your attic.
- Cut the opening with precision atop your roof.
- Pry up shingles and position the roof vent.
- Secure the vent with nails, ensuring alignment with the roof’s contour.
The process requires a steady hand and a watchful eye to ensure proper installation.
Marking and Cutting the Vent Opening
Marking the vent location initiates the blueprint of your installation. A grease pencil and ruler serve as your drafting tools, translating measurements onto the roof deck with clarity. A simple screw pushed through from the attic marks your spot on the rooftop, guiding the precise placement of your vent.
To remove shingles and create a vent hole opening, follow these steps:
- Remove shingles around the area to prevent damage and clear the stage for cutting.
- Drill a pilot hole at the center of your marked territory.
- Use a circular saw to carve out the vent hole opening with surgical precision.
Securing the Vent in Place
With the opening cut, the vent flange is poised to take its place under the lifted shingles and over the newly created hole. Roofing nails are the anchors that secure the vent to your home, applied with care around the vent’s perimeter. Alignment with the surrounding shingles is not just about aesthetics; it’s crucial for the watertight seal that protects your home from the elements.
Sealing and Weatherproofing
Once the vent is positioned, applying sealant serves as the final barrier against weather penetration. Roof and flashing sealant are your allies, applied generously around the vent’s perimeter to prevent leaks.
Caulking old nail holes is a meticulous step, but one that fortifies your roof against moisture intrusion during the installation, and using roofing cement can enhance this process.
Let Us Take Care of Your Roof
The installation of a roof vent is an investment in the health and longevity of your home. Your roof vent serves as a silent guardian, ensuring that your living space remains comfortable, safe, and energy-efficient for years.
When your roof needs a makeover, our team at Secured Roofing can handle the project. We specialize in roof rejuvenation, storm damage repair, and more. Be sure to contact us for your roofing needs!
4 Common Types Of Roof Damage All Homeowners Should Know
Written by : Secured Roofing and Restorations
5 minutes read
As a homeowner, protecting your roof is paramount to safeguarding your investment and ensuring the safety and comfort of your family. However, roof damage is an inevitable part of homeownership, and knowing how to identify common types of roof damage can help you address issues promptly. In this guide, we’ll explore four common types of roof damage that all homeowners should be aware of, along with tips on how to spot and address them.
Inside this blog:
- The 4 most common types of roof damage that every homeowner should know
- A description of what each type of roof damage entails
- An explanation of the typical causes of each type of roof damage, so homeowners can take steps to prevent the damage in the future
- Clear solutions for how to effectively address the roof damage issue and tips for how to navigate the remedial process smoothly
Keep reading to learn all you can about the 4 common types of roof damage, their typical causes, and how to address them head on!
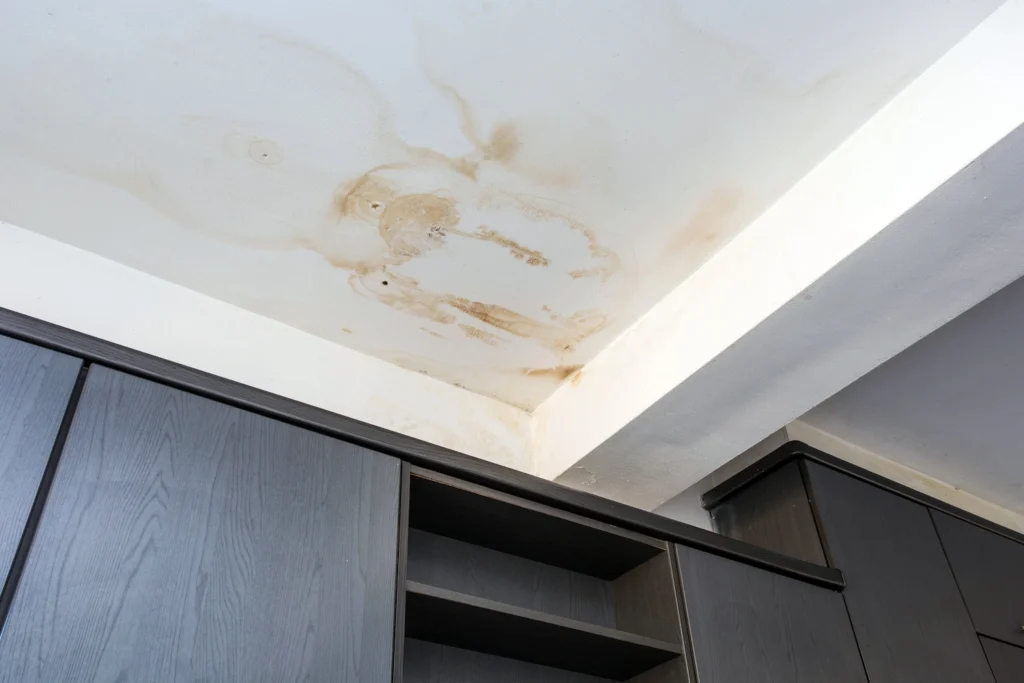
1. Leaks and Water Damage
For leaks and water damage, look out for water stains on ceilings or walls, damp or musty odors indoors, peeling paint or wallpaper, and visible signs of water infiltration in the attic.
Causes
Leaks in the roof can be caused by various factors, including damaged or missing shingles, cracked flashing around chimneys or vents, clogged gutters, or deteriorated sealant around roof penetrations like vents or skylights. These issues can allow water to seep into your home, leading to water damage and potential structural problems.
Addressing the Issue
When dealing with leaks, it’s essential to act promptly. Start by inspecting your roof for any damaged areas or signs of wear and tear. Repair any compromised shingles, flashing, or seals to prevent further water infiltration. Regularly clearing your gutters of debris can also help prevent water buildup and potential leaks. Additionally, consider installing a waterproof membrane beneath your shingles for added protection against moisture intrusion.
If you’re unsure about how to address the issue, don’t hesitate to seek assistance from a professional roofer to ensure that the repairs are done correctly and effectively.

2. Missing or Damaged Shingles
For missing or damaged shingles, look for visible gaps or areas where your asphalt shingles are missing, curling or buckling shingles, granule loss in gutters or downspouts, and bald spots on the roof.
Causes
Missing or damaged shingles are often caused by factors such as age, weathering, or improper installation during the roof’s construction. Additionally, severe weather conditions like hailstorms or falling debris can also lead to shingle damage over time.
Addressing the Issue
To tackle this problem, it’s crucial to replace missing or damaged shingles promptly to prevent water infiltration and further deterioration of the roof structure. You can start by inspecting your roof regularly for any signs of missing or damaged shingles.
If you notice any issues, consider hiring a professional roofing company to assess the extent of the damage and ensure the proper installation of replacement shingles. They can also advise on the best type of shingles to use based on your roof’s needs and your budget and help you navigate the insurance claim process.
3. Pest Infestation
For pest infestation, check for evidence of nesting or droppings in the attic, chewed or damaged roof materials, and visible entry points around the roofline.
Causes
Pests such as rodents, birds, or insects may seek shelter in your attic or roof spaces because they provide warmth and protection. However, their presence can lead to damage to insulation, wiring, and structural components over time.
Addressing the Issue
To tackle this problem, start by sealing any entry points or gaps around the roofline to prevent pests from accessing your home. Consider installing pest deterrents such as wire mesh or spikes along the edges of your roof to deter birds and rodents from landing or nesting.
Additionally, make it a habit to regularly inspect your attic for signs of infestation, such as droppings or nests, and address any issues promptly to prevent further damage.
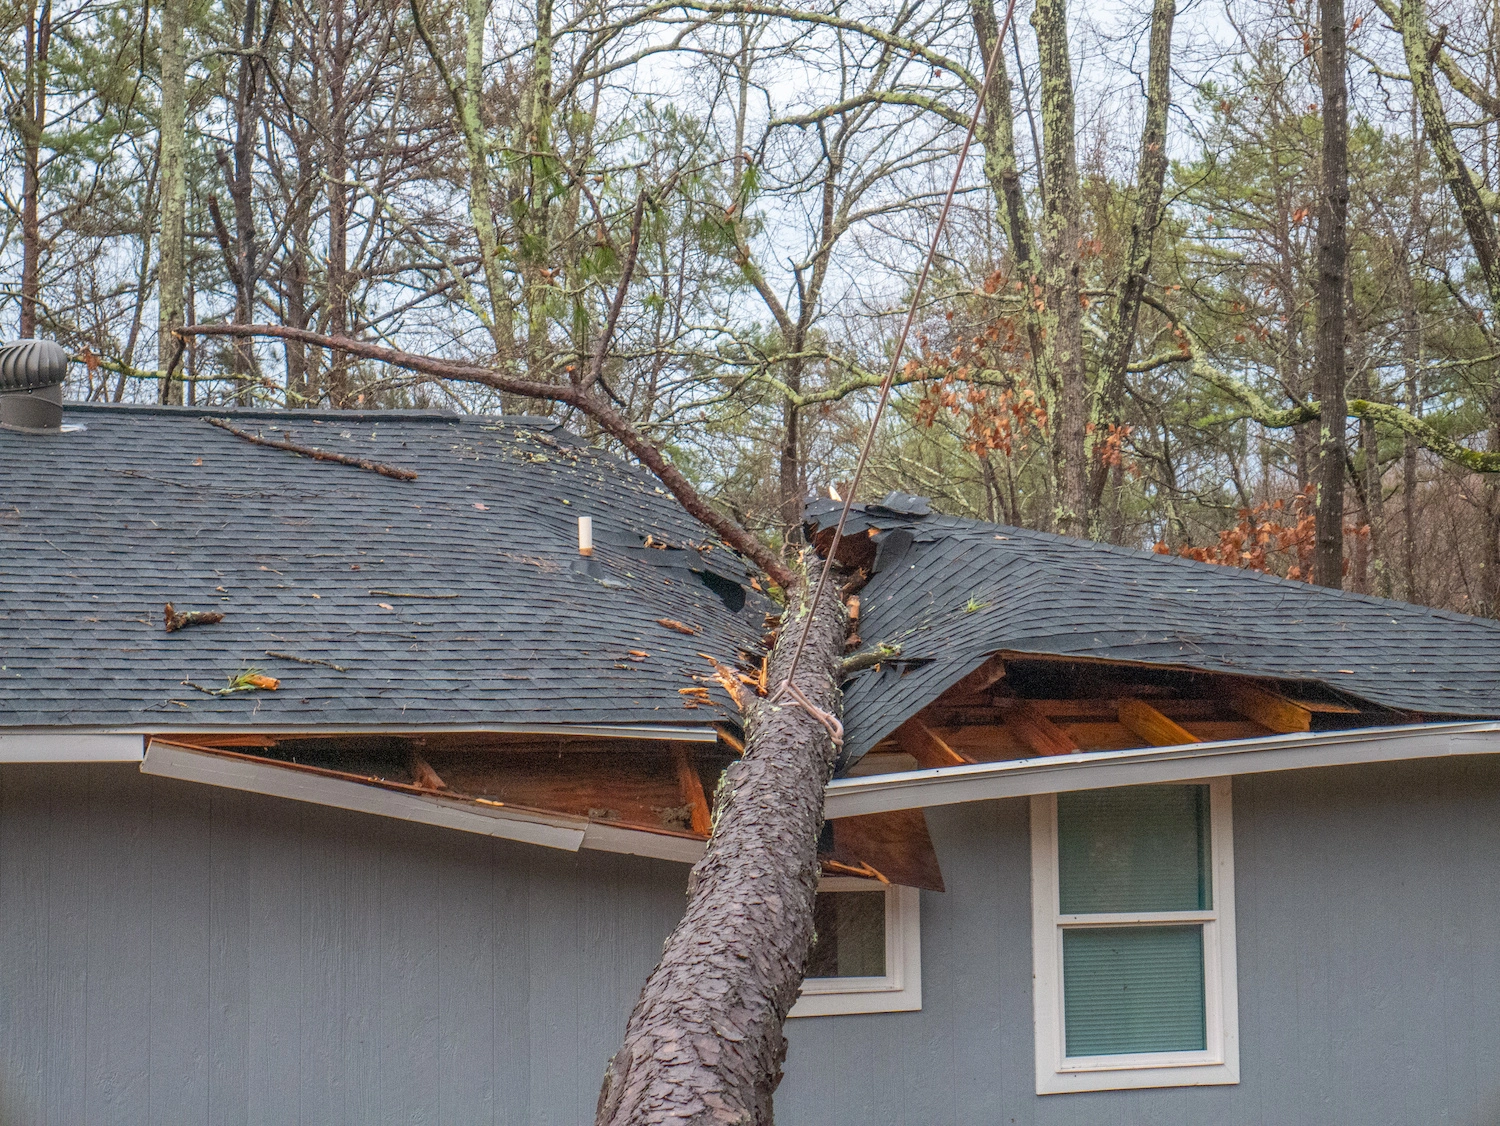
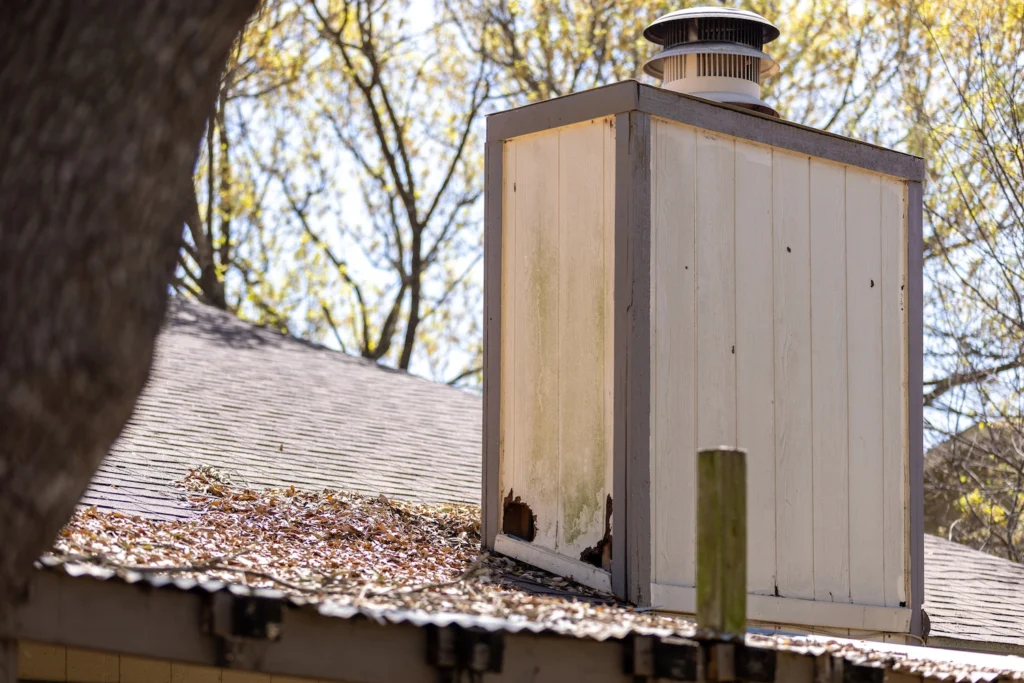
4. Tree Damage and Debris
For tree damage and debris, check if there’s visible damage to the roof caused by fallen branches or debris, scratches or indentations on shingles, and clogged gutters or downspouts.
Causes
Overhanging tree branches or nearby trees can pose a risk of damage to your roof during storms or high winds because they can break off and hit your roof. Falling branches, leaves, or debris can cause impact damage by hitting your roof or clog gutters, which leads to water buildup and potential leaks.
Addressing the Issue
To tackle this problem, you should trim overhanging tree branches to minimize the risk of damage to your roof during storms. Regularly clean gutters and downspouts to prevent clogs and ensure proper water drainage off your roof.
After severe weather events like storms, make sure to inspect your roof for any signs of damage, and if you find any, address them promptly before they worsen.
Protect Your Home With a Solid Roof
By familiarizing yourself with these common types of roof damage, you can take proactive steps to protect your home and address issues before they escalate into costly repairs. Remember to schedule regular roof inspections and maintenance to ensure the longevity and integrity of your roof. When in doubt, consult with a professional roofing contractor for expert advice and assistance in addressing roof damage effectively.
Contact our team of expert contractors at Secured Roofing & Solar today. We’ll answer all of your questions and customize an approach to tackle your project quickly and efficiently. Every one of our roofing experts is trained to provide the highest professional workmanship, personalized service, and to use only the best quality materials.
How Long Does a Tile Roof Last in Florida?
Written by : Secured Roofing and Restorations
6 minutes read

If you’re lucky enough to have a tile roof gracing your home, you probably already know that it’s not only beautiful but also durable. However, the scorching heat and humidity of the Sunshine State can take a toll on even the toughest roofs. In this guide, we’ll explore the key factors that influence the lifespan of your tile roof in Florida’s intense climate. Let’s dive in and learn how to make your tile roof last for years to come!
Inside this blog:
- An overview of the 4 key factors affecting tile roof lifespan in Florida
- A deep dive into how material type impacts the longevity of a tile roof
- Critical maintenance tips for tile roof owners
Keep reading to learn how long your tile roof can last under the Florida sun with proper maintenance and care!
So, How Long Does a Tile Roof Last in Florida?
First things first, let’s talk about why tile roofs are so popular in Florida. With their classic Mediterranean charm and excellent durability, tile roofs are a common sight in the Sunshine State. But how long can you expect your tile roof to last in Florida’s hot and humid climate? Here are the factors to consider:
1. Tile Material
The type of tile material used can significantly impact the lifespan of your roof. Common tile materials include clay, concrete, and slate, each with its own advantages and considerations in Florida’s climate.
For example, clay tiles are known for their durability and resistance to mold and algae growth, making them a popular choice in humid environments like Florida.
2. Installation Quality
A properly installed tile roof can withstand the rigors of Florida’s weather far better than one that’s hastily or incorrectly installed. Quality installation is key to ensuring the longevity of your roof. Be sure to hire a reputable roofing contractor with experience in installing tile roofs to ensure the job is done right the first time.
3. Maintenance Habits
Regular maintenance plays a crucial role in extending the lifespan of your tile roof. From cleaning to repairs, staying on top of maintenance tasks can prevent issues from escalating and prolong your roof’s life. Consider scheduling professional roof inspections every few years to catch any potential problems early.
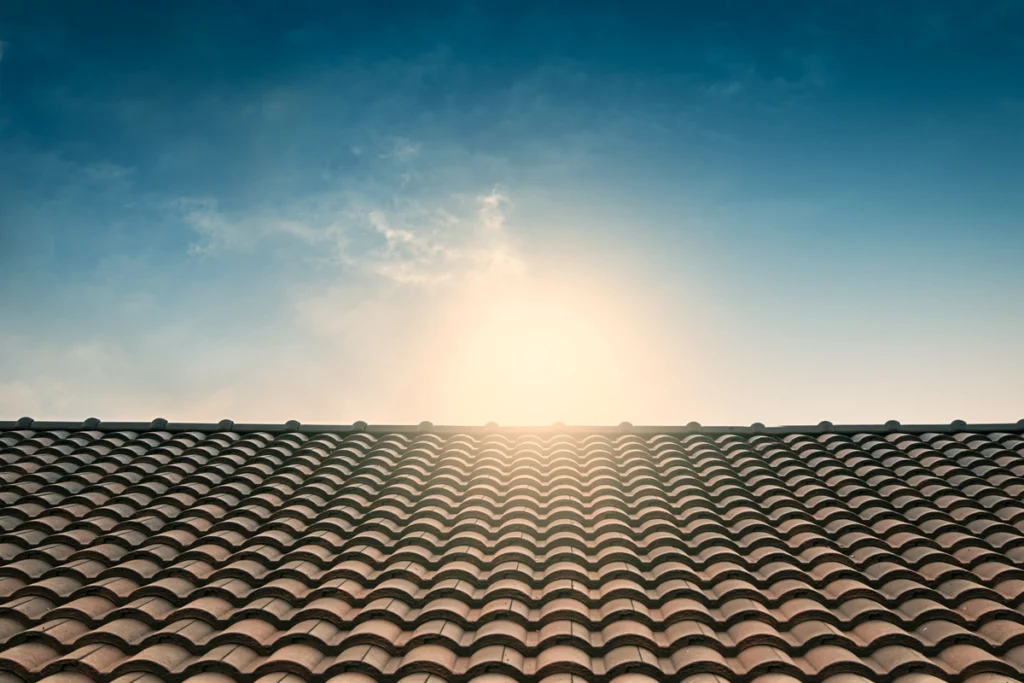
4. Exposure to Elements
Florida’s climate isn’t just about heat—it’s also about humidity, UV exposure, and the occasional hurricane. How your tile roof fares against these elements will depend on factors like its orientation, shading, and ventilation.
Proper ventilation is especially important in Florida’s humid climate to prevent moisture buildup in the attic, which can lead to mold growth and structural damage.
🌴 How Material Affects Tile Roof Longevity in Florida
Now, let’s take a closer look at the particular roofing material that can affect how long your tile roof lasts in Florida’s heat:
Tile Material
As mentioned earlier, the type of tile material used can have a significant impact on longevity. Here’s a breakdown of how different tile materials stack up:
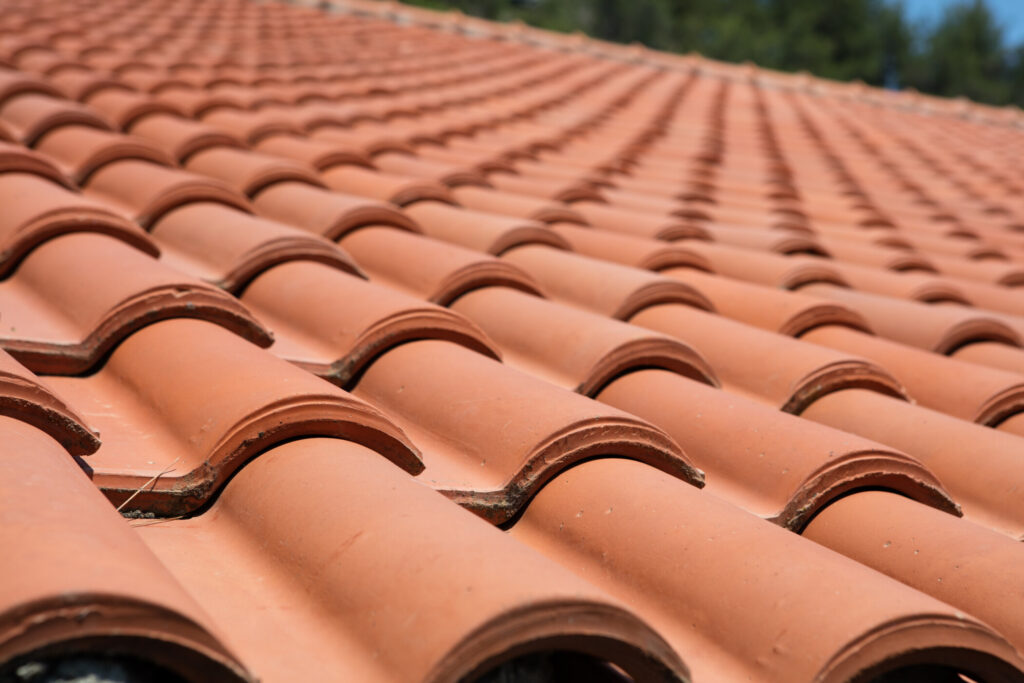
Clay Tiles
Traditional clay tile roofs are known for their durability and resistance to weathering. Clay roof tiles can last anywhere from 50 to 100 years or more with proper maintenance.
Concrete Tiles
Concrete tile roofs are a popular choice for their affordability and versatility. They typically have a lifespan of 30 to 50 years but may require more frequent maintenance in Florida’s climate.
Slate Tiles
Slate tiles are prized for their beauty and longevity, often lasting 100 years or more. While they can withstand Florida’s heat, they may be more susceptible to damage from hurricanes and other severe weather events.
🛠️ Installation Quality Matters
When it comes to tile roofing, proper installation is paramount. Here’s why installation quality matters:
Flashing and Underlayment
Flashing and underlayment are essential components of a tile roof, providing additional protection against water infiltration. Poorly installed flashing or underlayment can lead to leaks and premature roof failure.
Additionally, choosing high-quality flashing materials, such as corrosion-resistant metal, can enhance the durability and longevity of your roof.
Tile Alignment and Fastening
Each tile must be properly aligned and securely fastened to the roof deck to withstand high winds and prevent uplift during storms. A professional roofer will ensure that tiles are installed according to manufacturer specifications for optimal performance.
Proper fastening techniques, such as using corrosion-resistant screws or nails, can prevent tiles from becoming dislodged or damaged in severe weather conditions.
Maintenance Tips for Tile Roof Owners
To maximize the lifespan of your tile roof in Florida’s heat, here are some essential maintenance tips:
Regular Inspections
Schedule annual roof inspections to check for signs of damage or wear, such as cracked or broken tiles, loose flashing, or clogged gutters. Regular inspections also provide an opportunity to assess the condition of your roof’s mortar or adhesive, ensuring that tiles remain securely in place.
Cleaning
Keep your tile roof clean by removing debris, leaves, and moss regularly. This prevents moisture buildup and extends the life of your roof. Additionally, consider investing in professional roof cleaning services, especially if moss or algae growth is prevalent in your area, to maintain the aesthetic appeal and structural integrity of your roof.
Repair Promptly
If you notice any issues during your inspections, such as cracked tiles or damaged flashing, don’t wait to address them. Prompt repairs can prevent further damage and prolong the life of your roof.
Remember, even small issues can escalate into larger problems if left unattended, so it’s essential to address them as soon as possible to avoid costly repairs down the line.
Keep Your Tile Roof in Top Shape Under The Florida Sun
While Florida’s heat and humidity can pose challenges for tile roofs, proper installation, maintenance, and material selection can help ensure your roof stands the test of time. By understanding the factors that affect your tile roof’s longevity and taking proactive steps to care for it, you can enjoy years of beauty and protection for your home. Here’s to many more sunny days under your durable tile roof!
Contact our pro team of roofing contractors at Secured Roofing and Restorations today for expert workmanship and speedy turnaround times. We can’t wait to get the ball rolling on your next roofing project!
How to Repair a Roof After Suffering Storm Damage
Written by : Secured Roofing and Restorations
6 minutes read
It’s never a pleasant experience to deal with storm damage, especially when it affects the roof over your head. Whether it’s heavy winds, hail, or torrential rain, storms can wreak havoc on your roof, leaving behind leaks, missing shingles, and other damage. In this guide, we’ll walk you through the steps to repair your roof and restore your home’s protection and comfort after suffering storm damage. Let’s get started and weather the storm together!
Inside this blog:
- How to properly assess roof damage after a storm
- The importance of hiring a professional roofer to repair your roof
- Typical cost of roof repairs
Keep reading to become an empowered homeowner and learn how to get your roof back in tip top shape after a storm blows your way!
Assessing the Damage
The first step in repairing your roof after a storm is to assess the extent of the damage. Here’s what to look for:
Missing or Damaged Shingles
Check for any shingles that have been torn off or are visibly damaged. Look for signs of granule loss, cracks, or curling edges. Damaged shingles can compromise the integrity of your roof and lead to leaks if not addressed promptly.
Leaks or Water Stains
Inspect your attic or ceiling for signs of water infiltration, such as stains, dampness, or dripping water. These could indicate areas of damage on your roof. Pay close attention to the areas directly below roof penetrations, as these are common spots for leaks to occur.
Gutter Damage
Check your gutters and downspouts for dents, clogs, or displacement caused by falling debris or heavy rainfall. Damaged gutters can prevent water from properly draining away from your home, leading to water damage to your roof, siding, and foundation.
🚧 Immediate Roof Repairs
Once you’ve assessed the damage, it’s essential to address any immediate repairs to prevent further water intrusion and protect your home’s interior. Here are some steps you can take:
- Temporary Patching: Use roofing cement, tarps, or temporary patches to cover any exposed areas of your roof where shingles are missing or damaged. This will help prevent water from seeping into your home until permanent repairs can be made.
- Clear Debris: Remove any debris, such as branches or leaves, from your roof and gutters to prevent clogs and further damage during the next storm.
Hiring a Professional Roofing Contractor
While you may be tempted to tackle roof repairs on your own, it’s often best to leave it to the professionals, especially when dealing with storm damage. Here’s why:
Safety Concerns
Roofing work can be dangerous, especially after a storm when surfaces may be slippery and unstable. Professional roofers have the training and equipment to work safely at heights. Additionally, they are well-versed in safety protocols and can identify and mitigate potential hazards on your roof.
Expertise and Experience
Professional roofers have the knowledge and experience to accurately assess the extent of the damage and recommend the best course of action for repairs. Their expertise allows them to identify hidden issues that may not be apparent to the untrained eye, ensuring comprehensive repairs.
Quality Workmanship
Hiring a professional roofer ensures that repairs are done correctly the first time, reducing the risk of future leaks or damage. With their attention to detail and commitment to quality workmanship, professional roofers can provide long-lasting solutions that protect your home for years to come.
💰 Cost of Roof Repairs
The cost of repairing a roof after storm damage can vary depending on several factors, including the extent of the damage, the type of materials used, and the contractor’s pricing. Here are some average costs to consider:
- Minor Repairs: Minor repairs, such as replacing a few missing shingles or patching small leaks, can cost anywhere from $200 to $500.
- Moderate Damage: For more extensive damage, such as multiple missing shingles or significant leaks, repairs can range from $500 to $1,500.
- Severe Damage: In cases of severe damage, such as widespread shingle loss or structural damage, repairs may cost $1,500 or more.
📋 Insurance Coverage

If your home is insured, your homeowner’s insurance policy may cover the cost of repairing storm damage to your roof. Here’s what you need to know:
- Review Your Policy: Review your insurance company policy to understand what is covered and what your deductible is for roof repairs before you make an insurance claim for storm or wind damage.
- Document the Damage: Take photos of the damage to your roof and keep any receipts or invoices for temporary repairs you’ve made.
- File a Claim: Contact your insurance provider to file a claim for the storm damage to your roof. Be prepared to provide documentation and cooperate with the claims adjuster.
Preventing Future Damage
Once your roof has been repaired, it’s essential to take steps to prevent future damage and protect your home against the next storm. Here are some tips:
Regular Maintenance
Schedule annual roof inspections and maintenance to catch any issues early and keep your roof in good condition. Regular maintenance can help prolong the lifespan of your roof and prevent costly repairs down the line.
Trim Trees and Branches
Trim back overhanging branches to prevent them from scraping against your roof during high winds or heavy rains. This simple step can minimize the risk of damage to your roof and reduce the likelihood of branches falling and causing further damage during storms.
Install Storm Shutters
Consider installing storm shutters or impact-resistant windows to protect your home’s exterior from flying debris during storms. Storm shutters provide an extra layer of protection against high winds and projectiles, helping to safeguard your windows and prevent damage to your home’s interior.
Upgrade Roofing Materials
If your roof is nearing the end of its lifespan, consider upgrading to more durable roofing materials, such as impact-resistant shingles or metal roofing, to better withstand future storms. Investing in high-quality roofing materials can provide added peace of mind and protection for your home against severe weather events.
Weather the Storm Together With a Solid Roof
Dealing with storm damage roof repair can be stressful, but with the right knowledge and assistance, you can repair your roof and restore your home’s protection and comfort. By assessing the roof damage, addressing immediate repairs, and working with a professional roofer, you can ensure that your roof is back in top shape and ready to weather the next storm that comes your way.
Contact our pro team of roofing contractors at Secured Roofing and Restorations today for expert workmanship and speedy turnaround times. We can’t wait to get the ball rolling on your next roofing project!
Roof Flashing: What It Is & Why It’s Important
Written by : Secured Roofing and Restorations
5 minutes read

Ever heard of roof flashing? It might not be the most glamorous part of your home, but it plays a crucial role in keeping your roof watertight and your interior dry. In this guide, we’ll take a closer look at what roof flashing is, why it’s essential, and how you can ensure your flashing is doing its job effectively. Let’s dive in and shed some light on this vital component of your roof!
Inside this blog:
- A breakdown of roof flashing for homeowners
- 4 common types of roof flashing
- Signs you may have roof flashing problems
Keep reading to learn everything you need to know about roof flashing so you can be an empowered homeowner and understand how to keep your home safe!
Understanding Roof Flashing
So, what exactly is roof flashing? Essentially, roof flashing is a thin, waterproof material installed around roof penetrations, such as chimneys, vents, skylights, and dormers, as well as along roof intersections and edges. Its primary purpose is to prevent water from seeping into your home at vulnerable points where different roof planes meet or where the roof meets vertical surfaces. Here’s a closer look at why roof flashing is so important:
Waterproofing
The main function of roof flashing is to create a watertight seal around vulnerable areas of your roof, preventing water infiltration and potential damage to your home’s interior. Without proper flashing, water can find its way into your home through even the smallest gaps or openings in the roof, leading to costly repairs and structural damage over time.
Preventing Leaks
By directing water away from seams, joints, and intersections, roof flashing helps prevent leaks and water damage, keeping your home dry and protected. Leaks can not only damage your ceiling and walls but also compromise the insulation in your attic, leading to energy loss and increased utility bills.
Protecting Structural Integrity
Water intrusion can lead to rot, mold, and deterioration of the roof decking, rafters, and other structural components. Properly installed flashing helps maintain the structural integrity of your roof and prolong its lifespan. This helps preserve the overall stability and safety of your home, reducing the risk of costly repairs or even structural failure in the future.
4 Types of Roof Flashing
Roof flashing comes in various materials and forms, each suited to different applications and preferences. Here are some common types of roof flashing you may encounter:
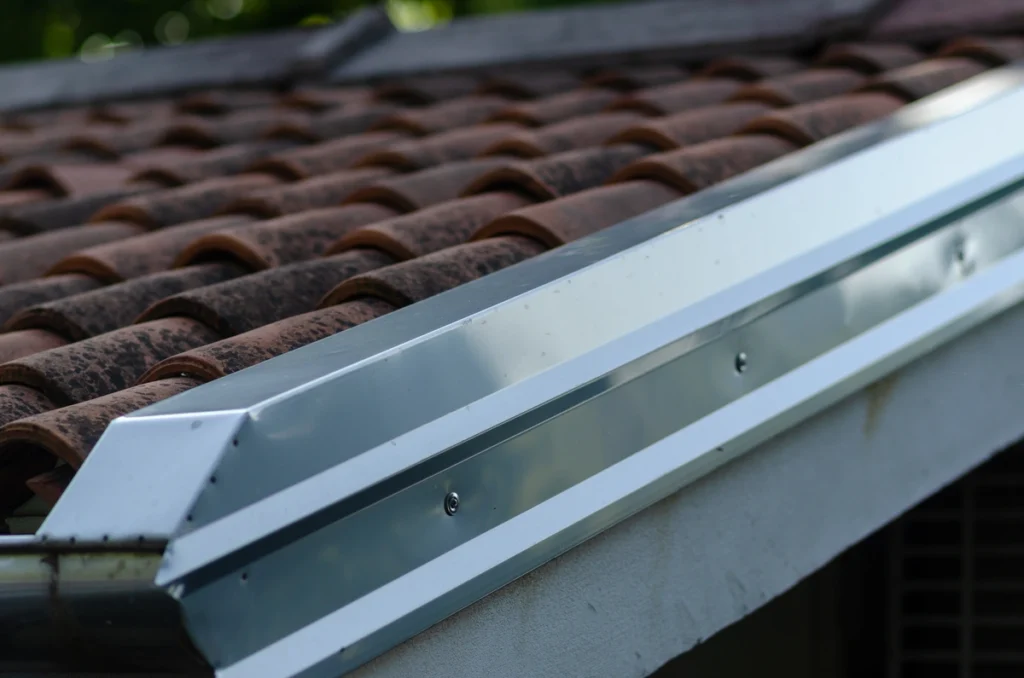
1. Metal Flashing

Made of materials such as aluminum, copper, or galvanized steel, metal flashing is durable and long-lasting. It’s commonly used around chimneys, skylights, and valleys where water runoff is heavy.
2. Rubber or EPDM Flashing
Flexible and weather-resistant, rubber or EPDM (ethylene propylene diene monomer) flashing is ideal for curved or irregular surfaces. It’s often used in conjunction with metal flashing for added protection.
3. Bitumen or Asphalt Flashing
Bitumen or asphalt flashing is made of tar-like substances and is commonly used in built-up roofing systems or as a base flashing material.
4. Lead Flashing
Lead flashing is highly durable and malleable, making it suitable for custom flashing applications or intricate roof designs. It’s often used around chimneys and dormers.
🌧️ Why Roof Flashing Matters
Roof flashing may not be the most visible part of your roof, but it plays a vital role in protecting your home from water damage and maintaining its structural integrity. Here are some key reasons why roof flashing matters:
- Preventing Water Damage: Without proper flashing, water can seep into your home through gaps and openings in the roof, leading to leaks, mold growth, and structural damage.
- Preserving Indoor Comfort: A leaky roof can result in dampness, mold, and musty odors inside your home, compromising indoor air quality and comfort. Effective roof flashing helps keep your interior dry and comfortable year-round.
- Avoiding Costly Repairs: Water damage from roof leaks can be expensive to repair, requiring extensive remediation and possibly even replacing damaged structural components. Properly installed and maintained flashing can help you avoid these costly repairs or having to get a new roof down the road.
🚩 Signs of Flashing Problems
Like any part of your roof, flashing can deteriorate over time due to exposure to the elements and wear and tear. Here are some signs that your roof flashing may be in need of repair or replacement:
- Visible Damage: Look for signs of rust, corrosion, or damage to the flashing material itself, as well as any gaps or separation between the flashing and the roof surface.
- Water Stains: Water stains on ceilings or walls near roof penetrations, such as chimneys or vents, may indicate a problem with the flashing in those areas.
- Missing or Loose Flashing: If you notice any areas where the flashing is missing, loose, or improperly installed, it’s essential to address these issues promptly to prevent water infiltration.
Maintaining Your Roof Flashing
To ensure your roof flashing materials remain effective and in good condition, it’s essential to perform regular maintenance and inspections. Here are some tips for maintaining your roof flashing:
- Inspect Annually: Schedule annual roof inspections to check for signs of damage or deterioration in the flashing and other roofing components.
- Clear Debris: Keep roof surfaces and flashing clear of debris, such as leaves, branches, and dirt, to prevent water buildup and potential damage.
- Address Issues Promptly: If you notice any signs of flashing problems, such as rust, corrosion, or gaps, address them promptly to prevent water infiltration and potential damage to your home.
🛠️ Keep Your Roof Watertight
Roof flashing may not be the most glamorous part of your home, but it plays a crucial role in protecting it from water damage and maintaining its structural integrity. By understanding the importance of roof flashing, recognizing signs of potential problems, and performing regular maintenance, you can ensure your roof remains watertight and your home stays dry and protected for years to come.
Contact our pro team of roofing contractors at Secured Roofing and Restorations today for expert workmanship and speedy turnaround times. We can’t wait to get the ball rolling on your next roofing project!
Roof Restoration Explained: Benefits, Costs, & More
Written by : Secured Roofing and Restorations
5 minutes read

Is your roof starting to show signs of wear and tear? Are you tired of dealing with leaks, missing shingles, or unsightly stains? It might be time to consider roof restoration! In this guide, we’ll dive into everything you need to know about roof restoration, including its benefits, costs, and how it can breathe new life into your home. Let’s get started!
Inside this blog:
- What’s involved in a typical roof restoration process
- 4 benefits of roof restoration
- Factors that affect the typical roof restoration cost
Keep reading to learn more about roof restoration so you can be prepared for when you decide to give your roof a well-deserved makeover!
🛠️ Understanding Roof Restoration
Roof restoration involves the process of repairing, cleaning, and recoating your roof to restore its functionality and appearance. It’s a cost-effective alternative to a full roof replacement and can extend the lifespan of your roof by several years. Here’s a closer look at what’s involved:
Repairing Damaged Areas
Roof restoration begins with a thorough inspection to identify any areas of damage, such as cracked or missing shingles, damaged flashing, or leaks. These issues are then repaired to ensure the roof is structurally sound and watertight.
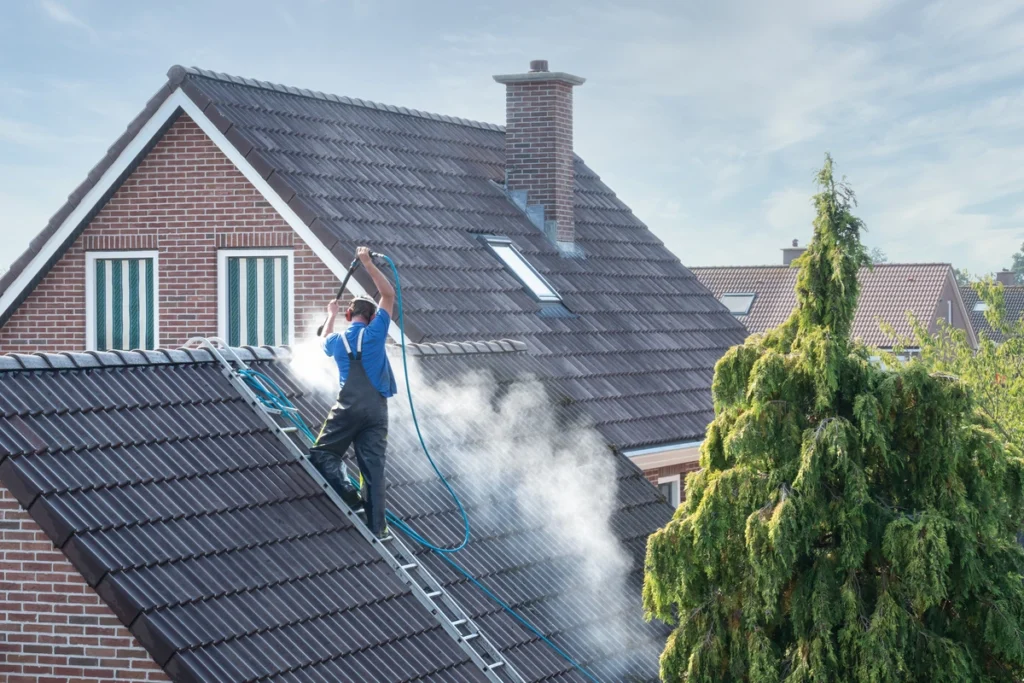
Cleaning and Preparing the Surface
Once repairs are complete, the roof is cleaned to remove dirt, debris, moss, and other contaminants that can compromise the effectiveness of the restoration process. This may involve pressure washing or chemical cleaning to ensure a clean surface for the restoration coatings.
Applying Roof Coatings
The final step in the restoration process is the application of roof coatings. These coatings provide an additional layer of protection against UV rays, water damage, and thermal expansion, helping to extend the life of the roof and improve energy efficiency.
4 Benefits of Roof Restoration
Roof restoration offers a range of benefits for homeowners looking to improve the condition and performance of their roofing system. Here are some of the key advantages:
1. Extended Lifespan
By addressing minor issues and adding protective coatings, adhering to a roof restoration system can extend the lifespan of your roof by up to 15 years or more. This not only saves you money in the long run but also provides peace of mind knowing your roof is well-protected for years to come.
2. Cost-Effective
Compared to a full roof replacement, roof restoration is much more cost-effective, saving homeowners thousands of dollars in labor and materials. With restoration, you get the benefits of a rejuvenated roof without the hefty price tag of a complete overhaul with a new roof. It’s still your existing roof– just with a makeover!
3. Improved Energy Efficiency
Reflective roof coatings can help reduce the heat absorbed by your roof, lowering indoor temperatures and reducing the workload on your HVAC system, leading to potential energy savings. This eco-friendly feature not only benefits your wallet but also reduces your carbon footprint.
4. Enhanced Curb Appeal
A freshly restored roof can significantly improve the appearance of your home, boosting curb appeal and potentially increasing its resale value. Whether you’re planning to sell or simply want to take pride in your home’s exterior, a restored roof can make a noticeable difference in its overall aesthetics.
💰 Cost of Roof Restoration
The cost of roof restoration can vary depending on several factors, including the size and slope of your roof, the extent of damage, and the materials used. On average, homeowners can expect to pay between $1,000 and $10,000 for roof restoration, with an average cost of around $4,000 to $6,000 for a typical residential roof.
Factors That Affect Roof Restoration Cost
Below are common factors that can impact the cost of a roof restoration.
- Roof Size: Larger roofs will naturally require more materials and labor, resulting in higher restoration costs.
- Extent of Damage: The more extensive the damage to your roof, the more repairs and preparation work will be required, adding to the overall cost.
- Choice of Materials: High-quality roof coatings and materials may come with a higher price tag but offer better durability and longevity.
- Roof Accessibility: Roofs that are difficult to access or have steep slopes may require specialized equipment and safety measures, increasing labor costs.
🤔 Is Roof Restoration Right for You?
Roof restoration isn’t suitable for every situation, so it’s essential to consider your specific needs and circumstances before making a decision. Here are a few factors to keep in mind:
Age of the Roof
If your roof is nearing the end of its lifespan or has extensive damage, a full replacement may be a better long-term solution. However, if your roof is relatively new and in relatively good condition, restoration can provide an economical way to prolong its life and maintain its performance.
Extent of Damage
Minor issues, such as surface wear or small leaks, are typically good candidates for restoration. However, significant structural damage may require more extensive repairs or replacement. It’s crucial to have a professional inspection to assess the extent of the damage accurately and determine the best course of action.
Budget Constraints
If you’re working within a limited budget or looking to save money on roofing costs, restoration may be a more affordable option compared to a full replacement. By addressing only the necessary repairs and applying protective coatings, you can improve the condition of your roof without breaking the bank.
🏡 Invest in Your Roof’s Future
Roof restoration is a cost-effective way to breathe new life into your home’s roof, improving its appearance, performance, and longevity. With benefits ranging from extended lifespan to enhanced energy efficiency, it’s a smart investment for homeowners looking to protect their most significant asset. So, if your roof is showing signs of wear and tear, consider giving it the TLC it deserves with a professional restoration treatment. Your home will thank you for it!
Contact our pro team of roofing contractors at Secured Roofing and Restorations today for expert workmanship and speedy turnaround times. We can’t wait to get the ball rolling on your next roofing project!
How to Repair a Roof Leak In 5 Simple Steps
Written by : Secured Roofing and Restorations
5 minutes read

Few things can send a chill down your spine like discovering a leaky roof. But don’t worry, with a little know-how and some elbow grease, you can tackle that pesky leak head-on. In this guide, we’ll walk you through five simple steps for roof leak repair and get your home back to dry and cozy in no time. Let’s dive in!
Inside this blog:
- 5 easy steps to repair your leaky roof
- Tips under each step
- 4 bonus tips for leak prevention
Keep reading to learn more about how to repair your leaky roof so you can live dry and comfortably in your home!
Step 1: Identify the Source of the Leak

The first step in fixing a roof leak is to pinpoint where it’s coming from. This may require some detective work, so grab a flashlight and head up to your attic to look for signs of water infiltration. Here’s what to look for:
- Water stains on the ceiling or walls
- Damp or discolored insulation
- Mold or mildew growth
- Traces of water dripping or pooling
Once you’ve located the source of the leak, mark the area with a pencil or masking tape so you can easily find it from the outside. Take note of any structural features or landmarks that can help you locate the spot precisely, ensuring that your repair efforts are focused and effective.
Step 2: Clear Debris from the Roof
Before you can make any repairs, you’ll need to clear away any debris, such as leaves, branches, or dirt, that may be blocking the path of water flow on your roof. Use a broom or leaf blower to sweep the roof clean, being careful not to damage the shingles or other roofing materials.
Additionally, consider checking your gutters for any clogs or buildup, as these can exacerbate water flow issues and contribute to leaks. Regular gutter maintenance can help prevent future roof problems and prolong the life of your roof.
Step 3: Apply Roof Patching Material
Now it’s time to patch up that leak! Depending on the size and severity of the leak, you may need to use different materials. Here’s a general guide:
- For small cracks or holes in asphalt shingles, you can use roofing cement or asphalt roof patching compound.
- For larger areas or more significant damage, consider using a roof sealant or silicone caulk.
- For metal roofs, you may need to use metal roof repair tape or patches specifically designed for metal roofing materials. Remember to follow the manufacturer’s instructions carefully when applying these materials to ensure a proper and long-lasting repair. (Additionally, consider reinforcing the patched area with an extra layer of material for added durability and protection against future leaks.)
Step 4: Seal Around Roof Penetrations
Roof penetrations, such as chimneys, vents, and skylights, are common culprits for leaks. To prevent water from seeping in around these areas, it’s essential to seal them properly. Here’s how:
- Use flashing or roof cement to seal around chimneys and vents, ensuring a tight seal between the roofing material and the penetration.
- Apply silicone caulk or sealant around skylights and other smaller penetrations, filling any gaps or cracks to prevent water intrusion.
Step 5: Perform a Water Test and Monitor for Leaks
Once you’ve made your repairs, it’s time to put them to the test. Grab a hose and have a helper stand inside while you spray water onto the repaired area from the outside. Keep an eye out for any signs of leaking, and have your helper alert you if they see water coming in.
It’s also a good idea to check the repaired area periodically, especially after heavy rainfall, to ensure that the leak has been successfully fixed and no new issues have arisen.
🌟 4 Bonus Tips for Preventing Roof Leaks

Let’s cover 4 tips below for how you can prevent roof leaks.
1. Regular Maintenance
Keep your roof in tip-top shape by performing regular inspections and maintenance, including clearing debris, checking for damaged shingles, and sealing around roof penetrations. Don’t forget to also inspect the flashing and gutter system to ensure everything is in working order and free of debris buildup.
2. Trim Overhanging Branches
Overhanging branches can rub against your roof and cause damage to the shingles, leading to potential leaks. Trim back any branches that hang over your roof to prevent this from happening, and consider hiring a professional tree service if the branches are too high or difficult to reach safely.
3. Inspect Attic Ventilation
Proper attic ventilation is essential for preventing moisture buildup and mold growth, which can contribute to roof leaks. Make sure your attic vents are clear and functioning correctly, and consider installing additional vents if needed to improve airflow and reduce humidity levels.
4. Address Ice Dams
In colder climates, ice dams can form along the edge of the roof and prevent water from draining properly. Install ice and water shield membrane along the eaves of your roof to prevent ice dams from forming, and consider adding additional insulation in the attic to help regulate temperature and prevent snow from melting and refreezing on the roof.
💪 Tackle a Leaking Roof Like a Real Pro
Leaky roof repairs may seem daunting at first, but with the right tools and know-how, it’s entirely manageable. By following these five simple steps and implementing preventive measures, you can keep your roof leak-free and your home dry and comfortable for years to come. So, roll up your sleeves, put on your DIY hat, and tackle that leak head-on! Your home will thank you.
Contact our pro team of roofing contractors at Secured Roofing and Restorations today for expert workmanship and speedy turnaround times. We can’t wait to get the ball rolling on your next roofing project!
8 Main Parts of a Roof Explained (Picture Guide)
Written by : Secured Roofing and Restorations
6 minutes read

Have you ever looked up at your roof and wondered what exactly makes it tick? If you feel confused about how all of your roofing parts work together to keep your home standing strong–don’t worry! We know you’re not a roofing contractor, and that’s why we’re here to put your mind at ease and educate you with the primary components of your own roof.
So, let’s break down the eight main parts of a roof, from the shingles on top to the rafters underneath.
Inside this blog:
- The 8 key components of a roof
- Features + functions for each roof component
Keep reading to become an empowered homeowner and learn everything you need to know about the roof that hangs over your home’s head!
The Roof: An Overview
Before we get into the nitty-gritty details, let’s take a moment to appreciate the importance of your roof. Not only does it protect you and your home from the elements, but it also plays a significant role in your home’s overall aesthetic appeal and structural integrity. From rain and snow to wind and sunshine, your roof bravely faces it all, day in and day out.
1. Shingles: The Outer Armor
Shingles are the first line of defense against the elements, covering the entire surface of your roof. They come in various materials, including asphalt, wood, metal, and tile, each with its own unique characteristics and aesthetic appeal.
Here are some key points about your roof’s shingles:
- Asphalt shingles are the most common type of roofing material, known for their affordability and durability.
- Wood shingles offer a natural, rustic look but require more maintenance to prevent rot and decay.
- Metal shingles are becoming increasingly popular for their longevity and energy efficiency.
- Tile shingles add a touch of elegance to any home but can be more expensive upfront.
2. Underlayment: The Waterproof Barrier
Underneath the shingles lies the underlayment, a waterproof barrier that protects your roof deck from moisture infiltration. Typically made of felt or synthetic materials, this roof component acts as a secondary line of defense against leaks and water damage.
Some key points about underlayment:
- Felt underlayment, also known as tar paper, is a traditional option that provides adequate protection at an affordable price.
- Synthetic underlayment is gaining popularity due to its superior durability and resistance to tearing and wrinkling.
- Proper installation of underlayment is crucial for ensuring a watertight seal and preventing water from seeping into your home and entire roofing system.
3. Roof Deck: The Structural Foundation
The roof decking is the solid surface that provides structural support for the rest of the roof components. It’s typically made of plywood or oriented strand board (OSB) and is attached directly to the rafters or trusses.
Here are some key points about your roof’s decking:
- Plywood is the most common material used for roof decks due to its strength, stability, and resistance to moisture.
- Oriented strand board (OSB) is a more affordable alternative to plywood but may be prone to swelling and delamination if exposed to prolonged moisture.
4. Flashing: The Leak Prevention Specialist
Flashing is a thin, weatherproof material installed around roof openings and transitions to prevent water from seeping into your home. You can think of flashing as your home’s ice and water shield. It’s typically made of metal, such as aluminum or galvanized steel, and is installed in areas vulnerable to leaks, such as around chimneys, vents, and skylights.
Here are some key points about flashing:
- Properly installed flashing is essential for maintaining a watertight seal and preventing water damage to your home’s interior and roofing structure.
- Flashing should be inspected regularly and replaced if damaged or deteriorated to ensure continued protection against leaks. Solid protection against water leaks could prevent a roof replacement in the future.
5. Ventilation: The Climate Control Expert
Proper ventilation is crucial for maintaining a healthy and comfortable indoor environment and extending the life of your roof. It allows air to circulate freely through your attic, preventing heat and moisture buildup that can lead to mold, mildew, and structural damage.
Here are some key points about ventilation:
- Ridge vents, soffit vents, and gable vents are commonly used to facilitate airflow and remove excess heat and moisture from the attic.
- Adequate ventilation can help lower energy costs by reducing the strain on your HVAC system and prolonging the life of your roofing materials.
6. Rafters: The Backbone of Your Roof
Rafters are the inclined beams that support the weight of the roof structure and transfer it to the walls of your home. They’re typically made of wood or metal and are spaced evenly across the width of the roof.
Here are some key points about rafters:
- Rafters are essential for providing structural support and maintaining the shape and integrity of your roof.
- Properly sized and spaced rafters are crucial for ensuring that your roof can withstand the weight of heavy snow loads and other environmental factors.
7. Gutters and Downspouts: The Rainwater Management Team
Gutters and downspouts are responsible for channeling rainwater away from your home’s foundation and preventing water damage to your roof and walls. Gutters are installed along the edges of the roof, while downspouts direct water from the gutters to the ground.
Here are some key points about gutters and downspouts:
- Regular maintenance, such as cleaning and repairing damaged sections, is essential for ensuring that gutters and downspouts function properly and prevent water buildup.
- Installing gutter guards can help minimize the accumulation of debris and reduce the frequency of gutter cleaning.
8. Eaves and Fascia: The Finishing Touches
Eaves are the lower edges of the roof that overhang the walls of your home, providing protection from the elements and adding architectural interest to your exterior. Fascia is the horizontal board that runs along the edge of the roof and supports the gutters.
Here are some key points about eaves and fascia:
- Properly maintained eaves and fascia can enhance the curb appeal of your home and protect it from water damage and rot.
- Regular inspections and repairs are essential for preventing issues such as rot, insect infestations, and damage from wind and weather.
🏗️ Your Roof, Piece by Piece
And there you have it – the eight main parts of a roof, explained in all their glory! From shingles and underlayment to rafters and gutters, each roof component plays a vital role in keeping your home safe, dry, and comfortable year-round. So, the next time you look up at your roof’s structure, take a moment to appreciate all the hard work that goes into keeping you and your family protected from the elements.
Contact our pro team of roofing contractors at Secured Roofing and Restorations today for expert workmanship and speedy turnaround times. We can’t wait to get the ball rolling on your next roofing project!