


Articles
6 Different Types of Roofs (Benefits, Materials & More)
 Written by : Secured Roofing and Restorations
 6 minutes read


When it comes to your home, the roof over your head is one of the most critical elements. Not only does it protect you from the elements, but it also plays a significant role in your home’s curb appeal. However, choosing the right type of roof can be a daunting task. From flat roofs to gabled roofs, each has its unique benefits, materials, and considerations. In this homeowner’s guide, we’ll explore six different types of roofs to help you make an informed decision about your roofing needs.
Inside this blog:
- 6 key types of roofs
- Benefits, materials, & considerations for each type of roof
- 5 additional factors to consider when choosing a roof for your home
Keep reading to discover everything you need to know about the 6 popular roofing types for homeowners and which type can bring your home the most benefits!
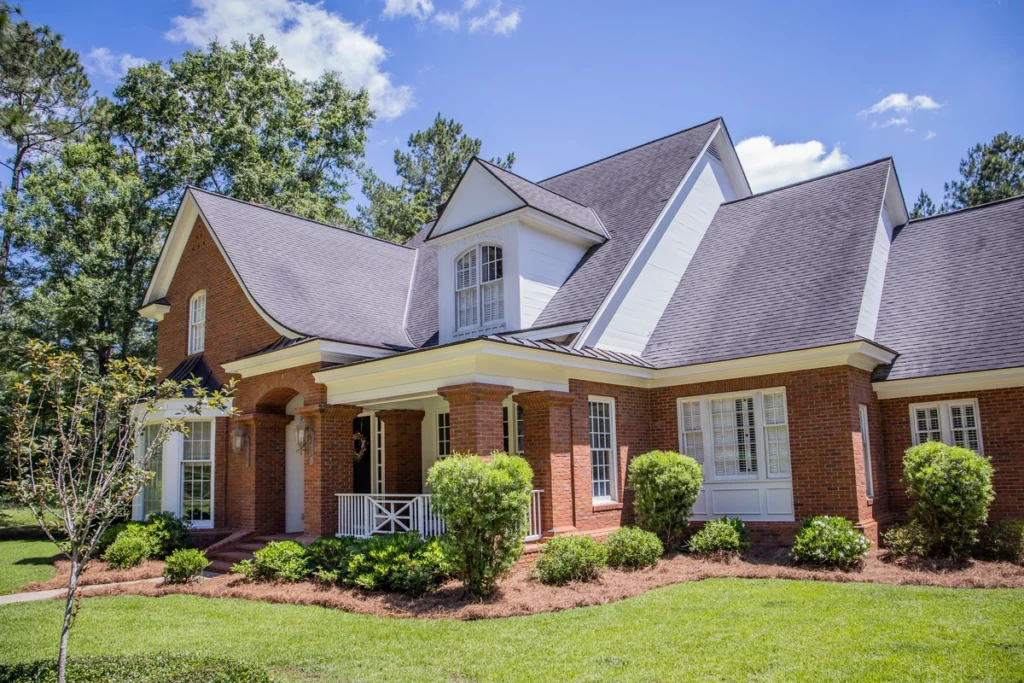
1. Gable Roof: Classic and Versatile
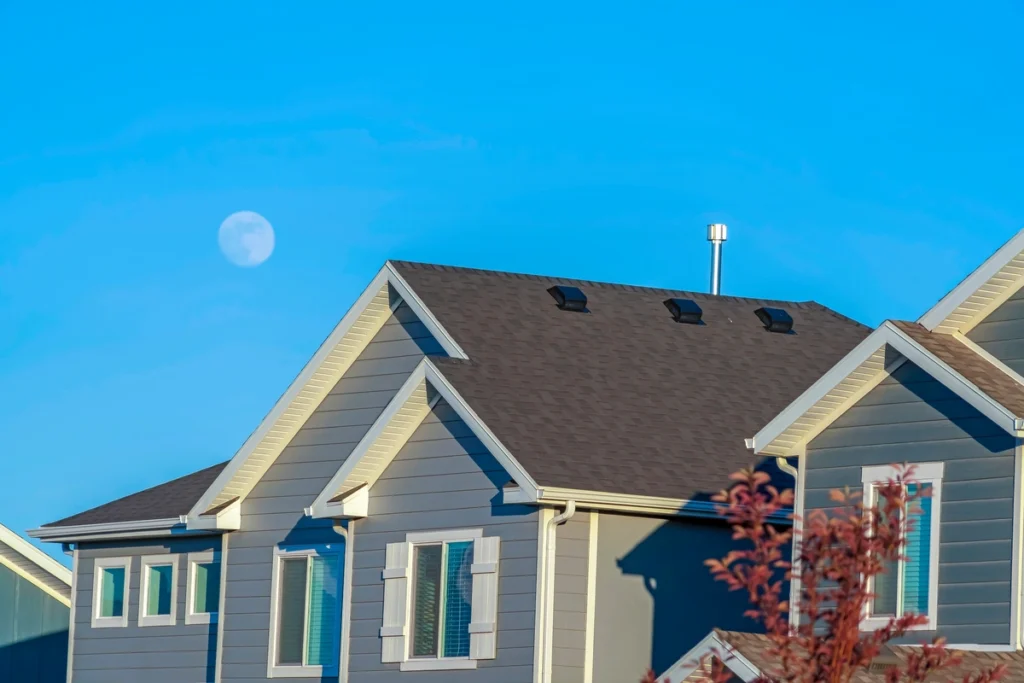
The gable roof, also known as a pitched or peaked roof, is one of the most common roof types you’ll find in residential neighborhoods:
- ✔️Benefits: Gable roofs provide excellent ventilation, as hot air rises and escapes through the top. They also offer a timeless, classic look that complements various architectural styles.
- ⚒️Materials: Gable roofs can be constructed using a variety of materials, including asphalt shingles, metal, wood shingles, or even slate, depending on your preferences and budget.
- 🤔Considerations: While gable roofs are popular, they can be vulnerable to high winds if not properly braced. It’s essential to have adequate structural support to prevent damage in storm-prone areas.
2. Hip Roof: Stability and Style
Hip roofs are known for their stability and architectural elegance. They have slopes on all four sides, meeting at a ridge at the top:
- ✔️Benefits: Hip roofs are excellent for stability and wind resistance, making them a reliable choice in hurricane-prone regions. They also provide more shade and outdoor living space under their eaves.
- ⚒️Materials: You can use a variety of materials for hip roofs, similar to gable roofs. Common choices include asphalt shingles, metal, and clay tiles.
- 🤔Considerations: The complexity of hip roofs may result in slightly higher construction costs compared to simpler roof types. However, the added benefits, especially in terms of durability, can outweigh the initial expense.
3. Flat Roof: Modern and Functional

Flat roofs have a low pitch or no pitch at all, offering a modern and functional design for both residential and commercial buildings:
- ✔️Benefits: Flat roofs are versatile and can serve as extra outdoor space, such as rooftop gardens or patio areas. They are also easier to access for maintenance.
- ⚒️Materials: Common materials for flat roofs include rubber (EPDM), modified bitumen, and built-up roofing (BUR). These materials are designed to be durable and watertight.
- 🤔Considerations: Proper drainage is crucial for flat roofs to prevent water from pooling, which can lead to leaks. Regular inspections and maintenance are essential to ensure their longevity.
4. Mansard Roof: French Elegance
Mansard roofs, also known as French roofs, are characterized by their double-pitched design, with the lower slope steeper than the upper one:
- ✔️Benefits: Mansard roofs provide additional living space in the form of attic rooms or storage areas. They also offer a unique, elegant appearance.
- ⚒️Materials: Typically, asphalt shingles or metal are used for mansard roofs. The choice of materials can affect both the aesthetics and durability of the roof.
- 🤔Considerations: Mansard roofs can be more expensive to construct due to their complex design, but the added space and visual appeal can be well worth it for some homeowners.
5. Gambrel Roof: Barn-Inspired Charm
Gambrel roofs resemble the roof of a classic barn. They have two slopes on each side, with the lower slope being steeper than the upper one:
- ✔️Benefits: Gambrel roofs offer a charming, rustic appearance that’s perfect for homes with a traditional or country-style design. They also provide extra space under the roof.
- ⚒️Materials: Asphalt shingles and metal are common materials for gambrel roofs. The choice of material can impact the roof’s durability and maintenance requirements.
- 🤔Considerations: Similar to mansard roofs, gambrel roofs can be more costly to construct due to their design complexity. However, they add unique character to a home and provide usable space in the attic.
6. Shed Roof: Modern Simplicity
Shed roofs, also known as skillion roofs, are characterized by a single-sloped surface that slopes downward in one direction:
- ✔️Benefits: Shed roofs are straightforward to design and construct, making them a popular choice for modern and minimalist architectural styles. They are also efficient at shedding rainwater.
- ⚒️Materials: Common materials for shed roofs include metal, asphalt shingles, and single-ply membrane roofing. The choice depends on your aesthetic preferences and budget.
- 🤔Considerations: Shed roofs may not provide as much attic space as other roof types, but they excel in simplicity and functionality. Proper insulation is crucial for energy efficiency in homes with shed roofs.
5 Additional Roofing Considerations
Before making a final decision on your roof type, here are a few additional considerations to keep in mind:
1. Maintenance Requirements
Different roof types have varying maintenance needs. Be sure to consider how much time and effort you’re willing to invest in maintaining your roof over the years.
2. Local Climate
Your local climate, including factors like rainfall, snow, wind, and temperature fluctuations, should influence your roofing material and design choices. Consult with local roofing professionals for expert advice.
3. Aesthetics and Home Style
The style of your home and your personal aesthetic preferences play a significant role in choosing the right roof type. Ensure your selection complements your home’s overall design.
4. Budget
Budget is a crucial factor when it comes to choosing the right roofing material and design. Some roof types may be more cost-effective upfront, while others may offer long-term savings due to their durability.
5. Professional Installation
Regardless of the roof type you choose, professional installation is essential to ensure a watertight, long-lasting roof. Always hire reputable roofing contractors for the job.
Find the Perfect Roof for Your Home 🏠
Choosing the right type of roof for your home is a significant decision that affects not only your property’s functionality but also its appearance and value. Each of these six roof types offers its unique benefits, materials, and considerations, catering to different architectural styles and homeowner preferences.
When making your decision, take into account your climate, budget, and maintenance capabilities. Consult with roofing professionals to get expert advice tailored to your specific needs. With the right roof overhead, your home will not only be protected but also reflect your personal style and enhance its overall appeal.
Contact our expert team of roofers at Secured Roofing & Solar today. We’ll make sure your home stands strong against the elements with an eye-catching and resilient roof!
7 Fun Things to Do While in Orlando, FL
Written by : Secured Roofing and Restorations
6 minutes read

Orlando, Florida, is known as the “Theme Park Capital of the World,” but it’s more than just thrilling rides, magical experiences, and beautiful Florida beaches. While you’re in Orlando, or waiting for your roof to be replaced, there are plenty of fun and exciting activities to explore beyond the theme parks. From outdoor adventures to cultural experiences, here are seven fantastic things to do in Orlando that will make your trip unforgettable. Let’s dive in!
Inside this blog:
- 7 awesome ideas for what you can do in Orland, FL
- Tips for how to make the most out of each Orlando adventure
Ready to see Orlando for all it has to offer?! Start scrolling through these 7 top ideas for how to make the most out of your Orlando experience!
1. Walt Disney World Resort: The Ultimate Magical Experience ✨

You can’t visit Orlando without a trip to one of the world famous theme parks – Walt Disney World Resort. While this is a must-visit for Disney enthusiasts, it offers something for everyone:
- Magic Kingdom: Experience classic Disney magic with Cinderella Castle, Space Mountain, and beloved characters.
- Epcot: Travel the world in a day, sampling global cuisine and exploring futuristic attractions.
- Animal Kingdom: Discover exotic animals and thrilling adventures in a lush, immersive environment.
- Hollywood Studios: Step into the world of Star Wars, Toy Story, and more blockbuster franchises.
2. Universal Orlando Resort: Movie Magic and Thrilling Rides 🎢
Universal Orlando Resort is another theme park paradise that’s perfect for movie buffs and thrill-seekers:
- Universal Studios Florida: Immerse yourself in movie magic with attractions like The Wizarding World of Harry Potter and the thrilling Revenge of the Mummy ride.
- Islands of Adventure: Experience jaw-dropping rides like the Incredible Hulk Coaster and The Amazing Adventures of Spider-Man.
- Volcano Bay: Cool off at the water park with thrilling slides and a tropical oasis.
3. ICON Park: Entertainment, Dining, and Scenic Views 🎡
ICON Park offers a mix of entertainment, dining, and scenic views, making it a great place to spend an evening in downtown Orlando.
- The Wheel: Take a ride on The Wheel for breathtaking views of Orlando’s skyline.
- Madame Tussauds Orlando: Meet lifelike wax figures of your favorite celebrities.
- Dining: Enjoy a variety of restaurants, from casual eateries to upscale dining options.
4. Kennedy Space Center Visitor Complex: Explore the Final Frontier 🚀
Just an hour’s drive from Orlando, the Kennedy Space Center offers a fascinating look at the history and future of space exploration:
- Space Shuttle Atlantis Exhibit: Get up close to the Space Shuttle Atlantis and experience the excitement of space travel.
- Rocket Garden: Experience a bit of Orlando magic by marveling at an impressive collection of historic rockets.
- Astronaut Encounter: Meet real-life astronauts and hear their incredible stories.
5. Gatorland: Get Up Close with Florida’s Wildlife 🐊

For a unique and wild experience, head to Gatorland with the whole family, where you can get up close and personal with Florida’s iconic alligators for a true Orlando vacation.
- Gator Shows: Watch thrilling gator shows and see expert handlers in action.
- Adventure Hour: Take part in the Adventure Hour to feed and learn about these incredible reptiles.
- Bird Rookery: Explore a bird rookery and witness diverse species of birds in their natural habitat.
6. Harry P. Leu Gardens: A Botanical Oasis 🌷
If you’re looking for a serene escape from the hustle and bustle, visit Harry P. Leu Gardens, a 50-acre botanical oasis:
- Rose Garden: Admire the stunning collection of roses in bloom at Harry P. Leu Gardens, where you can stroll amidst a kaleidoscope of colors, breathe in the intoxicating fragrance, and capture Instagram-worthy moments amid these delicate blooms.
- Camellia Collection: Explore the camellia collection at Harry P. Leu Gardens, one of the largest in the southeastern United States, and witness the intricate beauty of these exquisite flowering plants, which come in various shapes and hues, adding to the garden’s allure.
- Tropical Stream Garden: Meander through lush tropical landscapes and winding streams at Harry P. Leu Gardens, where the serene ambiance and the soothing sounds of water create a perfect setting for relaxation and contemplation amidst nature’s beauty.
7. Dr. Phillips Center for the Performing Arts: Cultural Delights 🎭
For a dose of culture and entertainment, attend a show or performance at the Dr. Phillips Center:
- Broadway Shows: Enjoy top-notch Broadway productions and touring musicals at the Dr. Phillips Center, where you can immerse yourself in the world of theater and witness captivating performances that will leave you spellbound.
- Concerts: Catch live music performances spanning various genres at the Dr. Phillips Center, offering a diverse lineup of artists and bands that cater to all musical tastes, from rock and pop to classical and jazz.
- Ballet and Dance: Experience the grace and elegance of ballet and contemporary dance at the Dr. Phillips Center, where you can witness the artistry and skill of talented dancers as they bring stories to life through movement and expression.
Bonus Tip: A Taste of International Drive 🌮
International Drive, often referred to as I-Drive, is a hub of dining and entertainment in central Florida. Stroll along this famous avenue to discover a plethora of restaurants, bars, and shops offering cuisine from around the world. It’s a fantastic place to indulge in culinary delights and enjoy the vibrant atmosphere.
Get to Know Orlando’s Magic Beyond the Theme Parks
While Orlando’s theme parks are undeniably magical, the city has so much more to offer. From exploring the wonders of space to getting up close with alligators, Orlando boasts a wide range of exciting attractions and experiences for every traveler. So, the next time you visit this sunny city, be sure to venture beyond the theme parks and discover the diverse and captivating side of Orlando.
A Note From the Secured Roofing and Restorations Team:
At Secured Roofing and Restorations, we love to support our community in Orlando and the surrounding areas of this Sunshine State. We hope you check out these awesome ideas in Orlando and have a blast exploring and seeking some adventure! And remember, you can always count on our pro team of roofers for your roofing needs to keep your Florida home standing strong!
Contact our expert team of roofers at Secured Roofing and Restorations today. We’ll make sure your home stands strong against the elements with an eye-catching and resilient roof!
How Long Does It Take To Replace a Roof? (By Material)
Written by : Secured Roofing and Restorations
6 minutes read

Replacing a roof is a significant undertaking for any homeowner, and one of the most common questions is, “How long will it take?” The answer can vary depending on several factors, with the type of roofing material being a key consideration. In this homeowner’s guide, we’ll break down the estimated time frames for roof replacement based on different materials, so you’ll have a better idea of what to expect when it’s time to tackle this important project.
Inside this blog:
- 6 popular roofing materials and how long they typically last
- Features + benefits of each roofing material
- What you should consider during the consultation and planning phase of a roof replacement
Keep reading to learn more about how long it takes to replace a roof based on its material! Let’s start by going over 6 key roofing materials.
1. Asphalt Shingles
Asphalt shingles are the most common roofing material in the United States, and they offer several advantages, including a relatively quick installation process:
- Average Timeframe: On average, replacing an asphalt shingle roof typically takes about 1 to 3 days for a professional roofing crew. This timeframe can vary depending on the size and complexity of the roof.
- Efficiency: Asphalt shingles are known for their ease of installation, which contributes to the speed of the process. Roofers can work efficiently to remove the old shingles and install the new ones.
- Minimal Disruption: The quick installation of asphalt shingles means less disruption to your daily life, as the roofing crew can complete the project relatively swiftly.
2. Metal Roofing
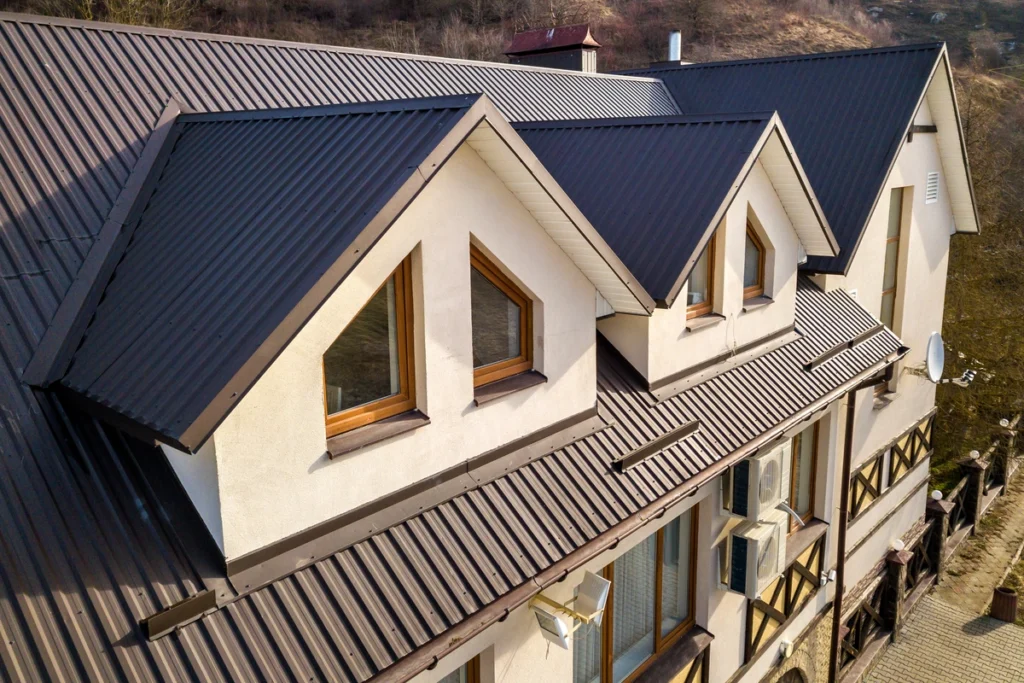
Metal roofing is becoming increasingly popular due to its durability and longevity. When it comes to installation time, here’s what you can expect:
- Average Timeframe: Installing a metal roof typically takes about 1 to 3 days, similar to asphalt shingles. The precise duration depends on factors such as the roof’s size and complexity.
- Efficiency: Metal roofing materials are lightweight and often come in large panels, making them easier and faster to install compared to some other materials.
- Durability Payoff: While the installation time frame is similar to asphalt shingles, the longevity of a metal roof means you’ll enjoy many years of low-maintenance protection.
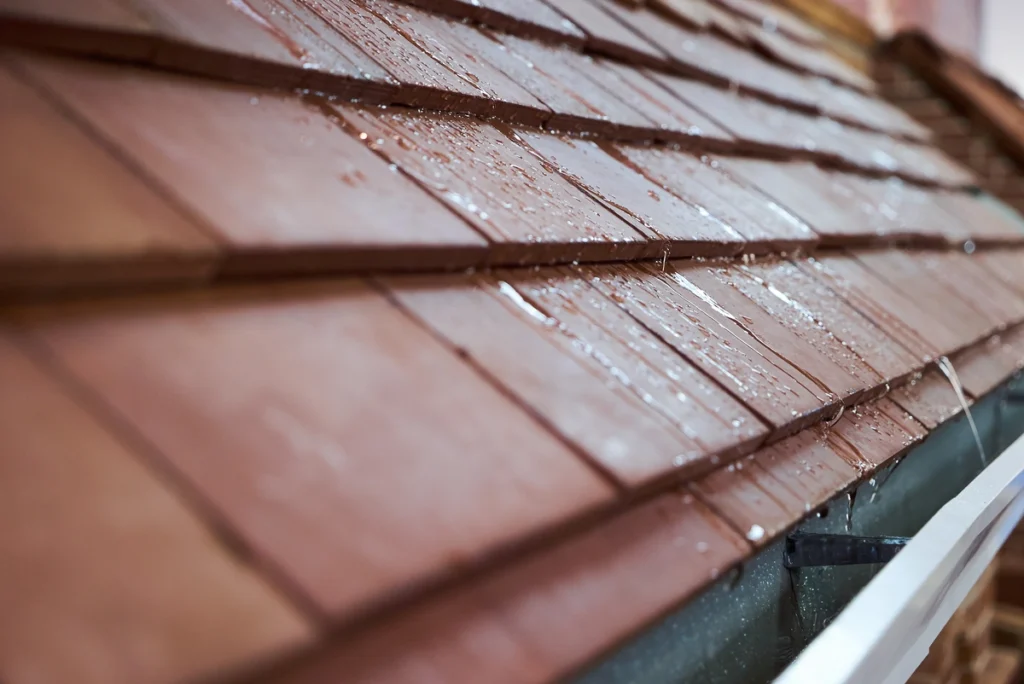
3. Wood Shingles/Shakes
Wood shingles and shakes add a natural, rustic charm to a home, but they may require a bit more time for installation:
- Average Timeframe: Replacing a wood shingle or shake roof can take around 3 to 5 days or even longer, depending on the size and complexity of the roof. Wood roofing materials are more labor-intensive to install.
- Craftsmanship: Wood shingles and shakes require careful installation to ensure they lay flat and overlap correctly. This craftsmanship takes time but contributes to the material’s classic appearance.
- Maintenance: Keep in mind that wood roofing materials typically require more maintenance and may need periodic replacement sooner than some other materials.
4. Tile Roofs
Tile roofs are known for their exceptional durability and timeless beauty, but they can be more time-consuming to replace:
- Average Timeframe: Replacing a tile roof can take anywhere from 5 to 14 days, or even longer for larger or more intricate roofs. The installation process is slower due to the weight and fragility of the tiles.
- Attention to Detail: Tile roofs require precise installation to ensure that each tile is correctly positioned and secured. The extra care taken during installation contributes to their long lifespan.
- Architectural Appeal: The beauty and architectural style of tile roofs are well worth the longer installation time for homeowners who appreciate their unique aesthetics.
5. Slate Roofs
Slate roofs are renowned for their unparalleled longevity and natural elegance, but they are among the most time-consuming roofing materials to replace:
- Average Timeframe: Replacing a slate roof is a patient process that can take 14 to 21 days or more. The time required is mainly due to the weight, thickness, and fragility of slate tiles.
- Precision Installation: Each slate tile must be individually secured with care to ensure a watertight and long-lasting roof. This meticulous installation process is what makes slate roofs last for generations.
- Lifetime Investment: While slate roofs require a significant upfront time investment, they are virtually maintenance-free and can last over a century, making them a lifetime investment in your home.
6. Clay Tile Roofs
Clay tile roofs are known for their elegance and ability to withstand harsh weather conditions, but they also require a patient approach to replacement:
- Average Timeframe: Replacing a clay tile roof typically takes about 7 to 14 days, depending on factors such as the size of the roof and the complexity of the design.
- Artistry in Installation: Clay tiles, like slate, require careful placement and securing to achieve the desired appearance and functionality. Roofing professionals take the time to ensure each tile fits snugly and contributes to the overall aesthetic.
- Visual Impact: The timeless beauty of clay tile roofs adds value to your home and enhances its curb appeal, making the extended installation time worth it for many homeowners.
Consultation and Planning Phase 📝
Before the actual roof replacement, there’s an essential step that can influence the timeline: The consultation and planning phase. Here’s what you need to consider…
Design and Material Selection
The time it takes to decide on the roofing material, design, and color can impact the overall project timeline. Take your time to choose the right roofing material that suits your home and budget.
Permitting and Approvals
Depending on your location and the type of roofing material, you may need permits and approvals from local authorities. Factor in the time it takes to obtain these permissions.
Scheduling with Roofing Contractors
Roofing contractors’ availability can vary, so plan your project well in advance to secure a convenient time frame.
Weather Delays and Unforeseen Issues ☔
Keep in mind that weather conditions can play a significant role in the duration of your roof replacement project. Rain, strong winds, or extreme heat can delay work, so it’s essential to have some flexibility in your project timeline. Additionally, unforeseen issues discovered during the removal of the old roof, such as hidden damage or structural concerns, can extend the project’s timeframe. It’s advisable to discuss potential delays and contingencies with your roofing contractor during the planning phase.
Choose The Right Roofing Material for Long-Lasting Protection
The time it takes to replace a roof depends on various factors, including the roofing material, the size and complexity of the roof, and external factors like weather and permitting. While some materials, like asphalt shingles and metal roofs, offer a quicker installation process, others, such as clay tile and slate roofs, require more time due to their weight and meticulous installation requirements.
Ultimately, investing the time and effort into a roof replacement project is well worth it, as a well-installed roof not only protects your home but also enhances its curb appeal and value. Remember to consult with roofing professionals to get accurate estimates and timelines tailored to your specific needs. By planning carefully and choosing the right roofing material, you can ensure a successful roof replacement that provides long-lasting protection for your home.
Contact our expert team of roofers at Secured Roofing & Solar today. We’ll make sure your home stands strong against the elements with an eye-catching and resilient roof!
How Old Is My Roof? (And Does It Need to Be Replaced?)
Written by : Secured Roofing and Restorations
6 minutes read

Your roof is your home’s #1 protector, quietly shielding you and your family from the elements. And although it does an awesome job keeping your home safe from turbulent weather, it eventually ages and may need replacing.
So how do you know when it’s time? In this homeowner’s guide, we’ll explore the telltale signs of an aging roof and share tips on determining if it’s due for a replacement. Let’s dive into the world of roofs and answer the questions, “How old is my roof and does it need to be replaced?”
Inside this blog:
- Signs that you have an old roof
- A 5-step guide to performing a roof inspection
- 5 factors to consider when thinking about getting a roof replacement
Keep reading to discover the true age of your roof and learn when it’s time to call in the pros and get a new protector to shield your home from the elements!
How Old Is Your Roof? ⏳
The first step in assessing your roof’s condition is knowing its age. Roofs, like everything else, have a limited lifespan. Here’s a general guideline for common roofing materials:
- Asphalt Shingles: An asphalt roof typically lasts 15 to 30 years.
- Metal Roofs: Can last 40 to 70 years or more.
- Wood Shingles/Shakes: Usually last 20 to 40 years.
- Tile Roofs: May last 50 years or longer.
- Slate Roofs: Can endure for over 100 years.
Start by finding out when your current roof was installed. If you’re not sure, you can check your home improvement records or consult a roofing professional for an estimate based on the material and appearance.
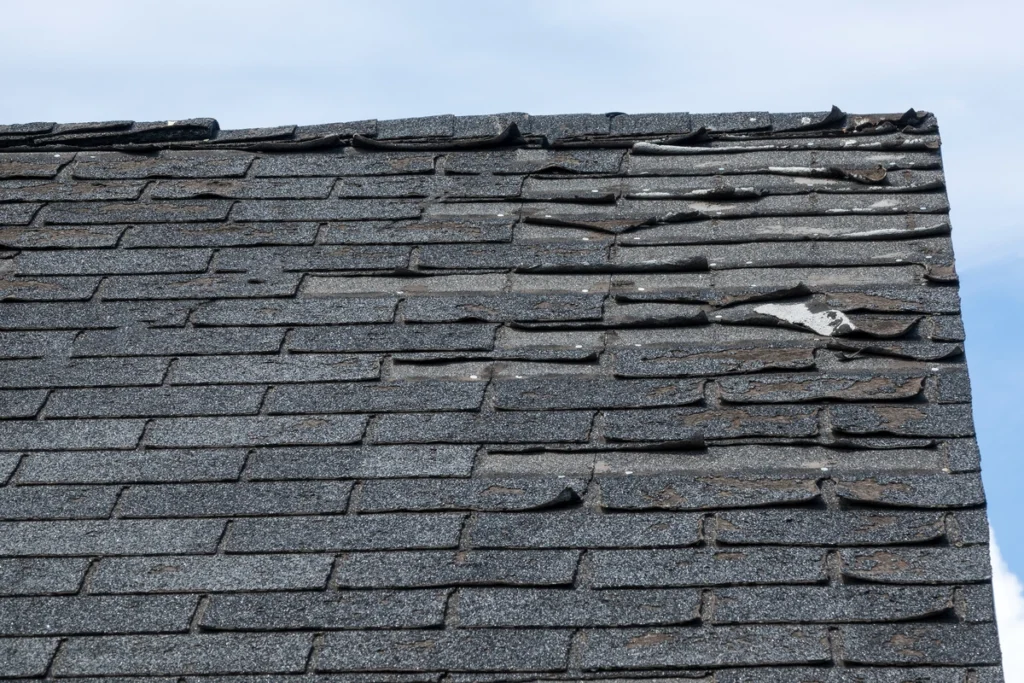
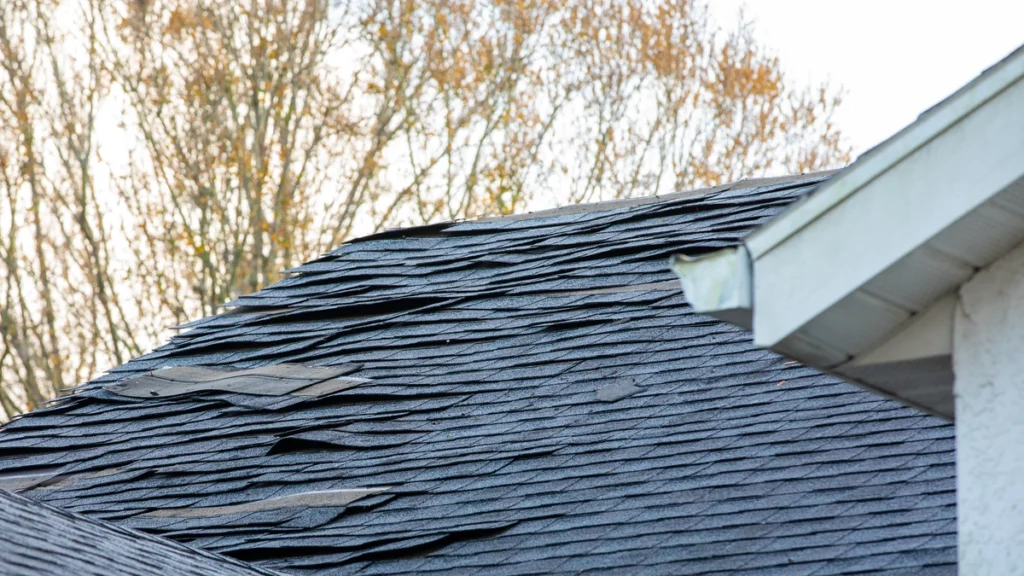
Signs That You Have an Aging Roof 🧐
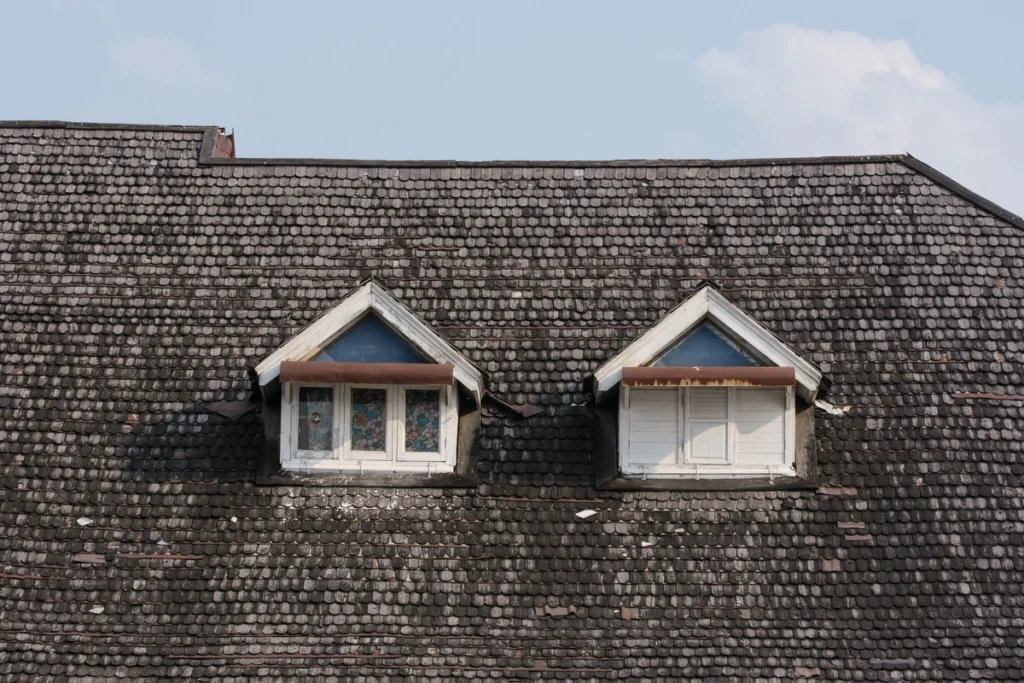
Now that you have a rough idea of your roof’s age, it’s time to look for signs of wear and tear. Here are some common indicators that your roof might be aging:
- Curling or Buckling Shingles: Over time, shingles can lose their flat shape and start to curl or buckle. This exposes your roof to potential leaks.
- Missing Shingles: Missing shingles are a clear sign of roof damage. Whether they’ve blown away in a storm or deteriorated over time, they need immediate attention.
- Granule Loss: Asphalt shingles may lose their granules, leaving bald spots. This makes them less effective at protecting your home.
- Sagging Roof: A sagging roof is a severe issue. It may indicate structural problems or water damage in your attic.
- Moss or Algae Growth: While not always a sign of impending failure, moss or algae growth on your roof can lead to moisture retention and weaken your shingles.
- Daylight Through the Roof: If you can see daylight through your roof boards, it’s time for a replacement. This indicates significant wear and tear.
- Water Stains on Ceilings: Water stains on your interior ceilings or walls are a clear indication that your roof is leaking.
- Excessive Roofing Debris: Finding a lot of roofing granules in your gutters or yard is a sign that your shingles are deteriorating.
Perform a Roof Inspection 🕵️♀️
If you suspect your roof may be showing signs of aging, performing a thorough roof inspection can help confirm its condition. Here’s a 5-step guide:
Step 1: Safety First
Use proper safety gear, including a harness, when climbing onto your roof. If you’re not comfortable doing this, consider hiring a professional.
Step 2: Exterior Inspection
Walk around your property, visually inspecting your roof for the signs mentioned earlier. Pay attention to areas around chimneys, vents, and skylights.
Step 3: Attic Inspection
Go into your attic and look for signs of water damage, such as wet insulation or water stains. Use a flashlight to check for daylight coming through the roof boards.
Step 4: Check Flashing and Seals
Examine the flashing around roof penetrations like chimneys and vents. Ensure that seals and caulk are intact and not cracked.
Step 5: Clean Gutters
Clean your gutters and look for an excessive amount of granules from your shingles. If you find many granules, it’s a sign that your roof is deteriorating.
Consider the Climate 🌦️

Your local climate can have a significant impact on your roof’s lifespan. In Florida’s sunny and humid climate, for example, roofs can take a beating from the intense heat and occasional hurricanes. Consider the following climate-related factors:
- UV Exposure: Frequent exposure to strong sunlight can cause shingles to deteriorate more quickly.
- Humidity: High humidity can contribute to moss and algae growth, potentially weakening your roofing material.
- Storms: Frequent storms or hurricanes can damage your roof and shorten its lifespan.
- Temperature Fluctuations: Extreme temperature fluctuations, common in some regions, can cause roofing materials to expand and contract, leading to wear and tear.
Consult a Professional Roofer ☎️
If you’re unsure about the condition of your roof or whether it needs replacement, it’s a good idea to consult a professional roofer. Here’s why:
- Expert Assessment: Roofing professionals have the knowledge and experience to accurately assess your roof’s condition. They can spot issues that might not be apparent to the untrained eye.
- Safety: Climbing on a roof can be dangerous, especially if you’re not accustomed to it. Roofing experts have the proper safety equipment and training to work on your roof safely.
- Quality Repairs: If it’s determined that your roof needs replacement, professional roofers can provide high-quality materials and expert craftsmanship to ensure your new roof is durable and long-lasting.
When to Consider Roof Replacement 🏗️
If your roof exhibits multiple signs of aging and damage, it may be time to consider a replacement. Here are 5 factors to consider:
1. Aging Shingles
If your shingles are reaching the end of their expected lifespan and showing signs of deterioration, a replacement is likely in order.
2. Persistent Leaks
If you’re dealing with frequent roof leaks that repairs can’t seem to fix, it’s a strong indicator that your roof needs replacing.
3. Extensive Damage
When a large portion of your roof is damaged or missing, repairs may not be sufficient to ensure your home’s protection.
4. Energy Efficiency
Older roofs may not be as energy-efficient as newer options. A replacement with more energy-efficient materials can reduce your heating and cooling costs.
5. Curb Appeal
If you’re looking to improve the appearance and value of your home, a new roof can make a significant difference.
Invest Wisely in Your Home’s Future 🏡
Your roof is a crucial component of your home, providing shelter and protection for you and your family. Knowing when it’s time for a replacement is essential to avoid costly damage to your property. Regular inspections, attention to signs of aging, and consulting with professionals can help you make informed decisions about the future of your roof. So, keep an eye on the sky and your feet on solid ground while you ensure your home’s safety and longevity.
Contact our expert team of roofers at Secured Roofing and Restorations today. We’ll make sure your home stands strong against the elements with an eye-catching and resilient roof!
6 Things to Know About Tarping a Roof After a Storm
Written by : Secured Roofing and Restorations
6 minutes read

Stormy weather can be both exhilarating and nerve-wracking, especially if it leaves your roof in need of some TLC. When those dark clouds part, and you’re faced with a damaged roof, you’ll want to know how to properly tarp it up to prevent further problems. In this homeowner’s guide, we’ll take you through the essentials of tarping your roof after a storm. Let’s get started!
Inside this blog:
- The 6 key things you need to know about tarping your roof after a storm
- Tips + tricks under each key aspect
Keep reading to become an empowered homeowner and learn how to effectively tarp your roof to keep your home safe!
1. Assess the Damage First 🕵️
Before you dive into tarping your roof, take some time to assess the damage. Here’s what you need to do:
- Safety First: Ensure it’s safe to access your roof. Don’t attempt tarping if you’re uncertain or if there are any electrical hazards.
- Examine the Damage: Carefully inspect your roof to identify areas with damage. Look for missing shingles, punctures, or cracks.
- Interior Inspection: Check your attic or ceiling for signs of water leaks. This can help pinpoint where the damage is.
2. Gather Your Materials and Tools 🧰
To tarp your roof effectively, you’ll need the right materials and tools on hand. Here’s what you’ll need:
- Tarps: Get heavy-duty tarps that are large enough to cover the damaged areas. You may need more than one.
- Nails or Screws: You’ll use these to secure the tarp to your roof.
- Hammer or Screwdriver: Depending on your choice of fasteners.
- Roofing Cement or Caulk: Use this to seal around the edges of the tarp for added protection.
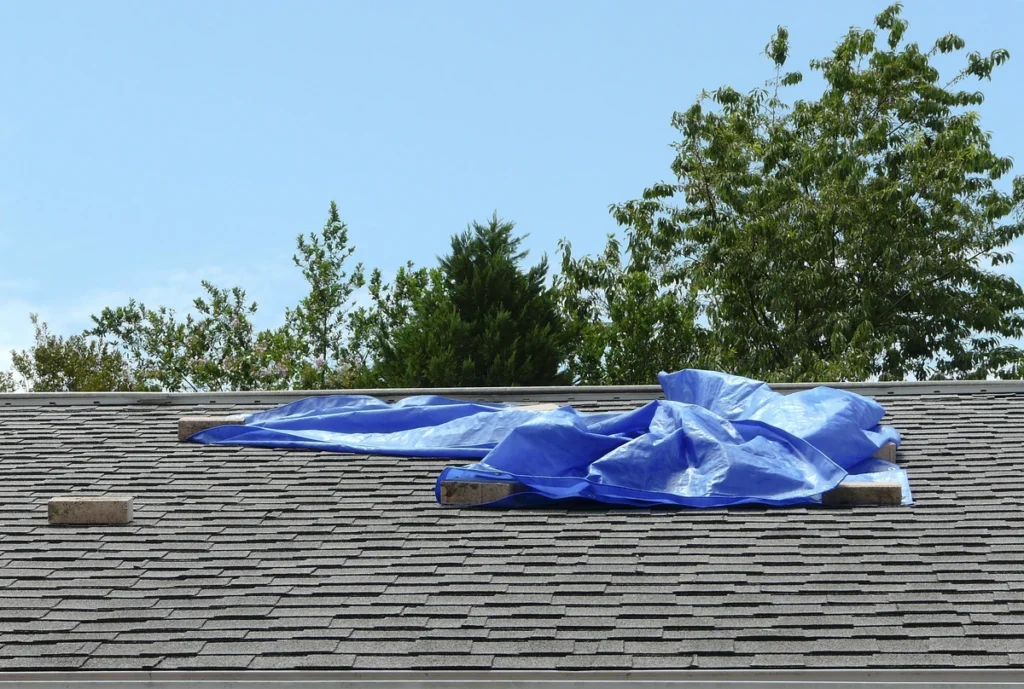
3. Choose the Right Tarp 🛡️
Selecting the right tarp is crucial for effective roof tarping. Here are some considerations:
- Material: When selecting a tarp, prioritize durability by choosing materials like heavy-duty plastic or canvas that not only withstand harsh weather but are also resistant to tearing.
- Size: Measuring the damaged area of your roof to determine the tarp size is a critical step to ensure proper coverage. Opting for a tarp that’s slightly larger than necessary provides an extra layer of protection by allowing for ample overlap, preventing water from finding its way through the edges.
- Color: Consider the color of the tarp as it can impact your home’s comfort. Opting for a light-colored tarp has the added benefit of reflecting sunlight, reducing heat buildup beneath the tarp.
4. Secure the Tarp Properly 🧷
Securing the tarp is where many homeowners make mistakes. Here’s how to do it correctly:
- Start at the Bottom: Beginning tarping at the lowest point of the damaged area and working your way up is essential to ensure effective water runoff. By starting low, you redirect water away from the damaged area, preventing further infiltration.
- Anchor Points: Securing the tarp with nails or screws through the reinforced grommets along the edges is crucial for stability. It’s not enough to loosely lay the tarp on your roof; it must be fastened securely to withstand the elements.
- Avoid Wrinkles: Smooth out any wrinkles or folds in the tarp meticulously to prevent water from pooling or collecting in pockets. Pooled water can add unnecessary weight and strain to your roof, potentially causing further damage.
5. Seal the Edges and Seams 🧩
Securing the tarp is only part of the job. You’ll also want to seal the edges and seams to make it watertight. Here’s how:
- Use Roofing Cement: Apply roofing cement or caulk along the edges of the tarp where it meets your roof. This helps create a tight seal and prevents water from seeping in.
- Overlap Seams: If you’re using multiple tarps, overlap them by several inches and seal the seam with roofing cement or caulk.
- Check for Gaps: Inspect your work to ensure there are no gaps or areas where water could penetrate.
6. Call a Professional for Permanent Repairs ☎️
Tarping your roof is a temporary fix to prevent further damage, but it’s not a long-term solution. Once the storm has passed and it’s safe, it’s crucial to call a professional roofing contractor to assess the damage and perform permanent repairs. Here’s why:
- Expertise: Roofing professionals have the knowledge and experience to accurately assess the extent of the damage and recommend the necessary repairs. Their expertise allows them to identify underlying issues ensuring a comprehensive restoration of your roof’s integrity.
- Safety: Climbing on a damaged roof can be dangerous. Roofing experts have the proper safety equipment and training to work on your roof safely.
- Quality Repairs: Professional repairs will ensure that your roof is restored to its pre-storm condition, providing long-lasting protection. Roofing experts use high-quality materials and follow industry best practices, which not only fix the immediate problem but also contribute to the overall durability and longevity of your roof.
A Quick Recap: What to Do When Tarping Your Roof 📝
Let’s sum it all up with a numbered list of what you should do when tarping your roof after a storm:
- Safety First: Ensure it’s safe to access your roof and identify the damage.
- Gather Your Materials: Collect tarps, fasteners, tools, and sealant.
- Choose the Right Tarp: Opt for a durable, waterproof tarp that’s the right size.
- Secure the Tarp Properly: Start at the lowest point, anchor it tightly, and avoid wrinkles.
- Seal the Edges and Seams: Apply roofing cement or caulk to create a watertight seal.
- Call a Professional: Seek expert help for permanent repairs to your roof.
Tarp Your Roof Like a True Pro 🏠
Tarping your roof after a storm is a crucial step to prevent further damage and protect your home. By following these steps and ensuring you use the right materials, you can effectively tarp your roof and keep your home safe and dry until permanent repairs can be made.
Remember that safety should always be your top priority. If you’re unsure about any aspect of roof tarping or if the damage is extensive, don’t hesitate to call a professional roofing contractor to assess and repair your roof properly. Stay safe, and may your home weather future storms with ease!
Contact our expert team of roofers at Secured Roofing and Restorations today. We’ll make sure your home stands strong against the elements with an eye-catching and resilient roof!
5 Best Roofing Material Options For Florida
Written by : Secured Roofing and Restorations
6 minutes read

If you live in the Sunshine State, you know all too well that the weather can be as unpredictable as a game of roulette. So, being a homeowner in Florida, you understand the importance of having a roof that can stand up to the elements. But with so many materials available, how do you choose the best roofing material for Florida?
In this homeowner’s guide, we’ll explore the top five roofing materials that can handle the heat, humidity, and occasional hurricane. Whether you’re building a new home or considering a roof replacement, we’ve got you covered. Let’s dive in!
Inside this blog:
- The 5 top roofing materials for Florida homeowners to consider
- 7 factors to think about when choosing a roof material
- Benefits + installation considerations for solar tiles
Keep reading to learn everything you need to know about how to choose the right roofing material for your Florida home!
1. Asphalt Shingles: The Florida Favorite
Asphalt shingles are the tried-and-true roofing material of choice for many Florida homeowners. Here’s why:
- Affordability: Asphalt shingles are budget-friendly, making them an attractive option for cost-conscious homeowners.
- Variety: They come in a wide range of styles and colors, allowing you to find the perfect fit for your home’s aesthetic.
- Durability: Asphalt shingles are designed to withstand Florida’s heat and occasional storms. They have a decent lifespan, usually around 15-20 years.
- Installation: Roofing contractors in Florida are well-versed in installing an asphalt roof, which can lead to a quicker and smoother installation process.
2. Metal Roofing: Cool and Durable
Metal roofing is gaining popularity in Florida for several reasons:
- Heat Reflectivity: A metal roof reflects sunlight, helping to keep your home cooler and reduce energy bills.
- Durability: They are highly resistant to hurricane winds, heavy rain, and rust, making them an excellent choice for Florida’s climate.
- Longevity: Metal roofs can last 40-70 years or more, providing a long-term roofing solution.
- Sustainability: Metal roofing is often made from recyclable materials and can be recycled at the end of its life, making it an environmentally friendly choice.
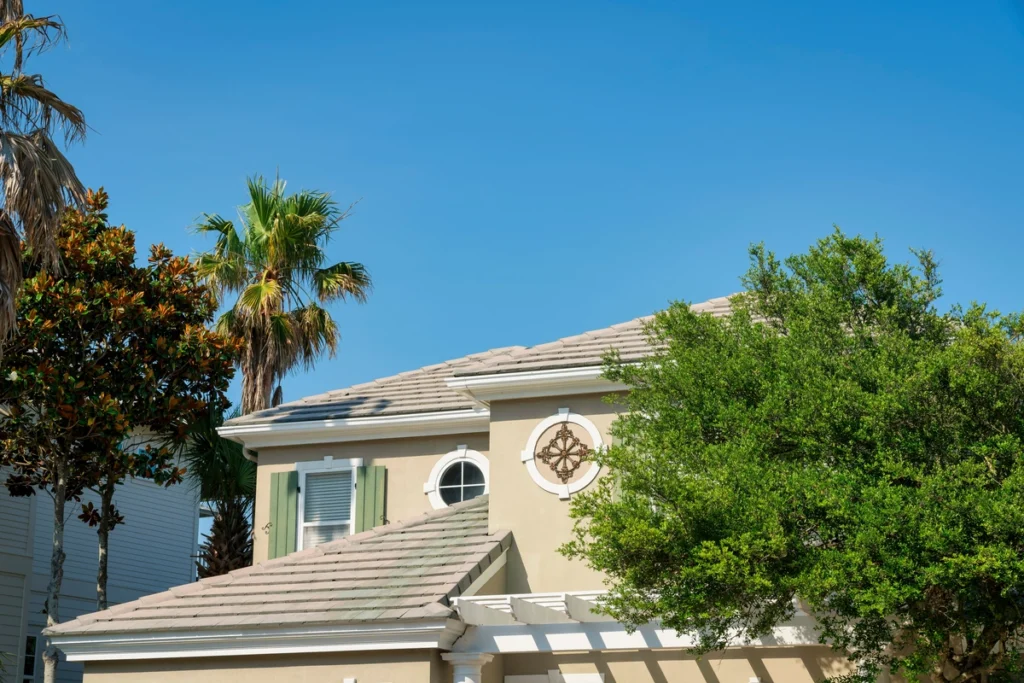
3. Concrete Tile: The Classic Look
Concrete tile roofing offers a timeless appeal along with some practical benefits:
- Aesthetic Appeal: Concrete tiles come in various styles and colors, giving your home a classic and elegant appearance.
- Durability: They are known for their longevity and can withstand the harsh Florida sun without fading or deteriorating.
- Fire Resistance: Concrete tiles are fire-resistant, which is a valuable feature in Florida’s hot and dry climate.
- Low Maintenance: Once installed, concrete tile roofs require minimal maintenance, saving you time and money.
4. Clay Tile: Mediterranean Charm
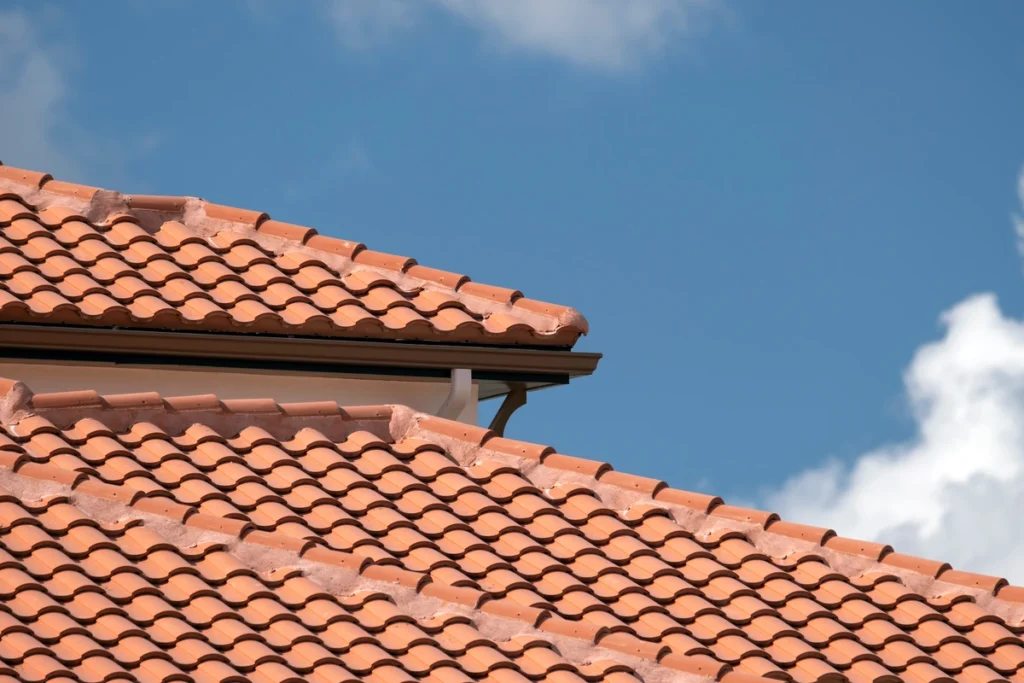
Clay tile roofs can add a touch of Mediterranean charm to your Florida home:
- Visual Appeal: Clay tiles are renowned for their distinctive and attractive look, giving your home a unique character.
- Durability: They can last for over 100 years, making them a long-term roofing solution.
- Heat Resistance: Clay tiles are excellent at keeping your home cool by reflecting sunlight and providing natural insulation.
- Low Maintenance: Like concrete tiles, clay tiles require minimal maintenance once installed.
5. Solar Tiles: Harnessing the Florida Sunshine
Solar tiles are a cutting-edge option that blends energy efficiency with roofing:
- Energy Savings: Solar tiles capture energy from the sun, reducing your electricity bills and carbon footprint.
- Environmental Impact: Solar tiles are an eco-friendly option that contributes to a sustainable future.
- Aesthetic Integration: They seamlessly blend with traditional roofing materials, maintaining your home’s appearance.
- Longevity: Solar tiles are durable and can last as long as traditional roofing materials.
Choosing the Right Roofing Material for Your Florida Home 🤔
Now that you’re aware of the top roofing materials for Florida, how do you make the right choice? Here are 7 factors to consider:
1. Climate
Florida’s climate can vary from north to south. Consider the specific weather conditions in your region, including heat, humidity, and hurricane risk.
2. Budget
Determine your budget for roofing, including installation from a roofing contractor and potential maintenance costs.
3. Aesthetics
Choose a roofing material that complements your home’s architectural style and personal preferences.
4. Longevity
Consider how long you plan to stay in your home and choose a roofing material that aligns with your long-term plans.
5. Energy Efficiency
If energy savings are a priority, opt for roofing materials with reflective properties or consider solar tiles.
6. Maintenance
Think about the level of maintenance you’re willing to commit to. Some materials require more upkeep than others.
7. Local Building Codes
Ensure that your chosen roofing material complies with local building codes and regulations in your area.
A Closer Look at Solar Tiles 🌞
If you’re intrigued by the idea of leveraging the Florida sunshine with solar tiles, here’s a closer look at why they’re gaining popularity:
Advantages of Solar Tiles:
- 👍Energy Generation: Solar tiles generate electricity from the sun, reducing your reliance on the grid and lowering your energy bills.
- 👍Environmental Benefits: Solar energy is clean and renewable, contributing to a greener environment.
- 👍Return on Investment: Over time, the energy savings from solar tiles can offset their initial cost, potentially leading to a return on your investment.
- 👍Home Value: Solar-equipped homes tend to have higher resale values and can be more attractive to buyers.
Installation Considerations for Solar Tiles:
Installing solar tiles involves more than just roofing expertise. Here are some key installation considerations:
- 🔨Orientation: Solar tiles should face south or southwest to maximize sun exposure.
- 🔨Structural Integrity: Ensure your roof structure can support the additional weight of solar tiles.
- 🔨Wiring: Proper electrical wiring and integration with your home’s electrical system are crucial for optimal performance.
- 🔨Inverter Installation: Solar tiles require an inverter to convert DC power into AC power for use in your home.
- 🔨Permitting: Check local permitting requirements for solar installations, and ensure your installer is properly licensed.
Which Roofing Material Will You Choose? 🏡
Choosing the right roofing material for your Florida home is a decision that requires careful consideration. The state’s unique climate and weather conditions demand a roofing material that can stand up to the heat, humidity, and occasional hurricanes.
Whether you opt for the affordability of asphalt shingles, the durability of metal roofing, the classic look of concrete or clay tiles, or the energy efficiency of solar tiles, each option has its advantages. Ultimately, the best roofing material for your Florida home will depend on your budget, aesthetic preferences, and long-term goals.
By making an informed choice, you can enjoy peace of mind knowing that your home is well-protected and equipped to withstand whatever Mother Nature throws your way in the Sunshine State.
Contact our expert team of roofers at Secured Roofing and Restorations today. We’ll make sure your home stands strong against the elements with an eye-catching and resilient roof!
Florida Roofing Underlayment Requirements: Overall Guide
Written by : Secured Roofing and Restorations
6 minutes read

If you’re a homeowner in the sunny state of Florida, you’re no stranger to the wild weather that can roll through the Sunshine State. From intense heat to torrential downpours and the occasional hurricane, your home’s roof takes a beating year-round. That’s why it’s crucial to understand Florida’s roofing underlayment requirements.
In this homeowner’s guide, we’ll break down what you need to know about roofing underlayment in Florida. From the basics to the specifics, we’ve got you covered, so you can keep your home safe and sound.
Inside this blog:
- The importance of roof underlayment
- 5 Florida roofing underlayment requirements
- How to choose the right underlayment for your Florida home in 6 steps
- Benefits of investing in quality underlayment for your Florida roof
Keep reading to learn more about roof underlayment and how it can benefit your home in the Sunshine State!
Why Roofing Underlayment Matters
Roofing underlayment might not be the most glamorous aspect of your home, but it plays a crucial role in protecting it from the elements. Here are a few reasons why it matters:
Weather Protection
Florida is no stranger to heavy rainfall, especially during hurricane season. A good roofing underlayment acts as a barrier against water infiltration, preventing leaks and water damage.
Heat Resistance
Florida’s scorching sun can take a toll on your roof’s shingles. Underlayment helps in reflecting heat away from your home, reducing energy costs and keeping your interior cool.
Wind Resistance
Hurricanes and strong winds are a reality in Florida. Proper underlayment installation helps keep your roof intact during high winds, preventing costly damage.
5 Florida Roofing Underlayment Requirements 📜
Florida has specific roofing underlayment requirements in place to ensure that homes are adequately protected against the state’s unique weather conditions. Here’s a breakdown of what you need to know:
1. Underlayment Material
The Florida Building Code requires roofing underlayment to be made of either:
- Asphalt-saturated felt
- Synthetic materials approved by the Florida Building Commission
Using approved materials is essential to comply with state regulations and ensure your roof can withstand Florida’s climate.
2. Minimum Underlayment Weight
Florida’s roofing code specifies a minimum underlayment weight of 15 pounds per 100 square feet for asphalt-saturated felt. This requirement ensures that the underlayment provides adequate protection against wind-driven rain.
3. Self-Adhering Underlayment
In areas with high wind speeds, self-adhering roof underlayment is often recommended or even required. This type of underlayment sticks to the roof deck, creating a secure seal that prevents water infiltration, even during severe storms.
4. Ice Barrier Requirements
In some parts of Florida, particularly in the northern regions, ice barrier underlayment may be necessary. This added layer helps prevent ice dam formation and water intrusion, which can lead to roof leaks and damage.
5. High Wind Zones
Florida is no stranger to high winds, especially during hurricane season. In high-wind zones, you may be required to use enhanced underlayment or install it with specific fastening methods to ensure it remains secure during storms.
How to Choose the Right Underlayment for Your Florida Home
Now that you know the basics of Florida’s roofing underlayment requirements, let’s discuss how to choose the right underlayment for your home in 6 steps.
1. Consult a Professional
Before making any decisions, it’s a good idea to consult with a roofing professional. They can assess your specific situation, taking into account factors like your location, roof type, and local building codes.
2. Consider Climate
Florida’s climate can vary greatly from north to south. Coastal areas may experience salt spray, while inland regions can be prone to extreme heat. Make sure your chosen underlayment is suitable for your specific climate conditions.
3. Think About Longevity
Investing in high-quality underlayment might cost more upfront, but it can save you money in the long run. Quality materials will last longer and provide better protection for your home.
4. Look for Local Approvals
Check if the underlayment you’re considering is approved by local building authorities. It’s essential to ensure your choice complies with Florida’s regulations.
5. Consider Self-Adhering Underlayment
In high-wind areas or hurricane-prone regions, self-adhering underlayment can provide an extra layer of protection. It adheres directly to the roof deck, reducing the risk of water infiltration.
6. Roof Slope Matters
The slope of your roof can influence the type of underlayment you need. Low-slope roofs may require different underlayment than steep-slope roofs.
💰Investing in Quality Roofing Underlayment 💰
When it comes to protecting your home in Florida, investing in quality roofing underlayment is a smart move. It’s an essential part of your roof’s defense against the elements and can save you money on repairs in the long run.
Benefits of Quality Underlayment
Below, we go over a few key benefits of investing in quality underlayment for your Florida roof.
- ✅Enhanced Durability: Quality underlayment can withstand the harsh Florida climate, ensuring your roof stays strong for years to come.
- ✅Better Energy Efficiency: Reflective underlayment can reduce your cooling costs by reflecting heat away from your home, keeping it cooler during hot Florida summers.
- ✅Peace of Mind: Knowing your home is protected by top-notch underlayment provides peace of mind, especially during hurricane season.
DIY vs. Professional Installation
While some homeowners may be inclined to tackle roofing projects themselves, installing roofing underlayment is a job best left to the professionals. Here’s why:
- 🛠️Safety: Roof work can be dangerous, especially for those without experience. Professionals have the training and equipment to work safely at heights.
- 🛠️Quality Installation: Proper underlayment installation is critical for its effectiveness. Professionals have the expertise to ensure it’s done right.
- 🛠️Warranty Considerations: Many roofing material warranties require professional installation to remain valid. DIY installations could void your warranty.
Keep Your Florida Home in Top-Notch Condition 🏠
Protecting your Florida home from the unpredictable weather conditions is a top priority for any homeowner. Understanding and meeting Florida’s roofing underlayment requirements is a significant step toward safeguarding your investment.
By choosing the right underlayment material, considering your climate, and consulting with professionals, you can ensure that your roof is up to the task of withstanding Florida’s heat, rain, and winds.
Investing in quality underlayment is not just a practical decision; it’s a long-term investment in the safety and longevity of your home. So, whether it’s the scorching sun or the next hurricane, your home will be ready to weather any storm.
Contact our expert team of roofers at Secured Roofing and Restorations today. We’ll make sure your home stands strong against the elements with an eye-catching and resilient roof!
8 Helpful Tips for Financing a Roof Replacement
Written by : Secured Roofing and Restorations
4 minutes read
When it comes to home improvements, few projects are as crucial as replacing your roof. However, the cost of a roof replacement can be substantial, making it essential to find suitable financing options. In this blog, we’ll share eight helpful tips to make financing your roof replacement a breeze.
Here’s what you’ll find in this blog:
- 8 great tips for snagging the best financing for your roofing project
- A variety of roof financing options for homeowners to consider
Keep reading to become an expert on financing your next roof replacement!
1. Get Multiple Quotes for Accurate Cost Estimates 📝

Before seeking financing, obtain multiple quotes from reputable roofing contractors. This step ensures you have an accurate estimate of your project’s cost.
2. Check Your Homeowner’s Insurance 🏡
Review your homeowner’s insurance policy to see if it covers roof replacements due to storm damage or other qualifying events. If your insurance covers it, the financial burden may be reduced.
3. Explore Roofing Financing Options 🏦
Roofing contractors often offer financing options or can recommend lenders. Explore these options to find terms that suit your budget.
4. Review Your Credit Score and Financial Health 📈
Lenders consider your credit score when determining loan eligibility and interest rates. Check your credit report for inaccuracies and work on improving your score if needed.
5. Compare Interest Rates and Loan Terms 📊
When considering financing options, compare interest rates, loan terms, and repayment schedules. Choose a loan that offers favorable terms and fits your budget.
6. Budget for Contingencies 💵
Roof replacements can uncover unexpected issues, such as structural damage or additional repairs. Budget for contingencies to avoid financial surprises.
7. Ask Questions and Seek Clarity 🤔
When discussing financing options with lenders or roofing contractors, don’t hesitate to ask questions and seek clarification about terms, fees, and repayment schedules.
8. Read the Fine Print and Contracts Carefully 🔎
Before signing any financing agreements or contracts, read the fine print carefully. Understand the terms, interest rates, and any penalties for early repayment.
Roof Financing Options to Consider
- Personal Savings: Using your personal savings is the most straightforward financing option. It doesn’t involve interest or monthly payments, but it might deplete your savings depending on the lump sum you take out.
- Home Equity Loan: A home equity loan allows you to borrow against the equity in your home, typically offering lower interest rates than personal loans or credit cards.
- Home Equity Line of Credit (HELOC): Similar to home equity loans, a HELOC provides a line of credit based on your home’s equity. You can withdraw funds as needed and pay interest only on the amount borrowed.
- Roofing Financing Programs: Many roofing contractors partner with financing companies to offer specialized loan programs for roof replacements. These loans often have competitive terms.
- Credit Cards: Using a credit card with a low-interest rate or a promotional 0% APR offer can be a quick financing solution. However, be mindful of high-interest rates once the promotional period ends.
- Personal Loans: Banks and online lenders may offer you a personal loan with a fixed interest rate. These loans are unsecured, meaning they don’t require collateral.
- Federal Housing Administration (FHA) Title I Loan: If you qualify, an FHA Title I loan can help finance home improvements, including roof replacements. These loans are backed by the government.
- Insurance Claim: If your roof damage is due to a qualifying event, such as a storm, your homeowner’s insurance may cover the cost of replacement.

Secure the Right Financing for a Worry-Free Roof Replacement 🔒
Financing a roof replacement doesn’t have to be a daunting task. By following these eight helpful tips, you can secure the right financing option for your project, ensuring a smooth and worry-free roof replacement process.
Remember to explore multiple financing options, review your credit health, and ask questions to make informed decisions about your roof replacement financing. With the right plan in place, you’ll not only protect your home but also your financial well-being.
Contact our pro roofing team at Secured Roofing and Restorations today for all your roofing needs. We’ll make sure your home is in top-notch shape with a solid roof over your head. Experience expert craftsmanship and competitive pricing from our talented roof professionals.
What Roof Hail Damage Looks Like & How to Spot It
Written by : Secured Roofing and Restorations
5 minutes read

Hailstorms can be a force of nature that leaves a lasting impact on your home, especially your roof. Even small-sized hail can cause significant damage that, if left unchecked, can lead to leaks and costly repairs. In this blog, we’ll take a closer look at what roof hail storm damage looks like and share tips on how to spot it early to protect your home.
Here’s what’s inside this blog:
- 5 telltale signs of roof hail damage
- Steps you should take after your roof gets hit by hail
- Tips + tricks for effectively identifying hail damage on your roof
Keep on reading to become an expert on spotting roof hail damage so you can keep your home safe and in pristine condition–even after the worst hail storm!
The 5 Telltale Signs of Roof Hail Damage 🕵️♂️
Roof hail damage isn’t always immediately visible from the ground, but there are specific signs to watch for.
1. Dented or Bruised Shingles
One of the most common indicators of hail damage is dented or bruised shingles. Hailstones can hit the shingles with enough force to cause impressions, making them look like dimples or bruises.
2. Granule Loss
Excessive granule loss is another red flag. Hail can dislodge the protective granules on shingles, leaving them vulnerable to further damage from UV rays and weathering.
3. Cracked or Split Shingles
Hail can crack or split shingles, compromising their ability to keep water out. These cracks may not be immediately visible but can lead to leaks over time.
4. Loose or Missing Shingles
In severe cases, hail can dislodge shingles entirely, leaving gaps in your roof’s protective layer. Missing shingles can lead to water infiltration and interior damage.
5. Dented Gutters and Downspouts
Don’t forget to inspect your gutters and downspouts. Hail can dent or damage these components, providing additional evidence of a hailstorm’s impact.
What to Do After a Hailstorm 🌩️
If you suspect your roof has sustained hail damage after a storm, here are some steps to take:
Safety First
Safety should always be your top priority. Wait until it’s safe to inspect your roof, and avoid going up there yourself. Leave roof inspections and repairs to professionals.
Document the Damage
Take photos of the hail damage as evidence for insurance claims. Capture clear images of dented, bruised, or missing shingles, as well as any damage to gutters and downspouts.
Contact Your Insurance Company
Report the hail damage to your insurance company promptly. They will guide you through the claims process and may send an adjuster to assess the damage.
Hire a Professional Roofing Contractor
Once you’ve reported the damage to your insurance company, it’s time to contact a professional roofing contractor. They can conduct a thorough inspection and provide an estimate for repairs.
How Hail Damage Can Affect Your Roof 💧
Hail damage, if left unaddressed, can have several adverse effects on your roof:
- Leakage: Dented, cracked, or split shingles can allow water to penetrate your roof, leading to interior damage, such as ceiling stains, mold growth, and structural issues.
- Reduced Lifespan: Hail damage can shorten your roof’s lifespan. Damaged shingles are more susceptible to wear and tear from the elements, meaning you may need a roof replacement sooner than expected.
- Energy Efficiency: Hail damage can affect your home’s energy efficiency. Cracked or missing shingles can lead to increased heat loss in the winter and reduced cooling efficiency in the summer.
- Home Value: A damaged roof can decrease your home’s resale value. Potential buyers may be wary of purchasing a home with known roof issues.
The Importance of Timely Repairs 🛠️
Timely repairs are crucial when it comes to hail damage. Here are 3 reasons why:
1. Prevent Further Damage
Addressing hail damage promptly prevents it from worsening over time. Small issues can become more significant and more expensive to fix if neglected.
2. Protect Your Home
Roof repairs safeguard your home’s structural integrity and interior. Preventing leaks and moisture intrusion is essential to avoid costly repairs down the line.
3. Insurance Coverage
Many insurance policies have time limits for reporting and filing hail damage claims. Failing to act promptly could result in your claim being denied.
Tips for Spotting Roof Hail Damage 🔍
- Ground Inspection: Start with a visual inspection from the ground. Use binoculars if necessary to get a closer look at your roof’s condition.
- Check for Dents and Bruises: Examine the shingles closely for dents and bruises. Look for areas with an uneven texture or small depressions.
- Inspect Gutters and Downspouts: Check your gutters and downspouts for signs of damage. Dents or dings in these components can indicate hail impact.
- Look for Granule Loss: Examine your yard, driveway, and sidewalk for loose granules from the shingles. Significant granule loss is a sign of hail damage.
- Schedule a Professional Inspection: If you suspect hail damage or are unsure about your roof’s condition, contact a professional roofing contractor for a comprehensive inspection.
Don’t Overlook Hail Damage 🌦️
Hailstorms can wreak havoc on your roof, causing damage that might not be immediately apparent. However, it’s essential to be proactive and diligent in inspecting your roof after a hailstorm, as timely repairs can prevent further issues and protect your home’s integrity.
If you suspect hail damage, document it, report it to your insurance company, and hire a professional roofing contractor to assess and address the damage promptly. By taking these steps, you’ll ensure your home remains safe and secure, even after the most unexpected storms.
Contact our pro roofing team at Secured Roofing and Restorations today for all your roofing needs. We’ll make sure your home is in top-notch shape with a solid roof over your head. Experience expert craftsmanship and competitive pricing from our talented roof professionals.
Top 6 Certainteed Shingle Colors for Your Roof
Written by : Secured Roofing and Restorations
5 minutes read
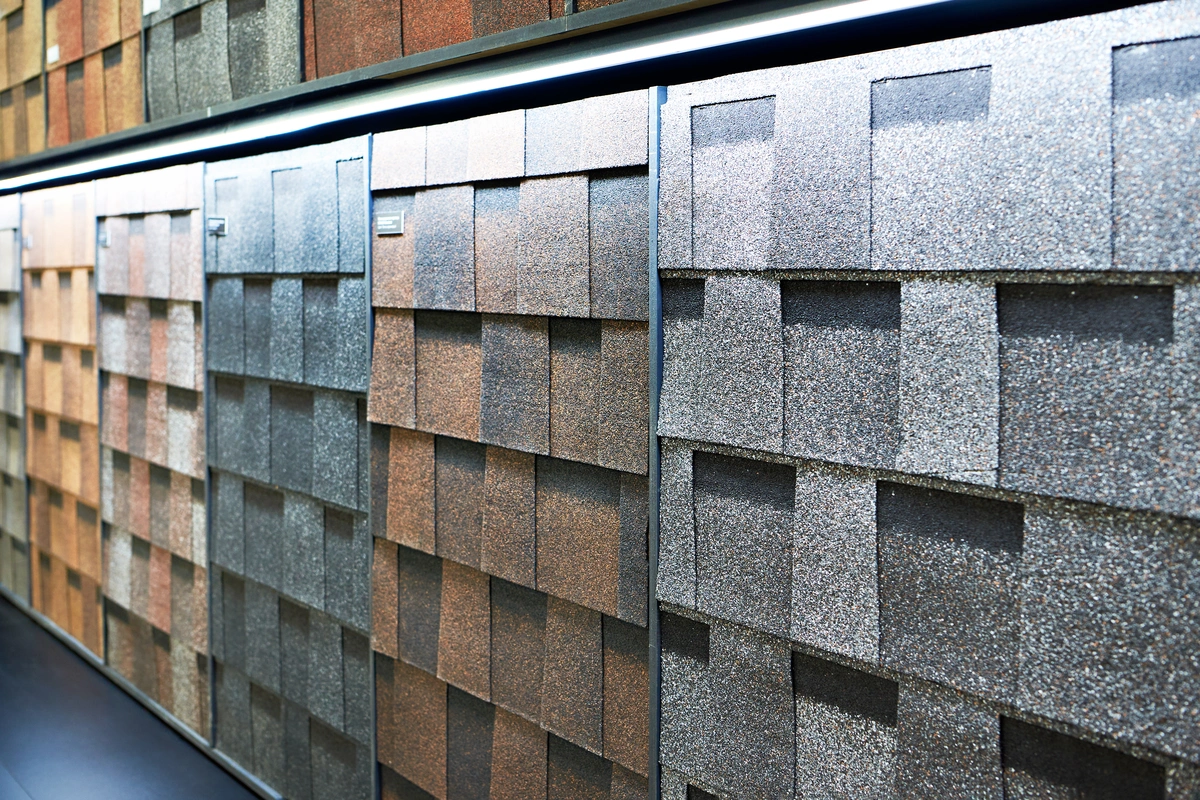
When it’s time to choose a new roof or replace your existing one, picking the right shingle color can be a game-changer for your home’s overall look and curb appeal. Certainteed, a well-known roofing manufacturer, offers a wide range of shingle colors to suit different architectural styles and personal preferences.
In this blog, we’ll explore six popular Certainteed shingle colors that can elevate the appearance of your home for your next roofing project. Time to replace your old shingles and boost your home’s aesthetic.
Inside this article:
- 6 awesome colors to choose from for your Certainteed shingles
- Tips + tricks for selecting the right shingle color for your home
Ready to learn everything you need to know about the best Certainteed shingle colors and how to choose the right one for your home? Start scrollin’!
1. Landmark Moire Black

- Elegance and Timelessness: Moire Black exudes a classic, elegant charm that never goes out of style. It complements various home styles, from traditional to modern, and adds a touch of sophistication to any residence.
- Versatile Aesthetics: These deep black landmark shingles pair beautifully with almost any exterior color palette, allowing you to experiment with different architectural accents and landscaping choices.
2. Landmark Weathered Wood
- Natural Beauty: Weathered Wood Certainteed shingles capture the essence of weathered cedar, creating a warm, rustic appearance reminiscent of natural wood. They bring a cozy, inviting feel to your home.
- Blends Seamlessly: This shingle color seamlessly integrates with earthy tones, greens, and neutral palettes, making it a versatile choice for a wide range of architectural styles.
3. Landmark Colonial Slate
- Timeless Appeal: Colonial Slate offers a timeless, dignified appearance that resonates with the classic architecture of colonial homes. It exudes a sense of stately elegance.
- Ideal Complement: Pair Colonial Slate with white or cream-colored exteriors to create a striking contrast and give your home a regal aesthetic.
4. Landmark Driftwood
- Coastal Inspiration: Driftwood evokes the tranquility of coastal living with its soft, sandy hues and weathered charm. It’s perfect for homes by the beach or those seeking a coastal vibe.
- Blend with Blues: This shingle color pairs harmoniously with blue and gray exterior accents, creating a beachy atmosphere that feels like a year-round vacation.
5. Landmark Heather Blend
- Warm and Welcoming: Heather Blend offers a warm, inviting appearance with its blend of earthy tones and soft pinks. It imparts a sense of comfort and coziness to your home.
- Harmonizes with Nature: This color choice complements homes nestled in lush, green surroundings, as it mirrors the natural hues of foliage and flowers.
6. Landmark Resawn Shake
- Rustic Charm: Resawn Shake replicates the look of hand-split cedar shakes, giving your home a charming, rustic character. It’s an excellent choice for cottages and cabins.
- Natural Affinity: This shingle color pairs effortlessly with natural wood elements, stone accents, and forest-inspired landscaping, enhancing the overall woodland aesthetic.
Tips for Choosing the Right Shingle Color 🎨
Now that you have a better idea of the color options you can choose from when it comes to Certainteed roofing materials, let’s go over how to pick the best asphalt shingles color for your roof.
Consider Your Home’s Style
Think about your home’s architectural style and roof shingles and choose a color that complements it. Traditional, modern, colonial, or coastal, your choice should align with your home’s personality.
Examine Exterior Colors
Take a close look at your home’s exterior colors, including siding, trim, and accents. Your shingle color should harmonize with these existing elements.
Curb Appeal
Keep curb appeal in mind. Opt for a color that enhances your home’s overall visual appeal and boosts its resale value.
Climate Considerations
Consider your climate. Light-colored shingles can reflect more sunlight and heat, potentially reducing cooling costs in hot climates, while darker shades can absorb heat and provide warmth in colder regions.
Neighborhood Aesthetics
While you want your home to stand out, it’s also essential to blend in with the neighborhood’s aesthetic. Choose a shingle color that’s consistent with the surrounding homes.
Personal Preference
Ultimately, trust your personal taste. Your home should reflect your unique style and preferences. After all, it’s your sanctuary.
Transform Your Roof, Elevate Your Home 🏠
Selecting the right shingle color can transform your roof from a functional necessity into a standout feature of your home’s exterior. Certainteed offers a spectrum of beautiful shingle colors to suit various architectural styles and homeowner preferences.
Whether you opt for the classic elegance of Moire Black or the coastal vibes of Driftwood, your choice can significantly impact your home’s curb appeal and overall aesthetic. So, take your time, explore your options, and choose the Certainteed shingle color that will elevate your home to new heights of beauty and charm.
Contact our pro roofing team at Secured Roofing and Restorations today for all your roofing needs. We’ll make sure your home is in top-notch shape with a solid roof over your head. Experience expert craftsmanship and competitive pricing from our talented roof professionals.