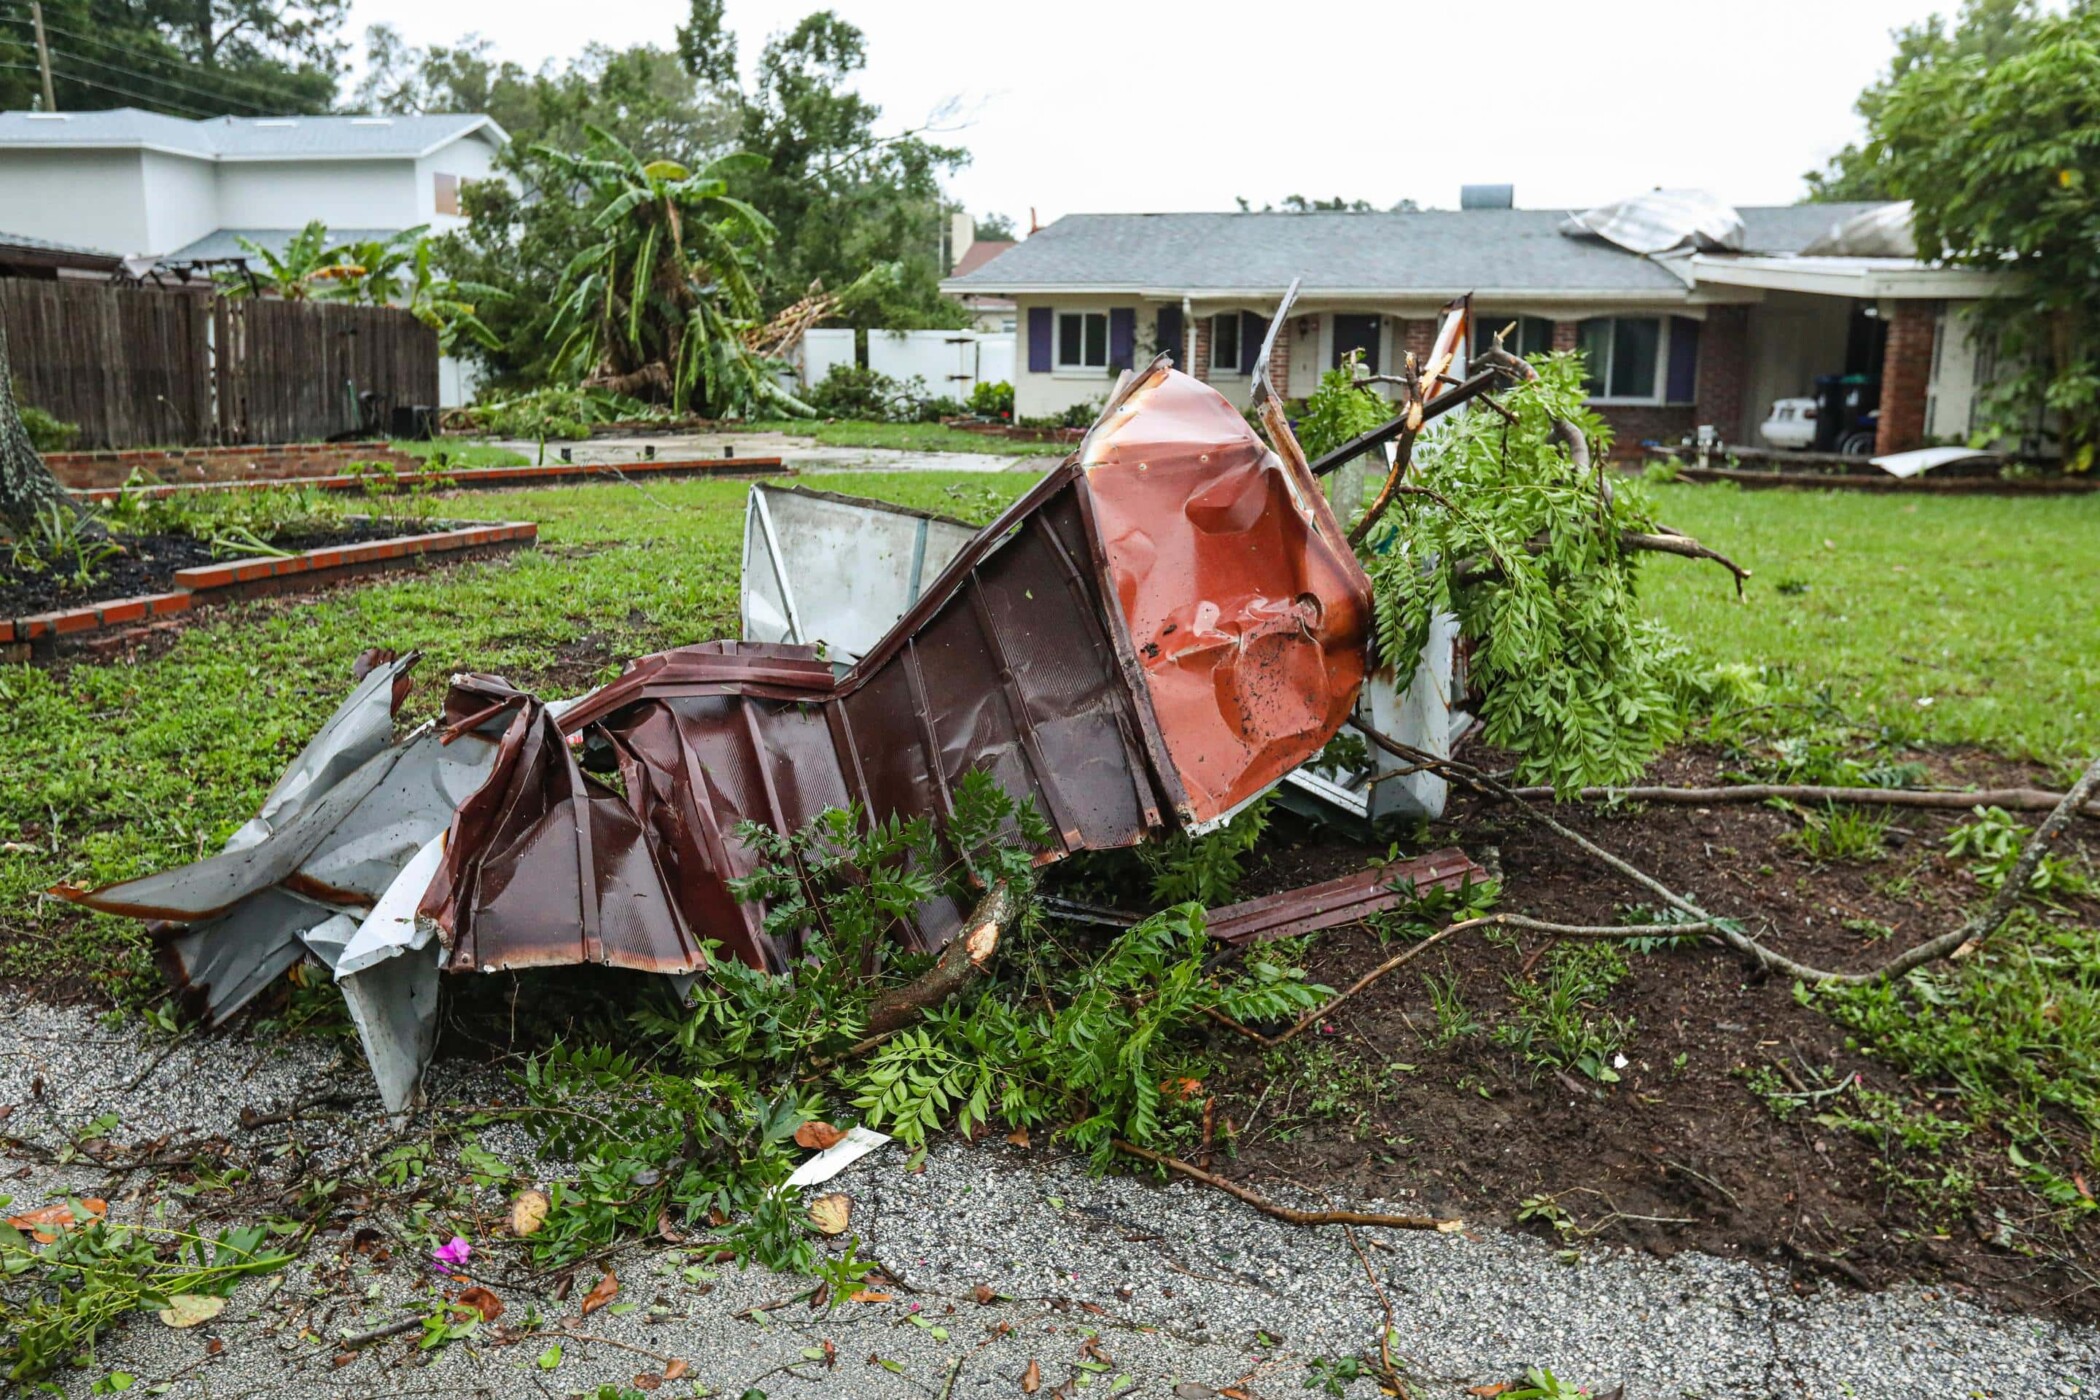
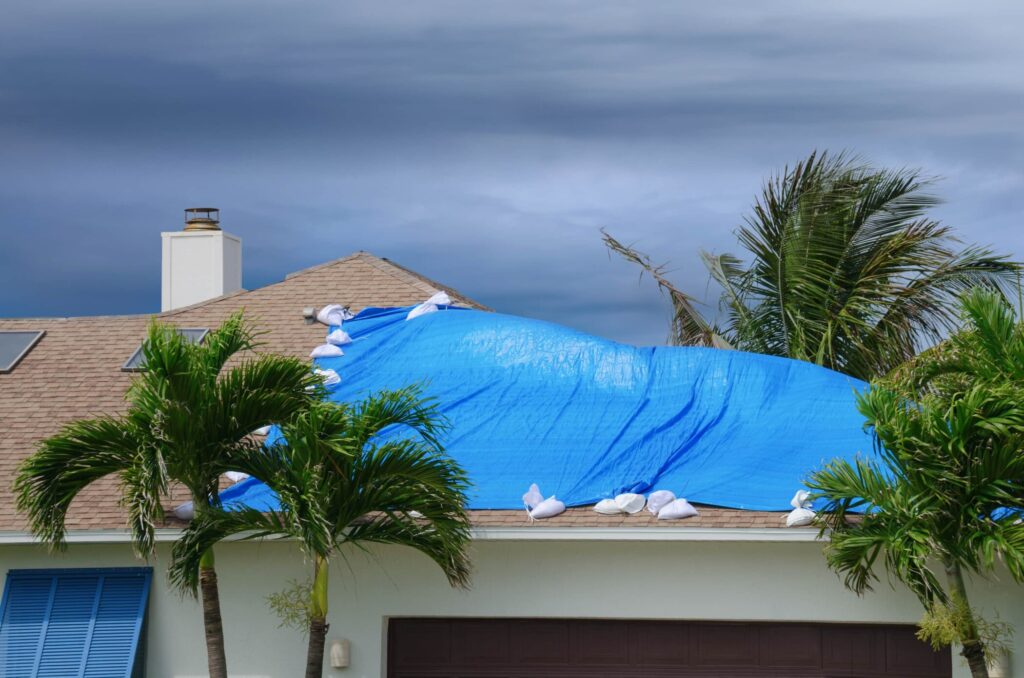
Storm Damage
How To Find A Roof Leak? (Signs, Repair and More)


A leaking roof is every homeowner’s nightmare. Not only can it cause significant water damage, but it can also lead to mold growth and structural issues if left unchecked. Fortunately, identifying and repairing a roof leak doesn’t have to be an ordeal. This guide will walk you through how to find a roof leak and provide valuable insights to help keep your home secure, including:
- Identifying the signs of a roof leak
- How to locate a roof leak in 7 steps
- The best methods for temporary and permanent repairs
- Preventative measures to avoid future leaks
🔎 Identifying the Signs of a Roof Leak
Identifying the signs of a roof leak is crucial for preventing extensive damage to your home. Early detection can save you from costly repairs and maintain the integrity of your property.
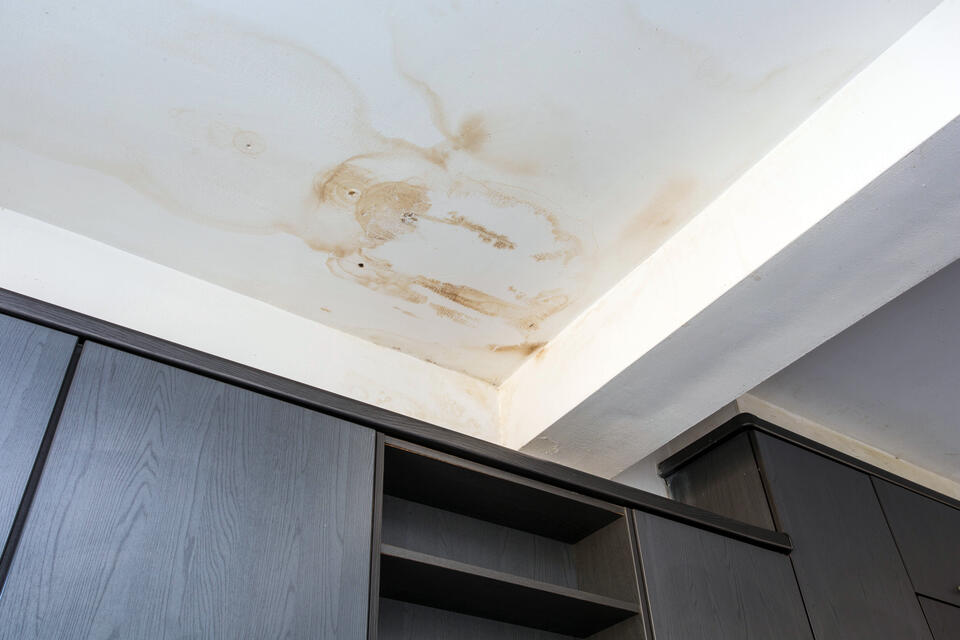
- Subtle Indicators of a Hidden Problem: Roof leaks don’t always make themselves immediately obvious. In fact, the first signs of a problem are often subtle. You might notice water stains on your ceiling or walls, or detect a musty odor in certain rooms—these can all indicate a hidden leak. Furthermore, peeling paint or wallpaper can also serve as early warning signals that something is amiss above.
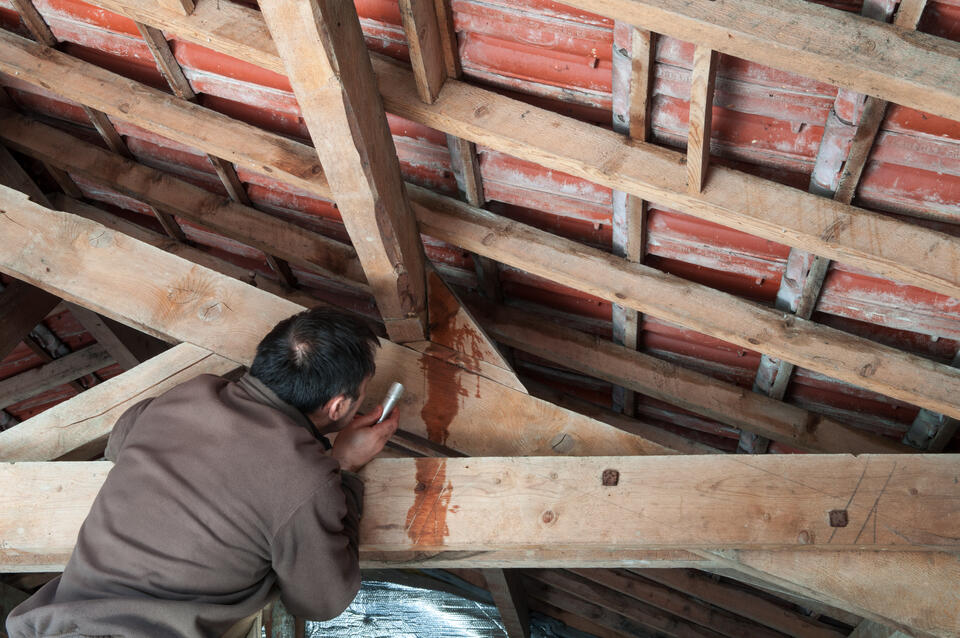
- Inspecting Your Attic for Clues: Your attic is often the best place to start when searching for a roof leak. During a rainy day, grab a flashlight and head up to look for drips or wet spots. Pay close attention to seams in the roofing structure and areas where different materials meet. Mold or mildew growth in the attic is another red flag that moisture is making its way inside.
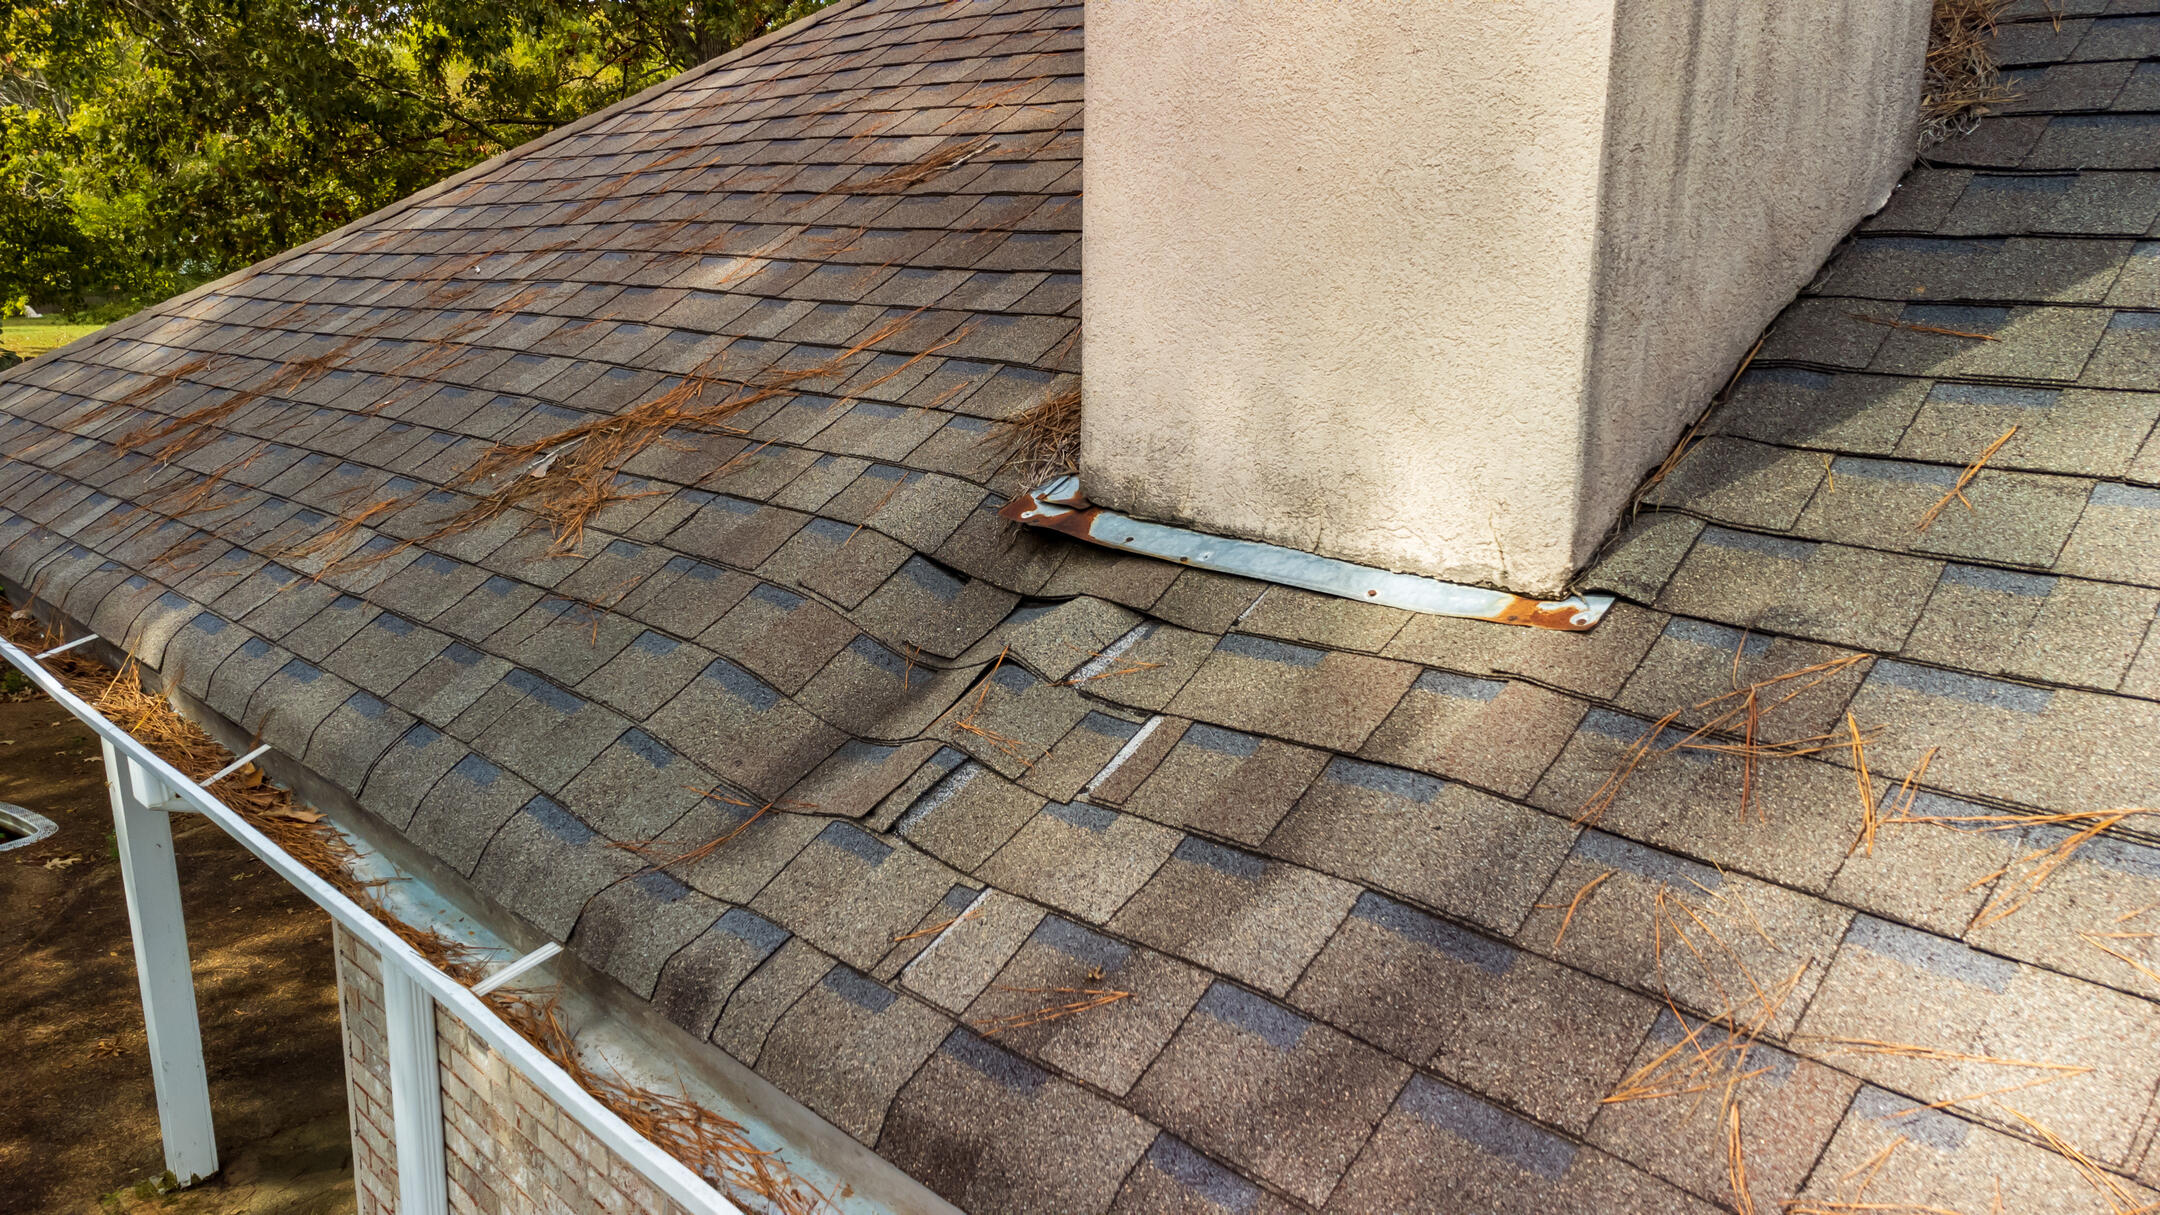
- Outdoor Warning Signs: Sometimes, the clues to finding a roof leak are right there on your rooftop. Damaged, curled, or missing shingles can act as a gateway for water entry. Check for any broken flashing or worn-out seals around chimneys and vents, as these are notorious weak points. Additionally, clogged gutters can lead to water pooling and seeping under your roof’s protective layers.
💧 How to Locate a Roof Leak in 7 Steps
Locating a roof leak promptly is crucial to prevent further damage to your home, which can lead to costly repairs and compromised structural integrity. Timely detection also helps maintain a healthy living environment by avoiding mold growth and water damage.
1. Start Indoors
Begin your search inside your home. Use a flashlight to check for any dark or damp spots on ceilings and walls. Pay special attention to areas around chimneys, skylights, and vents, as these are common leak entry points. If you notice any stains or peeling paint, it’s a sign that water is getting through. Make sure to inspect the corners of rooms and look for signs of water pooling or drips.
2. Move to the Attic
Once you’ve checked indoors, head up to the attic. This area often gives you the best view of potential leaks. Look for wet insulation or exposed wood that appears darker than surrounding material, indicating moisture presence. Check for any signs of mold or mildew as well, as these can signify ongoing moisture issues. If you see a water stain on the underside of the roof deck, trace it back to find the source.
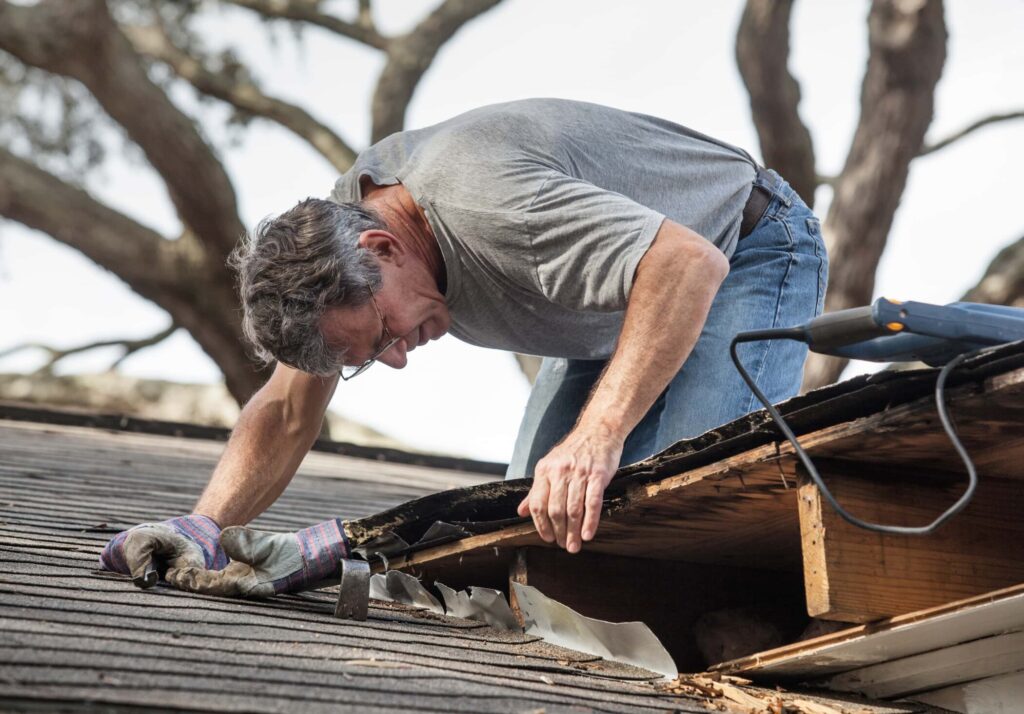
3. Inspect the Roof Surface
From the safety of a ladder, carefully examine your roof for any visible damage to shingles or flashing. Look for missing, cracked, or curled shingles that could allow water to penetrate. Pay attention to areas where different materials meet, such as where the roof meets the chimney or walls, as these seams can be weak points. If you notice any debris, such as leaves or branches, clear them away to prevent water backup.
4. Use a Hose
If possible, have someone assist you by spraying the roof with a hose while you watch inside the attic for any incoming water. Start at the lowest point of the roof and work your way up, allowing time for water to trickle down before checking for leaks. This method can help you pinpoint the exact location of a leak. Make sure to inspect any suspect areas thoroughly while the water is running.
5. Look for Overflow Marks
Finally, check the gutters and downspouts for overflow marks, which signal improper drainage and potential leaks. Clean out any debris that may be blocking the flow of water, as clogged gutters can cause water to back up and seep into your roof. Inspect the downspouts to ensure they are directing water away from the foundation of your home. If you find signs of overflow, consider installing or repairing gutter guards to prevent future issues.
6. Utilizing Technology for Detection
Modern technology offers tools to help homeowners find leaks without climbing onto dangerous rooftops. Infrared cameras detect temperature differences and can highlight moisture-laden areas. Similarly, drone inspections can safely provide aerial views to identify problematic spots without risking personal injury.
7. Don’t Overlook Flashing and Sealants
Flashing and sealants are critical components that protect against water infiltration. Over time, they can degrade or become dislodged. Thoroughly inspect these elements, particularly around skylights, chimneys, and vents. Repairing or replacing damaged flashing might be all it takes to stop that pesky leak.
🛠️ The Best Methods for Temporary and Permanent Repairs
Understanding the best methods for both temporary and permanent repairs is crucial for addressing roof leaks, as it helps prevent further damage to your home. Quick temporary fixes can provide immediate protection, while permanent solutions ensure long-term durability and peace of mind.
Quick Fixes to Stop the Drip
If you’re in a pinch, there are temporary solutions to halt leaks until professional help arrives. Roofing tape and tar can provide a short-term seal over small leaks. Additionally, plastic sheeting or waterproof tarps can be used to cover larger areas during heavy rain.
Tackling Permanent Repairs
For long-lasting results, proper repair involves addressing the root cause of the leak. Replacing damaged shingles or tiles is essential. In cases where flashing is the culprit, new flashing or sealant application is necessary. Always ensure that repairs match the existing roofing material for optimal protection and aesthetic consistency.
The Importance of Professional Help
While DIY fixes can be effective, calling in professionals ensures that the job is done thoroughly. Expert roofers possess the experience and equipment to accurately diagnose and address leaks, often spotting issues invisible to the untrained eye. Their work typically comes with a warranty, offering peace of mind and protection for your home.
🛑 Preventative Measures to Avoid Future Leaks
Implementing preventative measures to avoid future leaks is crucial for protecting infrastructure and resources. By proactively addressing potential issues, we can save on costly repairs and minimize disruptions while ensuring the integrity of systems and safety of individuals.
- Regular Roof Inspections: Prevention is key to avoiding costly repairs. Schedule routine inspections with a trusted roofing company to identify potential issues before they become serious problems. Many recommend biannual checkups, ideally in spring and fall.
- Gutter Maintenance: Keep your gutters clean and free-flowing. Blocked gutters can cause water to pool and damage the roof edge, eventually leading to leaks. During fall, clear away leaves and debris, and consider installing gutter guards to prevent blockages year-round.
- Trim Overhanging Branches: Tree limbs can cause significant damage during storms, so it’s crucial to keep branches trimmed back from your roof. Not only can they break and fall, but they also provide pathways for squirrels and other critters to access your roof and create potential entry points for water.
🙌 Expert Solutions for Roof Leaks with Secured Roofing and Restorations
Finding and repairing a roof leak requires diligence, attention to detail, and occasionally, professional intervention. By understanding the signs of a leak and knowing how to address them quickly, homeowners can protect their property and maintain its value.
At Secured Roofing and Restorations, we understand the stress leaks can cause. Our team of dedicated experts provides comprehensive roofing solutions that are both efficient and reliable. We pride ourselves on our fast turnaround times and exceptional customer service, ensuring your home remains secure no matter the weather. Whether it’s a minor repair or a complete roof replacement, we’re here to help. For personalized advice or to schedule an inspection, contact us today. Protect your investment with Central Florida’s most trusted roofing partner.
What Do Curling Shingles Mean For Your Roof?
Curling shingles are often the first sign of trouble brewing above your head. For homeowners, understanding what curling shingles indicate is vital for maintaining the integrity and longevity of your roof. In this guide, we’ll explore everything you need to know about curling shingles and why addressing them promptly is crucial. Here’s what we’ll cover:
- Understanding curling shingles
- 8 things you should know about curling shingles
- FAQs
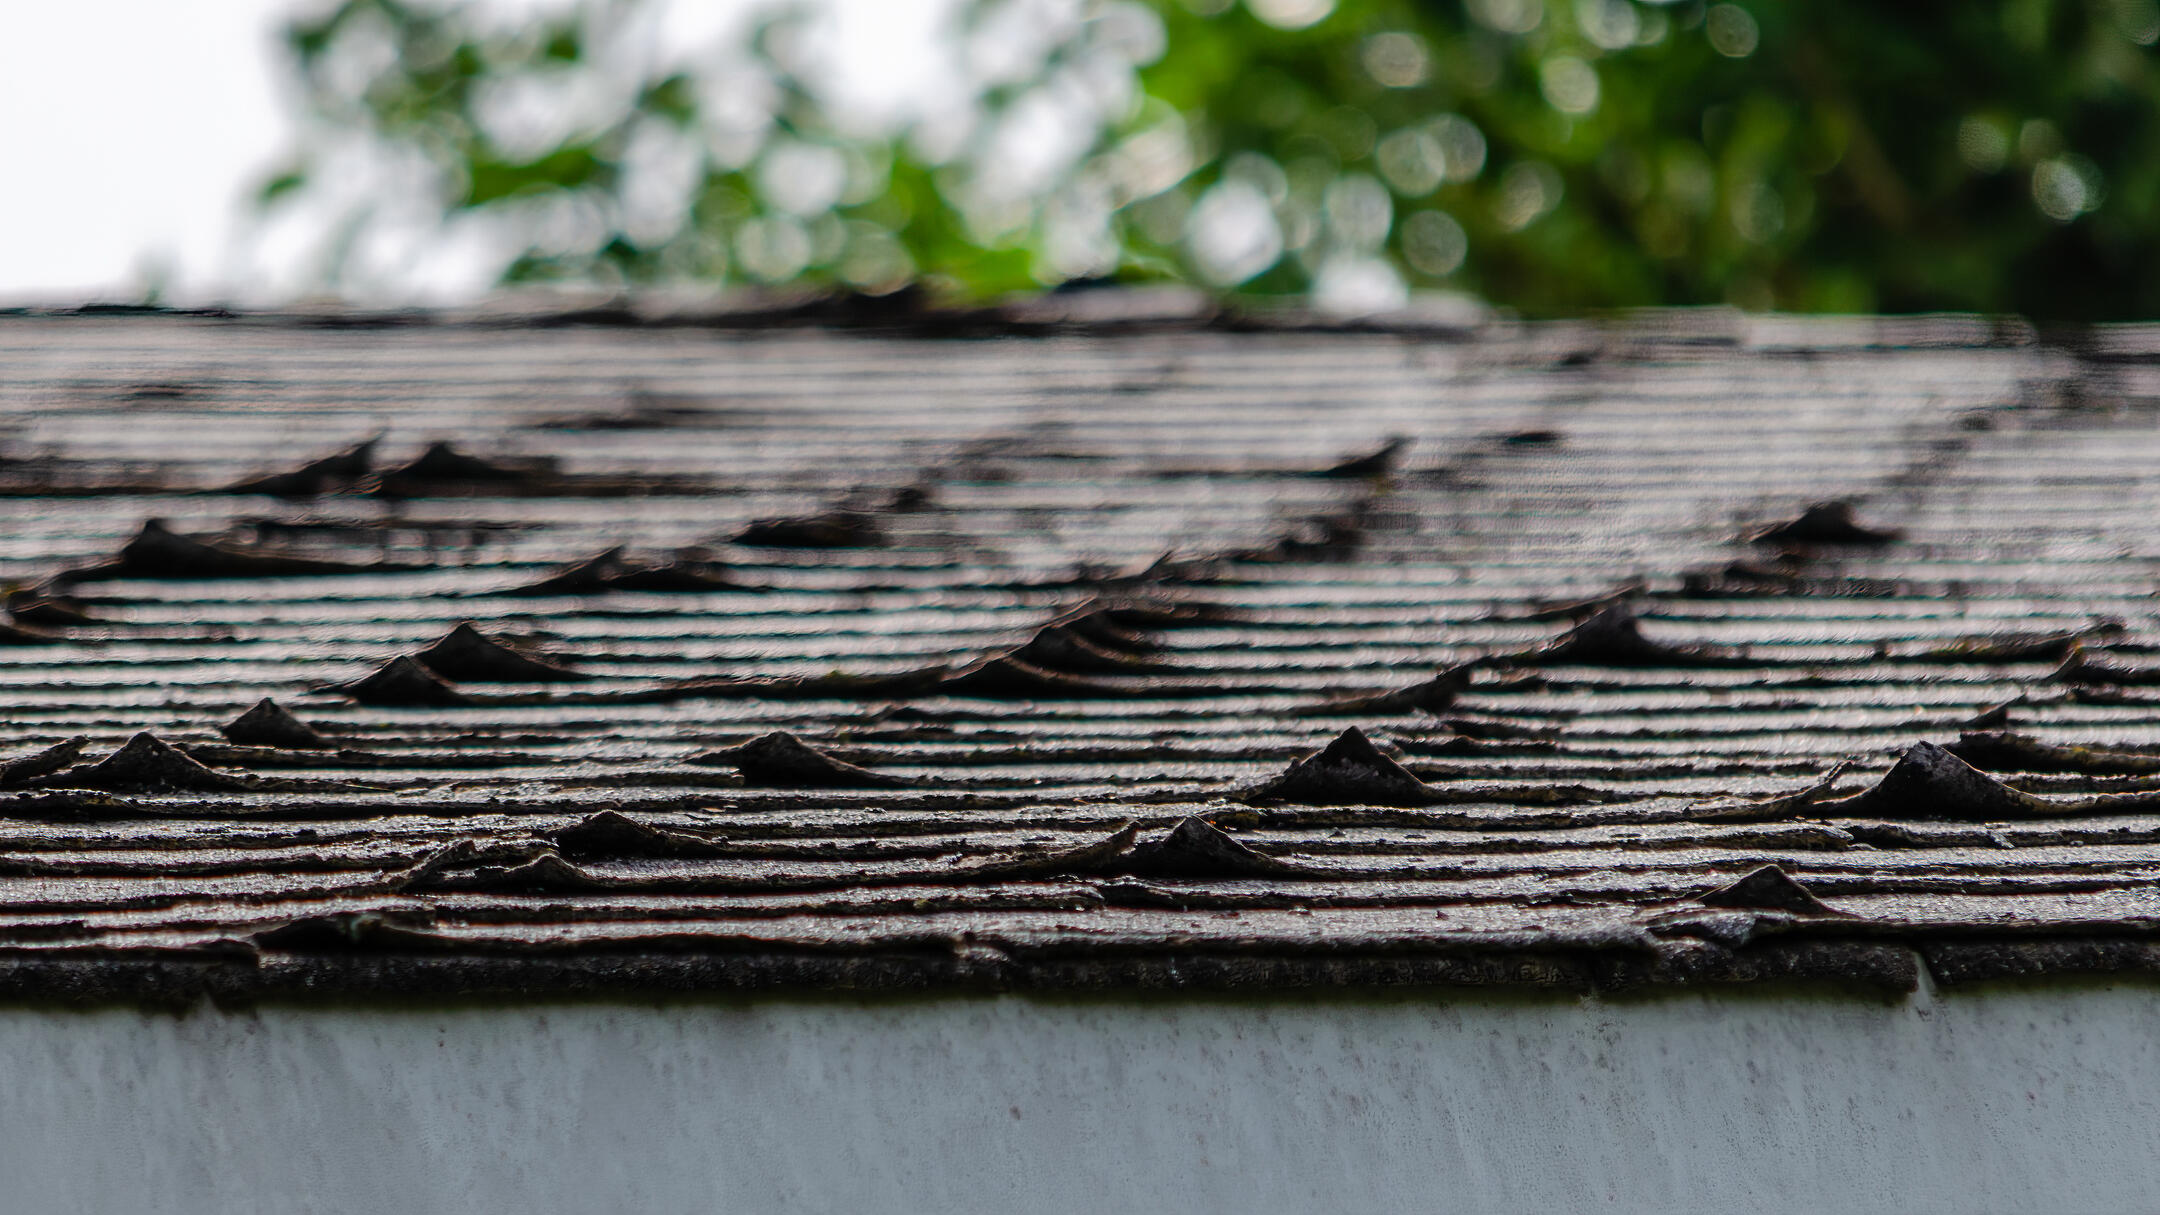
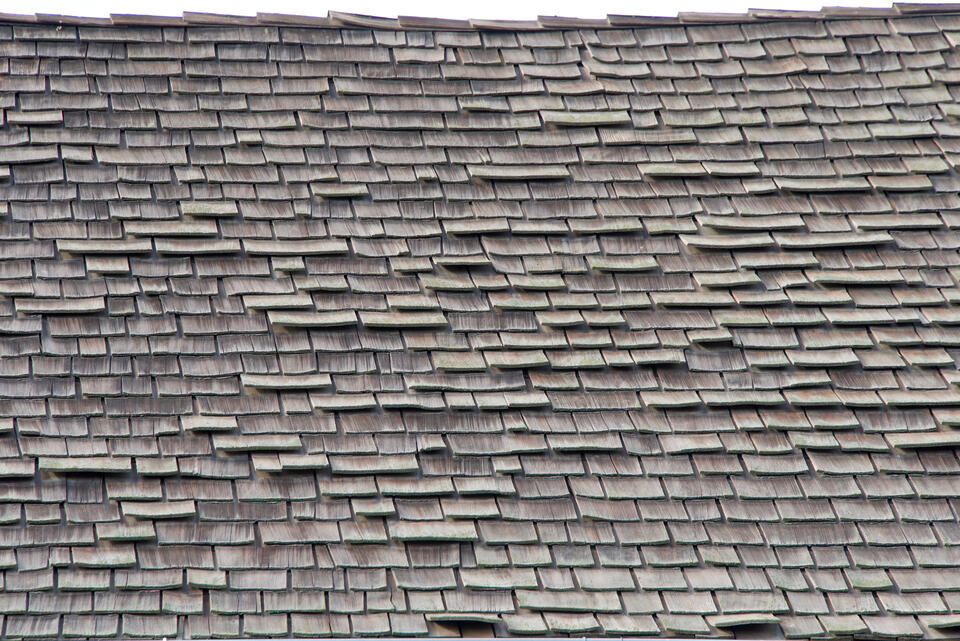
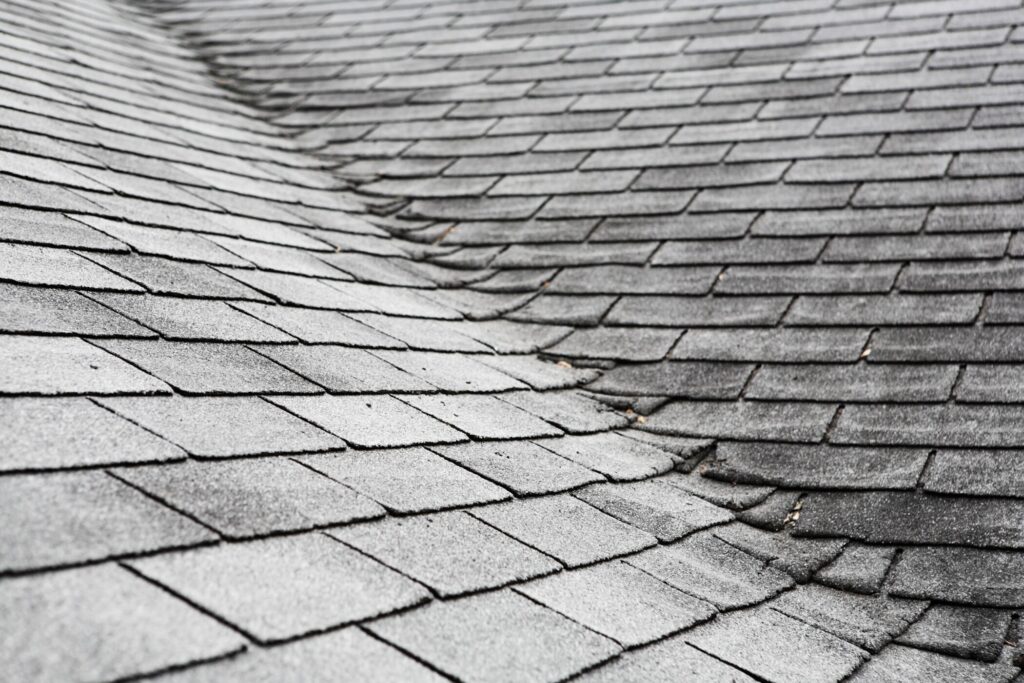
🤔 Understanding Curling Shingles

Curling shingles are a common issue in many homes, but not everyone knows what they are. Simply put, curling occurs when the edges of asphalt shingles turn upward or downward, which can lead to potential leaks and other roofing problems.
Key points to consider:
- Causes of Curling: Environmental factors and the natural aging process weaken shingles over time.
- Impact: Curled shingles may no longer provide adequate protection against the elements, increasing vulnerability to water damage.
- Early Recognition: Identifying curling shingles early can prevent more significant issues later on.
It’s essential to perform regular roof inspections, especially after severe weather events, to spot any early signs of curling or other damage.
💡 8 Things You Should Know About Curling Shingles
Understanding curling shingles is crucial for maintaining the integrity of your roof and preventing potential leaks or damage. Recognizing the signs early can save homeowners from costly repairs and extend the lifespan of their roofing system.
1. Causes of Curling Shingles
Shingles can curl for a variety of reasons, each of which compromises your roof’s integrity:
Improper Installation: Incorrect installation is one of the leading causes of curled shingles. If shingles are not nailed down correctly or if the wrong type of shingle is used for your roof’s pitch, curling is likely to occur.
Ventilation Issues: Poor attic ventilation can cause excessive heat and moisture to build up under the shingles, accelerating the aging process and causing them to curl.
Weather Conditions: Extreme weather conditions, such as heavy rain, snow, or intense sun, can cause shingles to expand and contract, leading to curling over time.
2. Signs Your Shingles are Curling
Detecting curling shingles early can prevent costly repairs. Here are some signs to look out for:
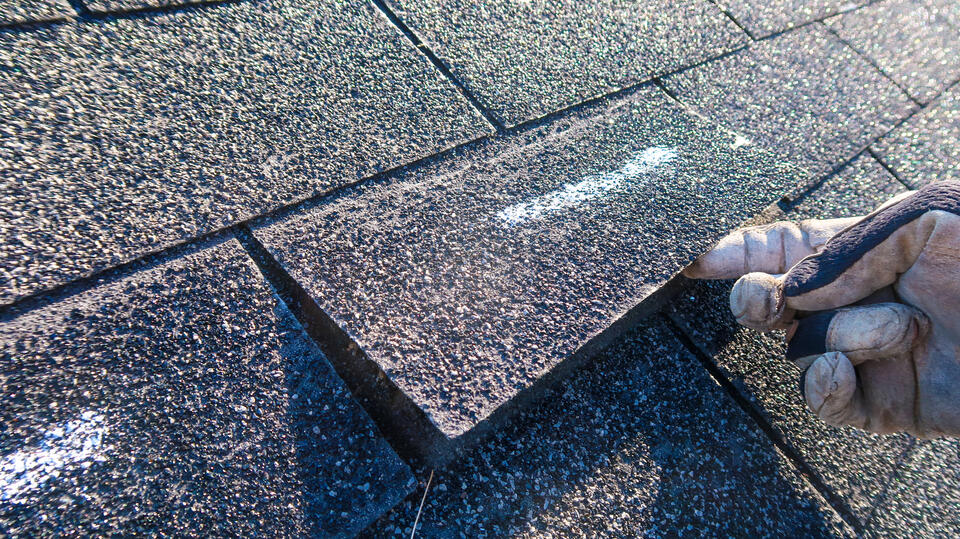
Curled Edges: If you notice that the edges of your shingles are lifting away from the roof, it’s a clear sign of curling.
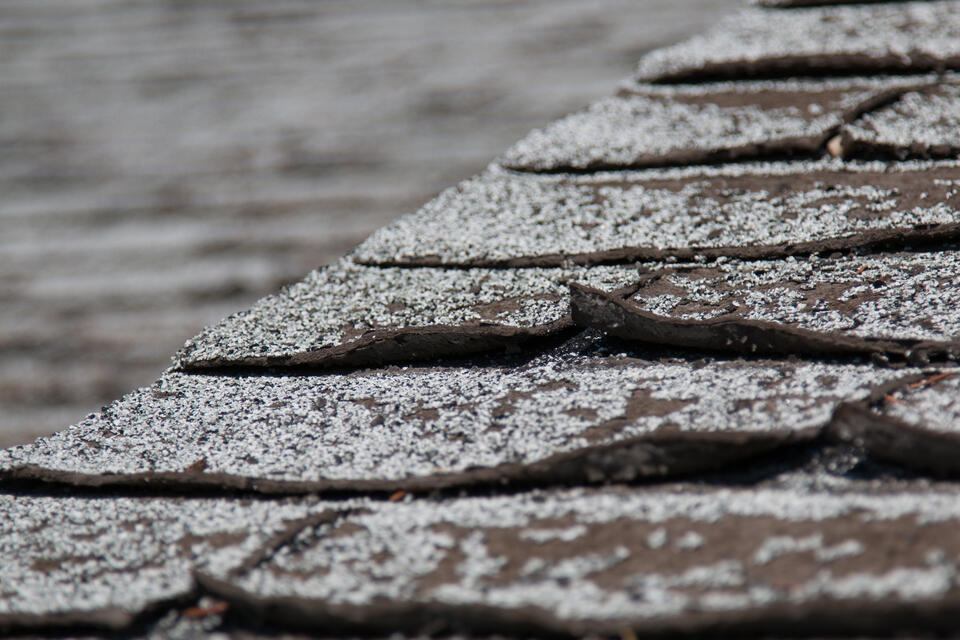
Missing Granules: Shingles losing granules will appear bare in spots, often preceding curling as the protective coating is compromised.
Shingle Breakage: Brittle shingles that break easily may have started to curl, weakening the overall structure of your roof.
3. Potential Damages from Curling Shingles
Ignoring curling shingles can lead to several severe issues:
Water Damage: When shingles curl, they can no longer effectively repel water, leading to leaks and potential water damage to your home’s interior.
Energy Efficiency Loss: Compromised shingles can affect your home’s insulation, leading to higher heating and cooling costs.
Decreased Home Value: A roof with visible damage like curling shingles can lower your property’s value, making it less attractive to potential buyers.
4. How to Prevent Shingle Curling
Preventing shingle curling requires proactive maintenance:
Regular Inspections: Schedule regular roof inspections to catch early signs of damage before they worsen.
Proper Ventilation: Ensure your attic is well-ventilated to prevent heat and moisture buildup that leads to curling.
Quality Materials: Invest in high-quality shingles and professional installation to reduce the likelihood of curling.
5. Repair vs. Replacement
When facing curling shingles, homeowners often ask whether they should repair or replace their roof:
Repair: Small areas of curling can often be addressed with targeted repairs, extending the life of your roof temporarily.
Replacement: If a significant portion of your roof is affected, or if the curling is severe, replacing the entire roof may be more cost-effective in the long run.
6. DIY Fixes vs. Professional Help
While some homeowners may be tempted to address curling shingles on their own, it’s essential to weigh the pros and cons:
DIY Fixes: Minor curling can sometimes be fixed with DIY methods, but these are often temporary solutions that may not address the underlying issues.
Professional Help: Hiring a professional ensures that repairs are done correctly and safely, preventing further damage and prolonging the life of your roof.
7. Choosing the Right Shingle Material
Selecting the appropriate shingle material can prevent future curling and enhance your roof’s durability:
Asphalt Shingles: Affordable and versatile, asphalt shingles are a popular choice, but quality and installation are key to preventing curling.
Metal Shingles: Metal shingles offer excellent durability and resistance to curling, although they come at a higher initial cost.
Composite Shingles: These can mimic the look of wood or slate without the associated curling issues, offering a balance between aesthetics and functionality.
8. Climate Considerations for Roofing
Different climates present unique challenges for roofing materials:
Hot Climates: In areas with intense heat, shingles can expand and contract, leading to curling. Opt for materials designed to withstand high temperatures.
Cold Climates: Cold weather can cause shingles to become brittle and curl. Insulation and heating considerations are crucial in these regions.
Humid Climates: Moisture buildup in humid areas can lead to shingle curling. Proper ventilation and moisture-resistant materials are recommended.
❓ FAQs
Addressing common questions can help homeowners better care for their shingles:
Q: How often should I inspect my roof?
It’s advisable to inspect your roof at least twice a year and after major storms to catch any damage early.
Q: What are the signs of shingle damage?
Look for curling, missing granules, or visible wear and tear as indicators of potential problems.
Q: Can I repair curling shingles myself?
While minor repairs are possible, professional evaluation is recommended to ensure comprehensive solutions.
🙌 Protect Your Home with Secured Roofing and Restorations
At Secured Roofing and Restorations, we understand that your home is your sanctuary, and a sturdy roof is vital for its protection. Our team is committed to providing high-quality roofing solutions tailored to your specific needs.
With our extensive experience in Central Florida, we know the unique challenges homeowners face, from intense sun exposure to sudden storms. Whether you need routine maintenance, targeted repairs, or a complete roof replacement, we offer prompt, reliable service to keep your home safe and secure. Don’t wait for more significant issues to arise—reach out to Secured Roofing and Restorations today for a complimentary inspection and consultation. Our experts are here to help you find the best solution for your roofing needs. By choosing Secured Roofing and Restorations, you’re not just getting a service; you’re gaining a partner dedicated to safeguarding your home for years to come.
Storm Damage Roof Inspection: What To Expect?
When storm clouds gather, the worry about potential damage to your home can be overwhelming. For homeowners, one of the most critical concerns is the roof. It’s your first line of defense against the elements, so ensuring it’s in top condition is essential. This comprehensive guide will walk you through the essentials of storm damage roof inspections, including:
- Understanding the importance of a storm damage roof inspection
- Recognizing signs of roof damage
- What to do if you find damage
- How Secured Roofing and Restorations can help
🤔 Why a Storm Damage Roof Inspection is Crucial
Taking the time to inspect your roof after a storm can save you from costly repairs down the line. Storms can cause hidden damage that, if left unchecked, can lead to leaks, structural issues, and even mold growth.
- Preventing Further Damage: One of the primary reasons to inspect your roof after a storm is to prevent further damage. Small issues can quickly escalate into major problems if not addressed promptly.
- Protecting Your Investment: Your home is likely your most significant investment. Regular inspections help protect this investment by ensuring that any damage is identified and repaired quickly.
- Ensuring Safety: A damaged roof can pose a significant safety risk. Loose shingles or structural damage can lead to accidents. An inspection ensures that any hazards are identified and fixed.
The Inspection Process
A thorough storm damage roof inspection involves several key steps. Understanding this process can help you know what to expect.
Initial Assessment
Begin with a thorough visual inspection from the ground level. Look for obvious signs of damage, such as missing shingles, visible holes, or any sagging areas that may indicate underlying issues. This initial check helps identify potential problems without needing to access the roof directly.
Closer Examination
For a more comprehensive assessment, it’s important to get on the roof if you feel safe doing so. Carefully inspect the surface for any signs of damage, such as cracked or curled shingles, rusted flashing, or leaks. If you’re unsure or uncomfortable, it’s wise to hire a professional who has the experience and safety equipment to conduct a detailed inspection.
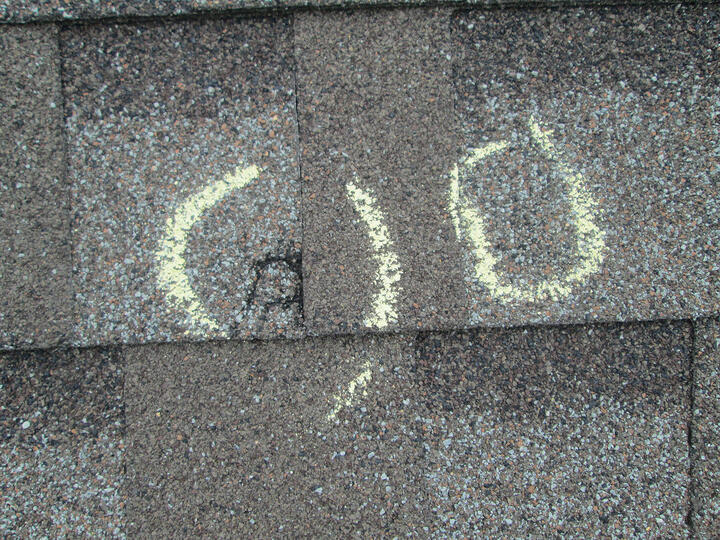
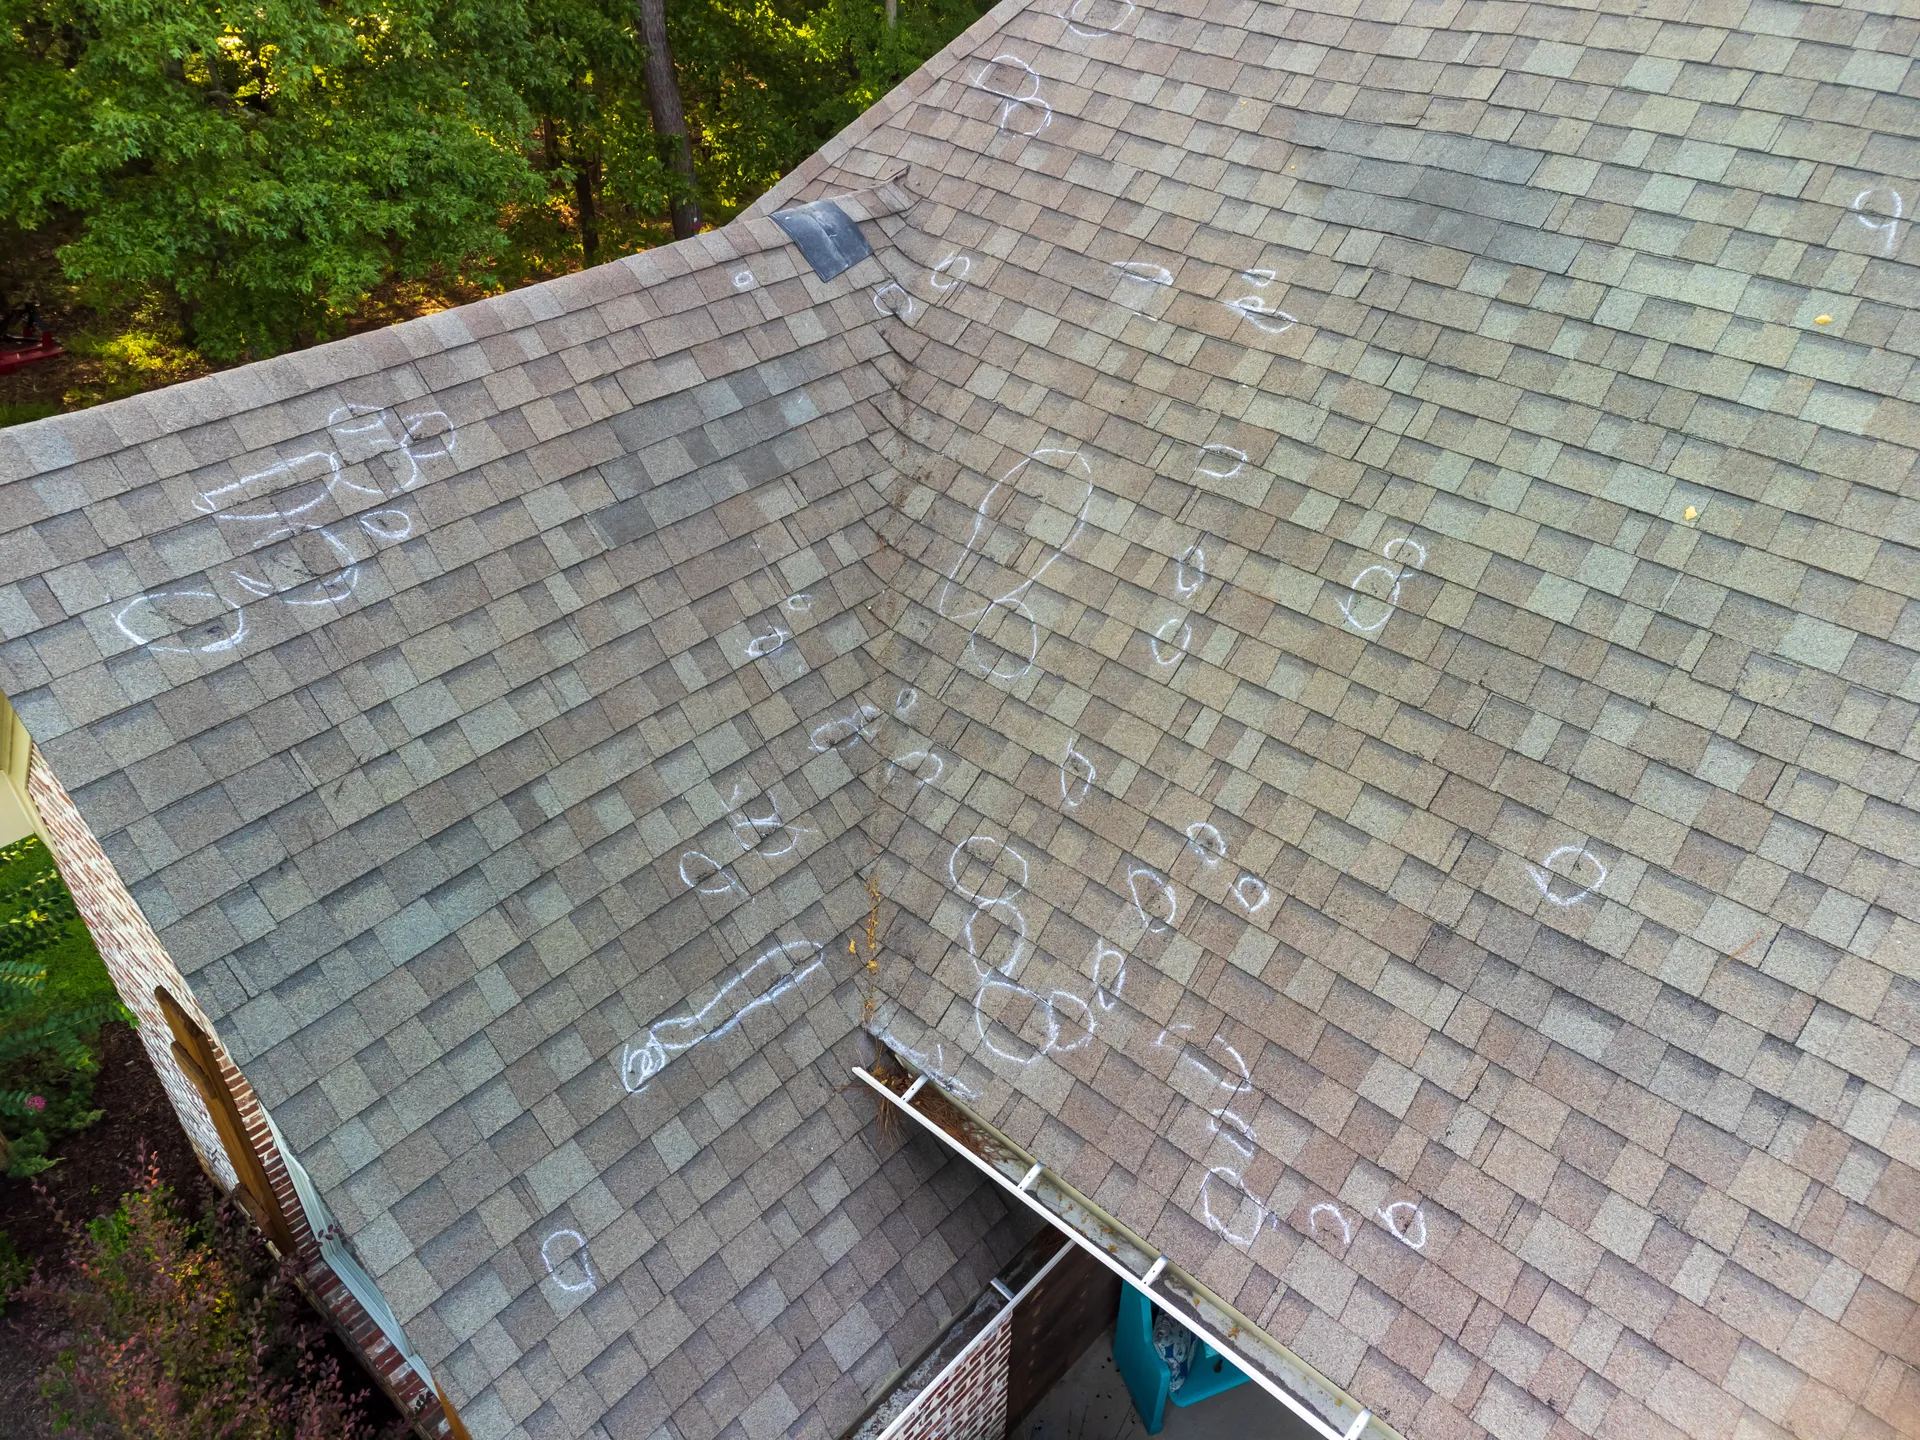
Documenting Damage
Capture photos of any damage you encounter during your inspection. This documentation is not only useful for your records but can also be crucial when filing an insurance claim. Clear images will help your insurance company understand the extent of the damage and speed up the claims process.
💡 9 Things You Might Find From a Storm Damage Roof Inspection
During your inspection, you might find various types of damage. Here are some common issues to look out for.
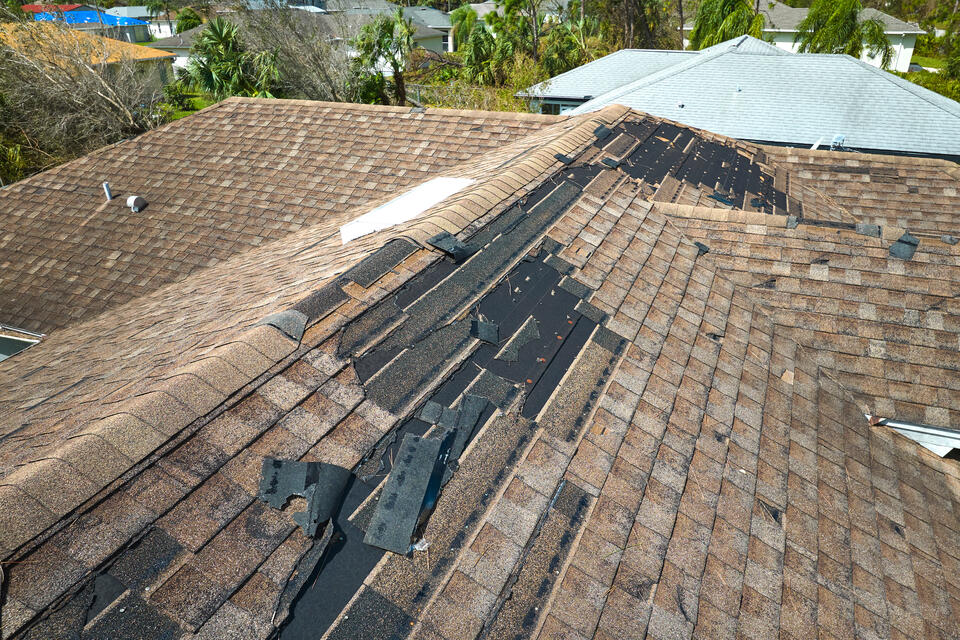
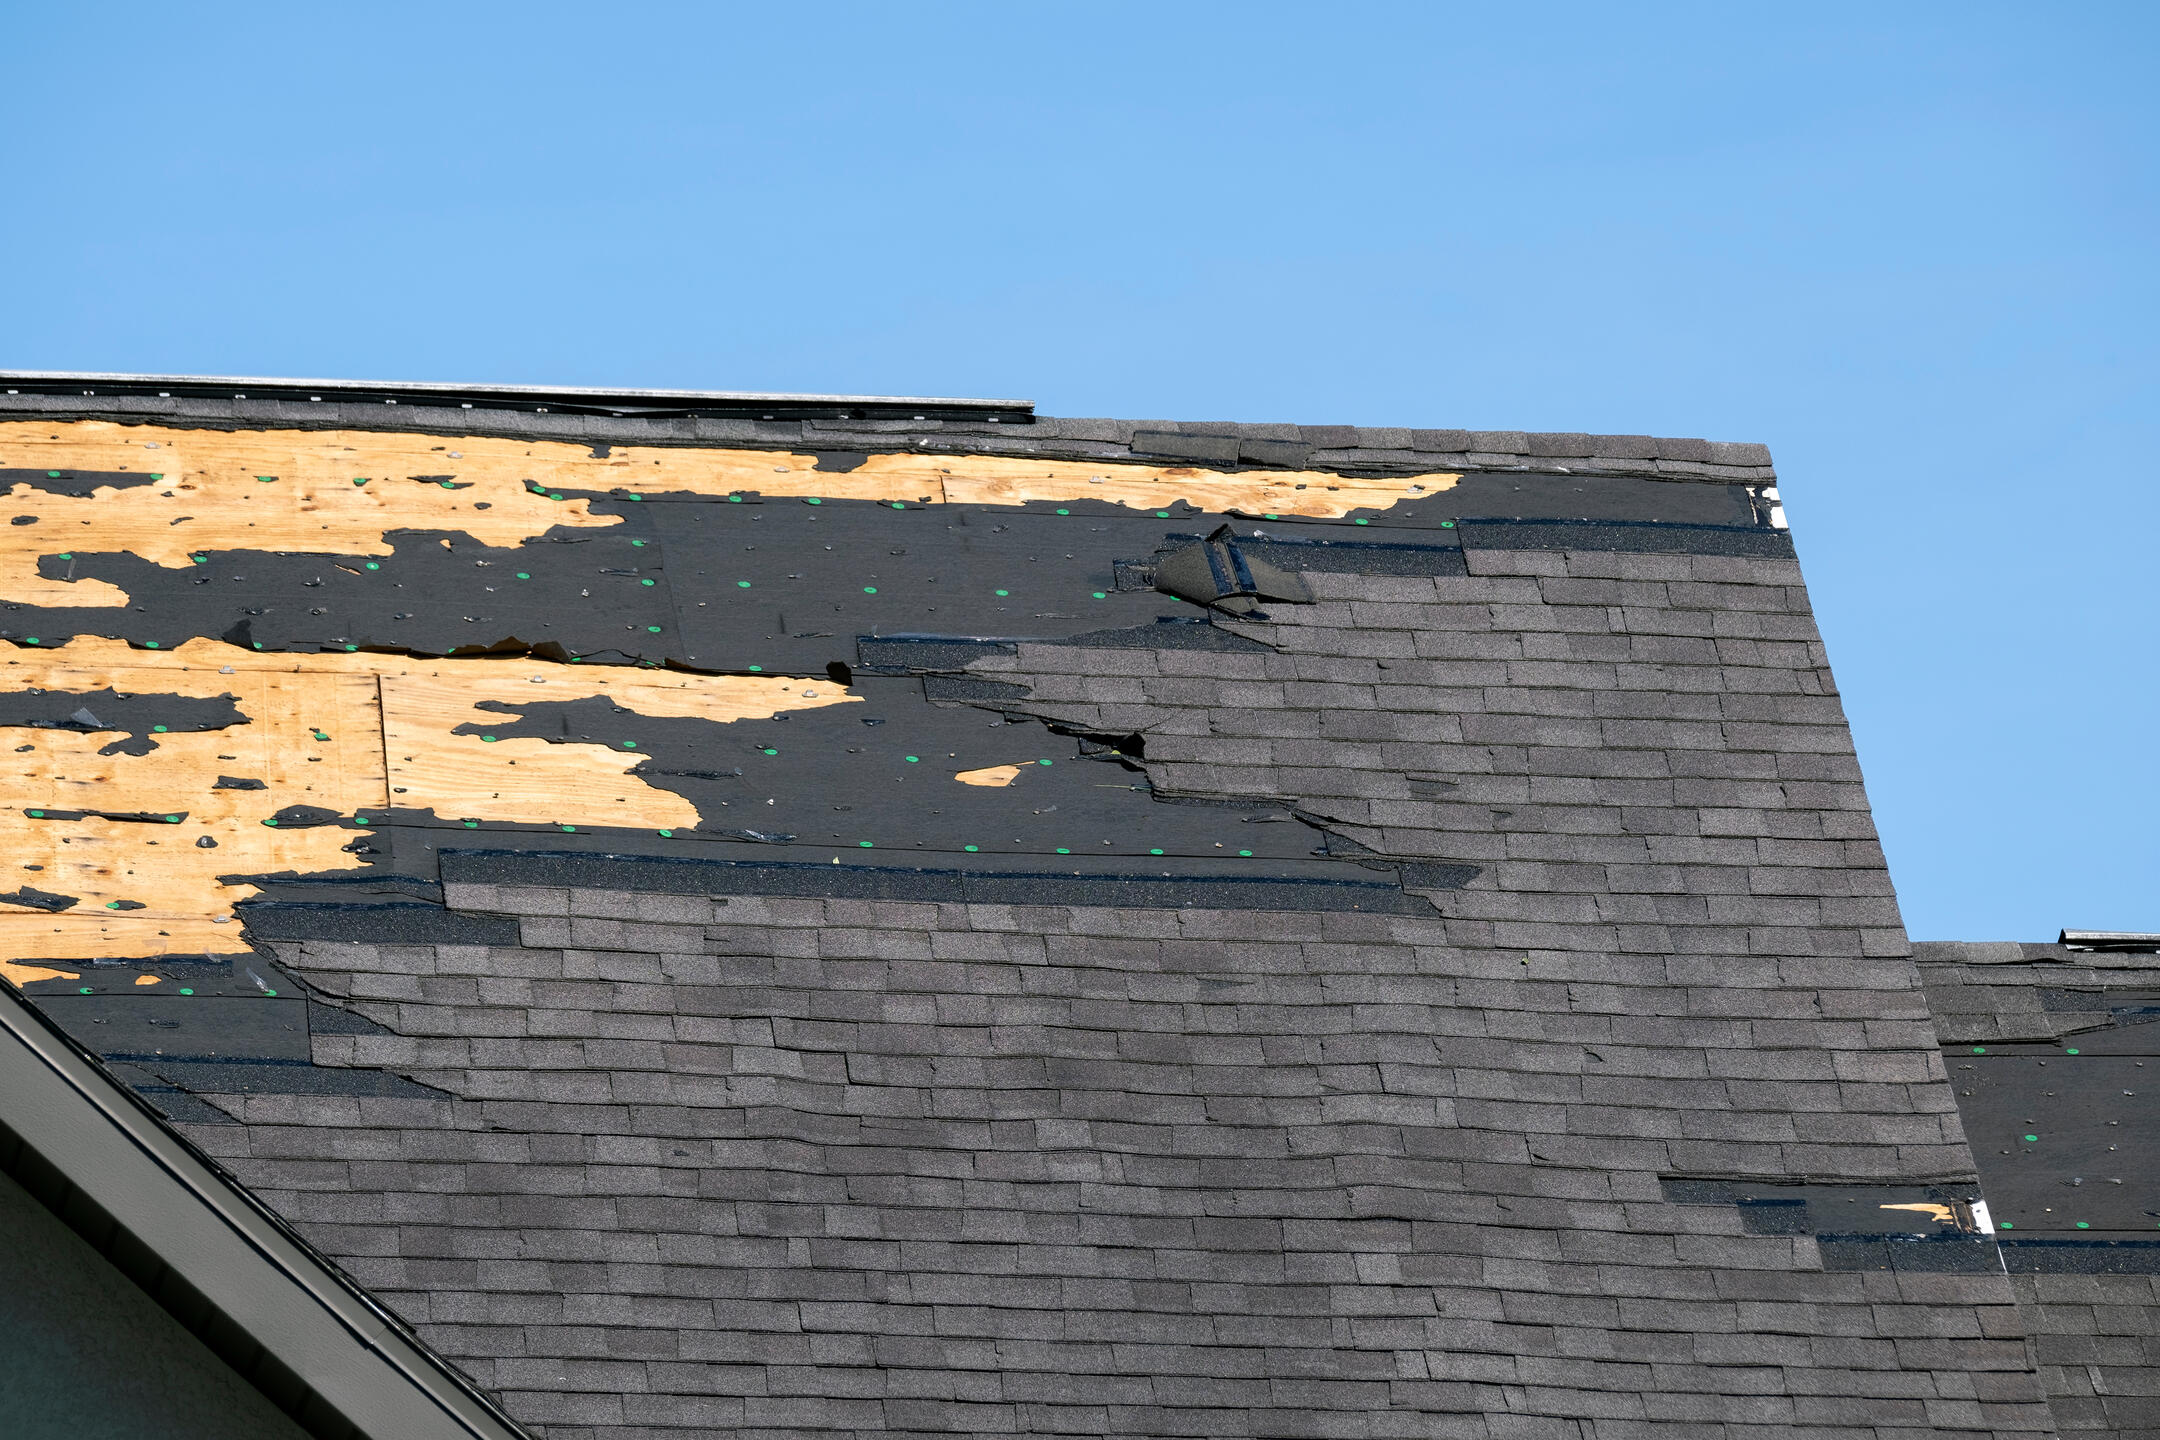
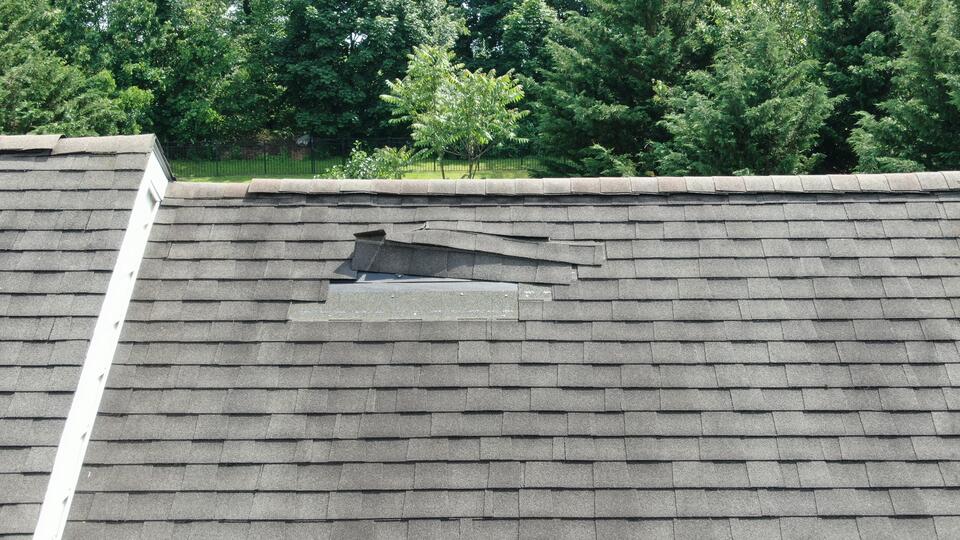
1. Shingle Damage
After a storm, it’s common to find shingles that are missing, cracked, or curled. These problems not only detract from the roof’s aesthetic appeal but can also create vulnerabilities that allow water to seep in, resulting in further damage to the underlying structure. Regularly inspecting shingles and replacing any that are compromised can help maintain the integrity of your roof.
2. Gutter Problems
Gutters play a crucial role in directing rainwater away from your home. Storms can lead to clogged or damaged gutters due to falling debris, such as branches and leaves. It’s important to regularly check for debris build-up, as this can cause overflowing gutters that may damage your siding or foundation. Additionally, ensure that gutters are securely attached; loose gutters can lead to serious water damage.
3. Flashing Issues
Flashing is vital for preventing leaks around chimneys, vents, and other roof penetrations. After severe weather, check to see if the flashing is loose, damaged, or missing. Compromised flashing can allow water to seep into your home, leading to leaks and significant water damage. Proper sealing and installation are essential for ensuring that flashing functions effectively.
4. Roof Leaks
One of the most concerning issues that can arise after a storm is roof leaks. Water stains on ceilings or walls are telltale signs of potential leaks in the roof. It’s important to inspect the interior of your home for any signs of moisture, such as discolored patches or peeling paint. Promptly addressing leaks can prevent further damage to your home and save you from costly repairs down the line.
5. Structural Damage
The framework of your roof must be in good condition to support the roofing materials and withstand harsh weather. After a storm, check for any sagging or warping in the roof’s structure, as these can indicate serious underlying issues that require immediate attention. Neglecting structural damage can lead to more extensive repairs and compromise the safety of your home.
6. Missing or Damaged Roof Tiles
In addition to inspecting shingles, take the time to look for any missing or damaged roof tiles. Tiles can become dislodged or broken due to high winds or falling debris, compromising the overall integrity of the roof. Replacing damaged tiles not only enhances the roof’s appearance but also protects your home from water ingress.
7. Damage to Ventilation Systems
Proper ventilation is key to maintaining a healthy attic environment. Storms can disrupt roof ventilation systems, leading to poor airflow, which can create conditions ripe for mold growth. Check that vents are clear of debris and functioning properly, as this will help prevent moisture build-up and potential health hazards in your home.
8. Debris Accumulation
Following a storm, it’s important to check for any debris that may have accumulated on your roof, such as branches, leaves, or other materials. This debris can trap moisture on the roof’s surface, increasing the risk of damage over time. Regularly clearing debris not only improves drainage but also helps preserve the lifespan of your roof.
9. Ice Dams
For homeowners in colder climates, the formation of ice dams at the edges of the roof can be a significant concern. Ice dams occur when melting snow refreezes at the roof’s edge, causing water to back up under shingles and potentially leading to leaks. To prevent ice dams, ensure proper insulation and ventilation in the attic to maintain a consistent temperature on the roof. Regularly removing snow build-up can also help mitigate this risk.
👉 What to Do If You Find Damage
If you discover damage during your inspection, it’s essential to take immediate action to prevent further issues.
Temporary Repairs
If possible, make temporary repairs to prevent more damage. This might include covering holes with tarps or sealing leaks with roofing tape.
Contacting a Professional
For significant damage, it’s best to contact a professional roofing contractor. They have the expertise and equipment to perform repairs safely and effectively.
Filing an Insurance Claim
Document all damage and contact your insurance company to file a claim. They will guide you through the process and send an adjuster to assess the damage.
👨🔧 The Role of Professional Roofers
Professional roofing contractors play a crucial role in storm damage repair. They have the skills and experience to identify and fix issues that you might miss.
Experience and Expertise
Professional roofers have the knowledge to assess damage accurately and recommend the best course of action. They can identify issues that may not be apparent to the untrained eye.
Safety Considerations
Roofing work can be dangerous. Professionals have the necessary safety equipment and training to perform repairs safely.
Quality Repairs
Hiring a professional ensures that repairs are done correctly and to a high standard. This can extend the lifespan of your roof and prevent future problems.
🙌 Protect Your Home with Storm Damage Roof Inspections
A storm damage roof inspection is an essential step in protecting your home and ensuring its longevity. By understanding what to look for and taking prompt action, you can prevent further damage and keep your roof in top condition.
At Secured Roofing and Restorations, we’re here to help. With our expertise, customer-focused approach, and commitment to quality, you can trust us with all your roofing needs. Don’t wait until it’s too late—contact us today to schedule your storm damage roof inspection and keep your home secure.
Hail Damage Roof: Signs, Repair & More
Hail can turn a peaceful day into a homeowner’s worst nightmare in minutes. From minor dents to significant structural damage, hailstorms wreak havoc on roofs, leaving homeowners stressed and unsure of what to do next. If you’ve recently experienced a hailstorm or simply want to be prepared, this article will help you understand hail damage roof signs and the steps to take for repair and prevention, including:
- 7 Signs You Have Hail Damage on Your Roof
- The Impact of Hail Damage on Your Home
- Immediate Steps to Take After a Hailstorm
- Professional Roof Inspection vs. DIY Inspection
- Effective Repair Solutions for Hail-Damaged Roofs
- Preventative Measures to Protect Your Roof
⚠️ 7 Signs You Have Hail Damage on Your Roof
Hail damage can often go unnoticed until it leads to more serious issues. Here are seven key signs that indicate your roof may have sustained hail damage, helping you take proactive steps to protect your home.
1. Dents or Dings in Roof Components
Look for small indentations or dings on the roof surface, particularly in softer materials like asphalt shingles or metal roofing. These imperfections can compromise the roof’s integrity and lead to further damage if not addressed promptly.
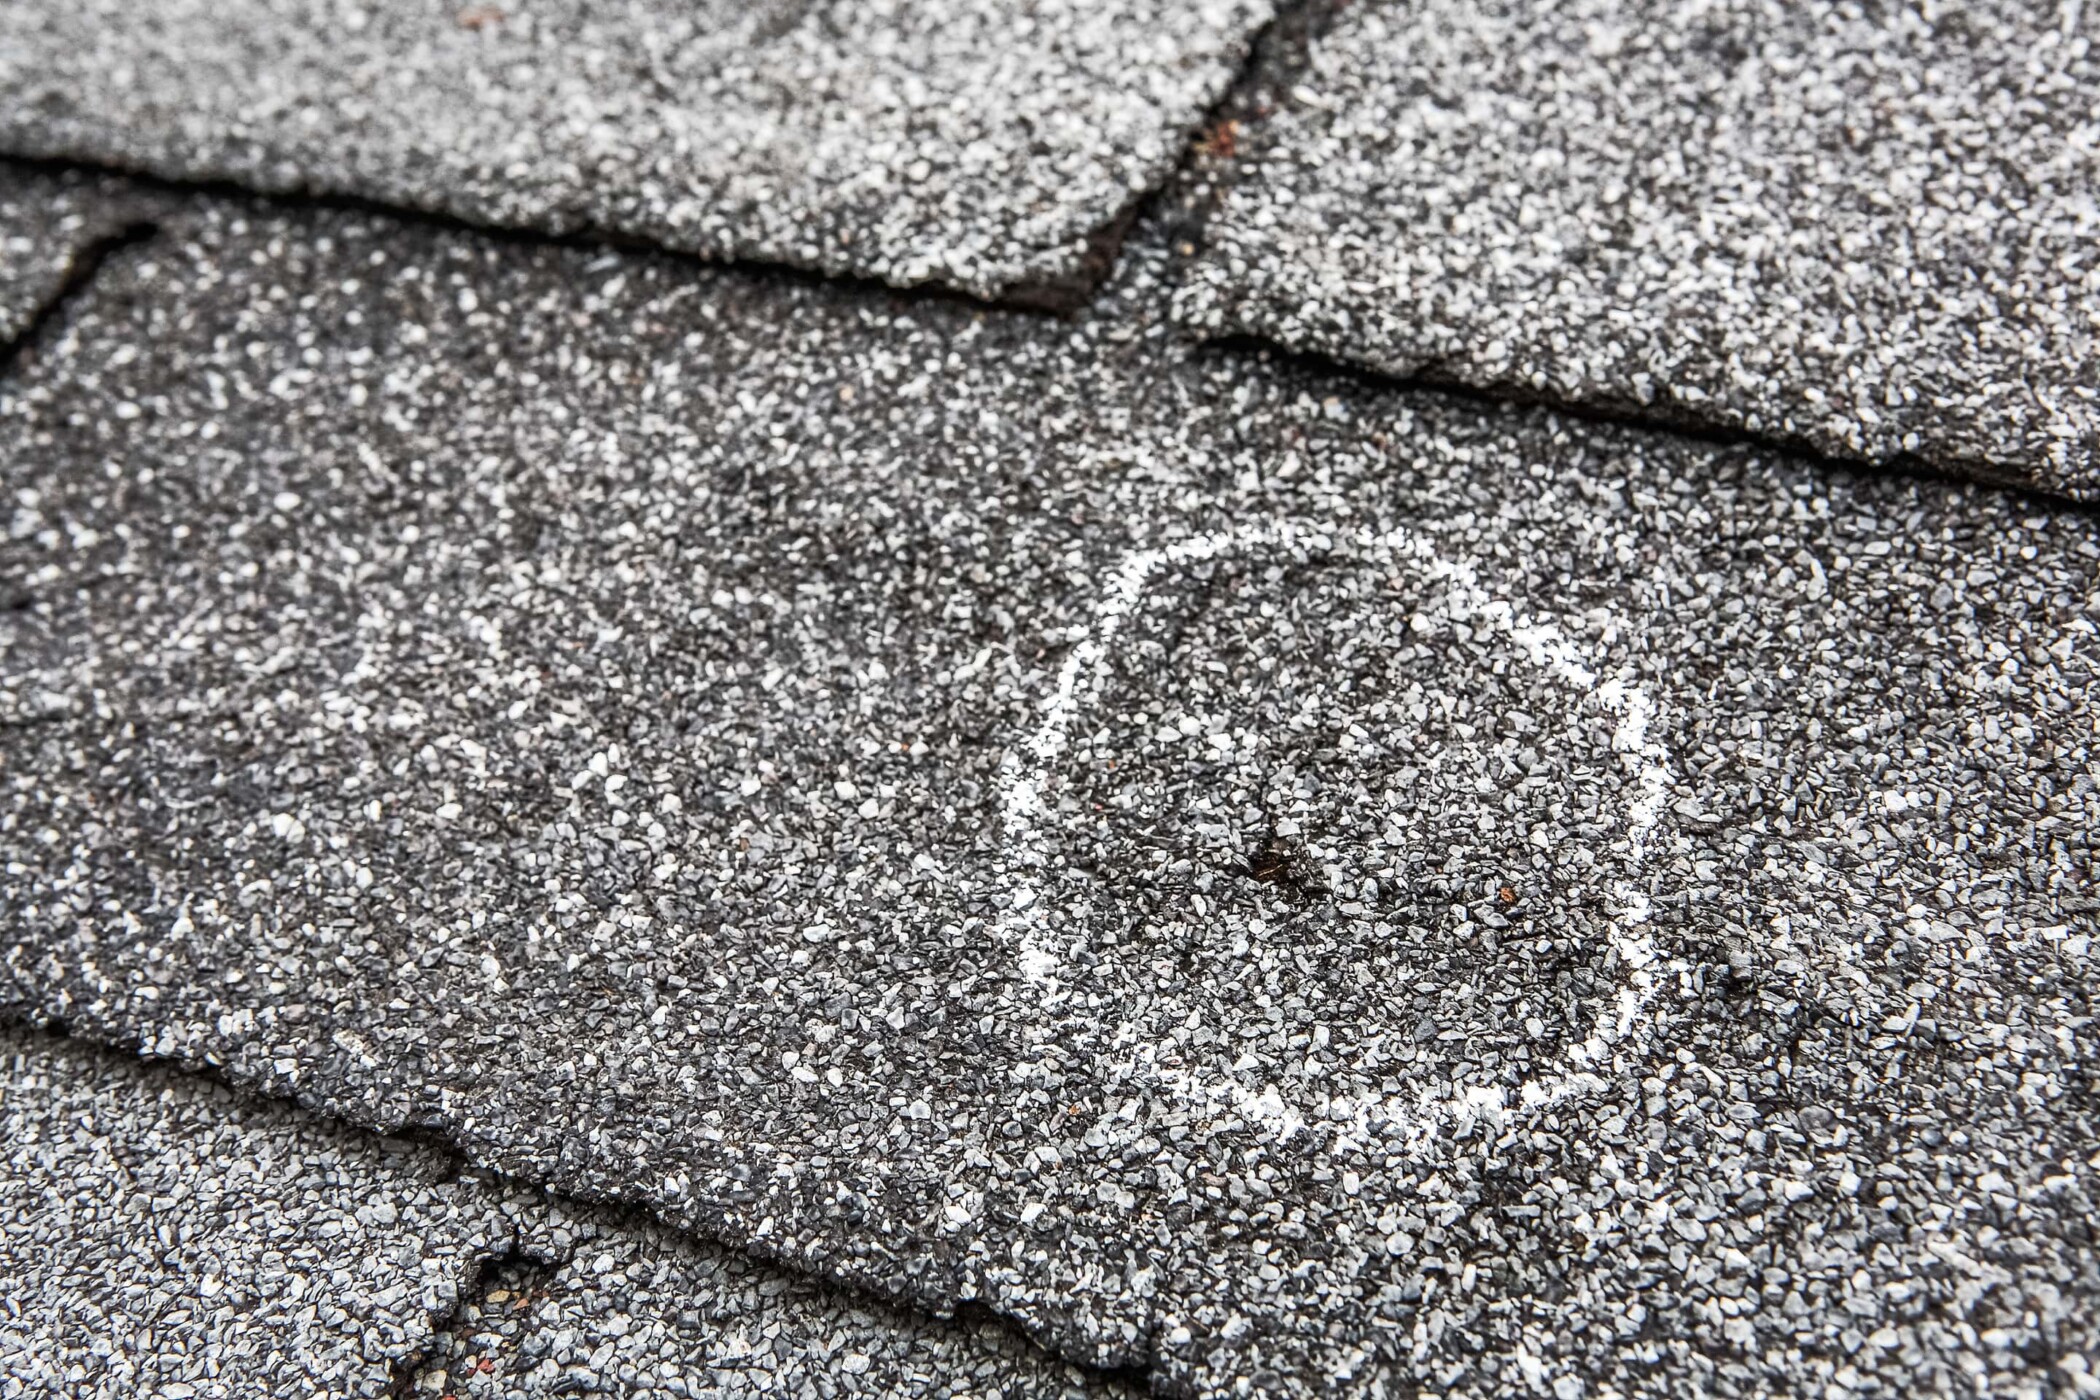
2. Granule Loss on Shingles
Check for granules that have washed off the shingles; you may find these in your gutters or on the ground around your home. Granule loss can expose the shingles to UV rays, reducing their lifespan and effectiveness in protecting your home.
3. Cracks or Splits in Shingles

Inspect for visible cracks or splits in the shingles, which can reduce their effectiveness in protecting your home. Even small cracks can allow moisture to seep in, potentially leading to leaks and water damage.
4. Damage to Flashing
Examine the metal flashing around chimneys, vent pipes, and other roof protrusions for any bends, tears, or breaks. Properly sealed flashing is crucial for preventing water from infiltrating these vulnerable areas, so any damage should be repaired immediately.
5. Missing Shingles
Identify any areas where shingles might be completely missing, exposing the underlayment or decking to the elements. Missing shingles can lead to leaks and further deterioration of the roof structure, making it vital to replace them as soon as possible.
6. Water Leaks Inside the Home
Be alert to any signs of water intrusion or leaks inside your home, which can indicate underlying roof damage from hail. Stains on ceilings or walls, or damp spots, are red flags that should prompt a thorough roof inspection.
7. Increased Energy Costs
Notice any unusual increases in your energy bills, which may suggest that your roof’s insulation has been compromised by hail damage. Poor insulation can lead to higher heating and cooling costs, indicating that your roof may need attention to restore its effectiveness.
👉 The Impact of Hail Damage on Your Home
Hail damage can pose a significant threat to your home, leading to costly repairs and long-term structural issues. Understanding the impact of hail on your property is crucial for maintaining its integrity and ensuring your safety.
Structural Integrity
Hail damage can weaken your roof’s structure, increasing the risk of leaks and further deterioration. It’s crucial to address these issues to maintain the structural integrity of your home.
Energy Efficiency
Damaged roofs often lead to energy inefficiency. Gaps and cracks can cause drafts, leading to higher heating and cooling costs.
Aesthetic Appeal
Beyond functionality, hail damage affects the visual appeal of your home. Damaged roofs can significantly reduce your property’s curb appeal and overall value.
❗️ Immediate Steps to Take After a Hailstorm
After a hailstorm, it’s crucial to assess the damage and take immediate action to protect your property. Here are some essential steps to follow to ensure safety and prevent further issues.
Stay Safe
First and foremost, prioritize your safety. Hailstorms can be unpredictable and dangerous, so it’s crucial to stay indoors. Avoid windows and doors, as hail can shatter glass. Wait until the storm has passed completely before venturing outside to assess any potential damage.
Document the Damage
Once it’s safe to go outside, take detailed photographs and notes of any damage caused by the hailstorm. Capture images from multiple angles and make a list of affected areas. This thorough documentation will be invaluable for filing an insurance claim or when consulting professional repair services, ensuring you have the necessary evidence to support your case.
Contact Your Insurance Company
Notify your insurance company as soon as possible to start the claim process. Provide them with all the necessary documentation to expedite the process.
Understanding Your Policy
Review your insurance policy to understand what is covered regarding hail damage. Policies vary, so knowing the specifics can help you file a successful claim.
Filing a Claim
When filing an insurance claim, provide all necessary documentation and be as detailed as possible. Include photos, notes, and any professional inspection reports.
Working with Adjusters
Insurance adjusters assess the damage and determine the claim amount. Be present during their inspection to ensure all damage is noted and accurately assessed.
🔎 Professional Roof Inspection vs. DIY Inspection
When it’s time for roof inspections, homeowners face the choice between hiring a professional or tackling the task themselves. While a DIY inspection may seem cost-effective, a professional roof inspection offers expertise and thoroughness that can uncover hidden issues. Understanding the differences can help you make an informed decision about the best approach for your home.
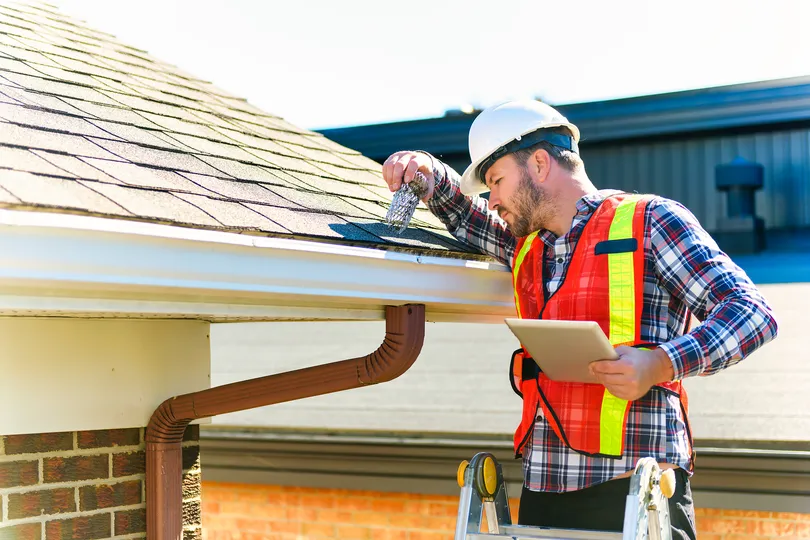
Benefits of Professional Inspection
Professional roof inspections provide a thorough assessment, going beyond the surface. With specialized tools and extensive expertise, professionals can detect even the smallest signs of damage, such as minor leaks or wear that may be overlooked by the untrained eye. This attention to detail ensures that potential issues are identified early, allowing for timely repairs and preventing costly damage down the line. Additionally, a professional inspection offers peace of mind, knowing that your roof’s condition is fully evaluated by an expert.
DIY Inspection Tips
If you opt for a DIY inspection, follow safety protocols and be meticulous. Use binoculars for hard-to-reach areas and document everything you find.
Safety First
Always prioritize safety. Use a sturdy ladder, wear non-slip shoes, and avoid inspecting the roof during adverse weather conditions.
Visual Inspection
Conduct a visual inspection from the ground first. Look for obvious signs like dents, cracked shingles, or missing pieces.
Detailed Inspection
For a more thorough inspection, carefully examine the roof’s surface, flashing, and gutters. Check for less obvious damage like granule loss or soft spots.
When to Call a Professional
If you’re unsure about the extent of the damage or feel unsafe conducting a DIY inspection, it’s best to call a professional. They can provide a detailed report and recommendations for repair.
👇 Effective Repair Solutions for Hail-Damaged Roofs
Hail damage can significantly compromise the integrity of your roof, making timely repairs essential. Here we’ll explore effective repair solutions to restore your roof and protect your home from further issues.
Temporary Fixes
Temporary fixes, such as tarping, serve as a crucial stopgap to prevent further damage to your property until professional repairs can be arranged. These solutions are particularly useful when the damage is extensive and requires immediate attention, as they help to shield your home from the elements, minimizing additional issues like leaks or mold growth.
Permanent Repairs
Permanent repairs encompass a range of tasks, including replacing damaged shingles, sealing leaks, and reinforcing the roof’s structural integrity. Engaging professional roofing contractors is vital for these tasks, as they bring expertise and experience to ensure that repairs are not only effective but also durable, providing peace of mind for homeowners.
Complete Roof Replacement
In instances where damage is severe, a complete roof replacement may be the only viable option. Although this can represent a significant financial investment, it is essential for ensuring the safety, stability, and longevity of your home. A new roof not only enhances curb appeal but also increases energy efficiency and protects against future weather-related issues.
✋ Preventative Measures to Protect Your Roof
Here are preventative measures that can help protect your roof from damage and extend its lifespan. By implementing these strategies, you can ensure your roof remains in good condition, safeguarding your home against potential issues.
Regular Maintenance

Regular roof maintenance is crucial for longevity and safety. This includes tasks such as cleaning gutters to ensure proper drainage and inspecting for minor damage like loose shingles or small leaks. By addressing these issues early, homeowners can avoid costly repairs and major problems in the future. It’s a good idea to schedule annual inspections with a professional to keep your roof in top shape and extend its lifespan.
Install Hail-Resistant Materials
When it comes to safeguarding your roof, consider upgrading to hail-resistant roofing materials. Options like impact-resistant shingles and metal roofs are designed to withstand harsh weather conditions, including hail storms. Not only do these materials provide better protection, but they can also enhance your home’s overall value and appeal, making them a worthwhile investment for homeowners concerned about extreme weather.
Reinforce Vulnerable Areas
Certain areas of your roof, such as skylights, vents, and chimneys, are more susceptible to damage during hailstorms. To protect these vulnerable spots, reinforce them with protective covers or impact-resistant materials. This additional layer of defense can significantly minimize damage, ensuring that your roof remains intact and functional even in severe weather conditions. Taking these proactive measures can save you time and money in repairs down the road.
🙌 Protect Your Home: Expert Hail Damage Repair Services
Addressing hail damage to your roof requires prompt action and expert guidance to safeguard your home. At Secured Roofing and Restorations, we are dedicated to providing reliable and professional services tailored to your exterior needs. Our experienced team understands the intricacies of hail damage and offers thorough inspections, effective repairs, and top-quality materials to ensure your home remains protected. Trust us to be your partner in maintaining your home’s integrity and value. Contact us today for a free consultation and let us help you restore your peace of mind.
2024 Hurricane Season Predictions For Florida

As we approach the 2024 hurricane season, many Florida homeowners are eager to understand what weather experts are predicting for the region. With the potential for severe storms and hurricanes, being prepared and informed is essential for protecting your home and loved ones. In this guide, we’ll explore the predictions for the upcoming hurricane season and provide valuable tips for homeowners to stay safe and secure.
Inside this blog:
- How to understand hurricane predictions
- 6 home preparedness tips
Keep reading to learn all you can about 2024 hurricane season predictions for the sunshine state!

Understanding the Predictions
Below we’ll dive into an overview of hurricane season/tropical storms’ predictions and what they mean.
Experts’ Forecasts
Meteorologists and hurricane prediction centers analyze a variety of factors to make their forecasts. They look at things like how warm the ocean water is, what the air is like in the atmosphere, and past hurricane seasons to predict what might happen next.
2024 Projections
For the upcoming 2024 hurricane season, experts are predicting that Florida could see more hurricanes than usual. This means there’s a higher chance of storms forming and possibly hitting the state.
Climate Change Impact
Climate change is making hurricanes stronger and more frequent. As the Earth’s temperature rises, so does the temperature of the ocean, which hurricanes feed off of. This can make them more powerful and more likely to cause damage when they hit land.
6 Home Preparedness Tips
To help Florida homeowners prepare for the upcoming Atlantic hurricane season, here are some essential tips:
1. Create a Hurricane Preparedness Plan
Take some time to sit down with your family and come up with a plan for what to do if a hurricane hits. This plan should include things like where you’ll go if you need to evacuate, how you’ll contact each other if you get separated, and what you’ll do to protect your home.
2. Stock Up on Supplies
It’s essential to have enough food, water, and other supplies to last you and your family for at least a few days in case you lose power or can’t leave your home. Make sure you have things like canned food, bottled water, flashlights, batteries, and a first-aid kit ready to go.
3. Secure Your Property
Before a storm hits, take some time to secure your property. Trim any trees or bushes that could fall onto your house, bring in any outdoor furniture or decorations, and reinforce your windows and doors to prevent them from breaking in high winds.
4. Review Insurance Coverage
Make sure you understand what your insurance policy covers and what it doesn’t, especially when it comes to hurricanes and wind damage. Consider adding flood insurance to your policy if you live in an area that’s prone to flooding.
5. Stay Informed
Keep an eye on the weather forecast and listen to updates from trusted sources like the National Hurricane Center and your local news station. Sign up for alerts on your phone so you’ll know right away if there’s a hurricane headed your way.
6. Evacuation Planning
If you live in an area that’s at risk of flooding or storm surge, you may need to evacuate when a hurricane hits. Know what evacuation zone you’re in and have a plan for where you’ll go and how you’ll get there. Make sure your car is gassed up and ready to go, and have a designated meeting spot in case you get separated from your family.
📝 Checklist for Hurricane Preparedness 📝
To ensure you’re ready for the 2024 hurricane season, here’s a checklist to follow:
- Develop a hurricane preparedness plan for your family.
- Stock up on emergency supplies and non-perishable food items.
- Secure your property by reinforcing windows, doors, and outdoor structures.
- Review your homeowners insurance policy for adequate coverage.
- Stay informed about weather forecasts and advisories.
- Know your evacuation zone and have a plan for evacuation if necessary.
- Keep important documents and valuables in a waterproof container.
🌀 Protect Your Home From Hurricane Season
By taking proactive steps to prepare for the upcoming hurricane season, Florida homeowners can mitigate risks and ensure the safety and security of their families and properties. Stay informed, stay prepared, and stay safe!
Contact our team of expert contractors at Secured Roofing and Restorations today. We’ll answer all of your questions and customize an approach to tackle your project quickly and efficiently. Every one of our roofing experts is trained to provide the highest professional workmanship, personalized service, and to use only the best quality materials.
Do You Have A Hail Damaged Roof? – Here is What To Do Next
Roof Damage In 2023: 7 Types Homeowners Need To Know
Your roof can be damaged in any number of ways, and it’s important to know how to spot it, and the next steps to get it repaired. Whether a storm came through and damaged your roof or its aging materials are not what they used to be, there are seven very common instances of damage that you should know.
Failed Flashing
One of the most common reasons for a roof leak is failed or damaged flashing. Flashing is installed around your chimneys, vents, skylights, and any other entrance to your roof. It prevents those seams from leaking, but if they are installed incorrectly or get damaged over time they can be the first thing to fail and cause leaks.
It’s important to watch for any water spots near the entrance of your chimney or vents in the basement, that can be a tell-tale sign of a leak in your flashing.
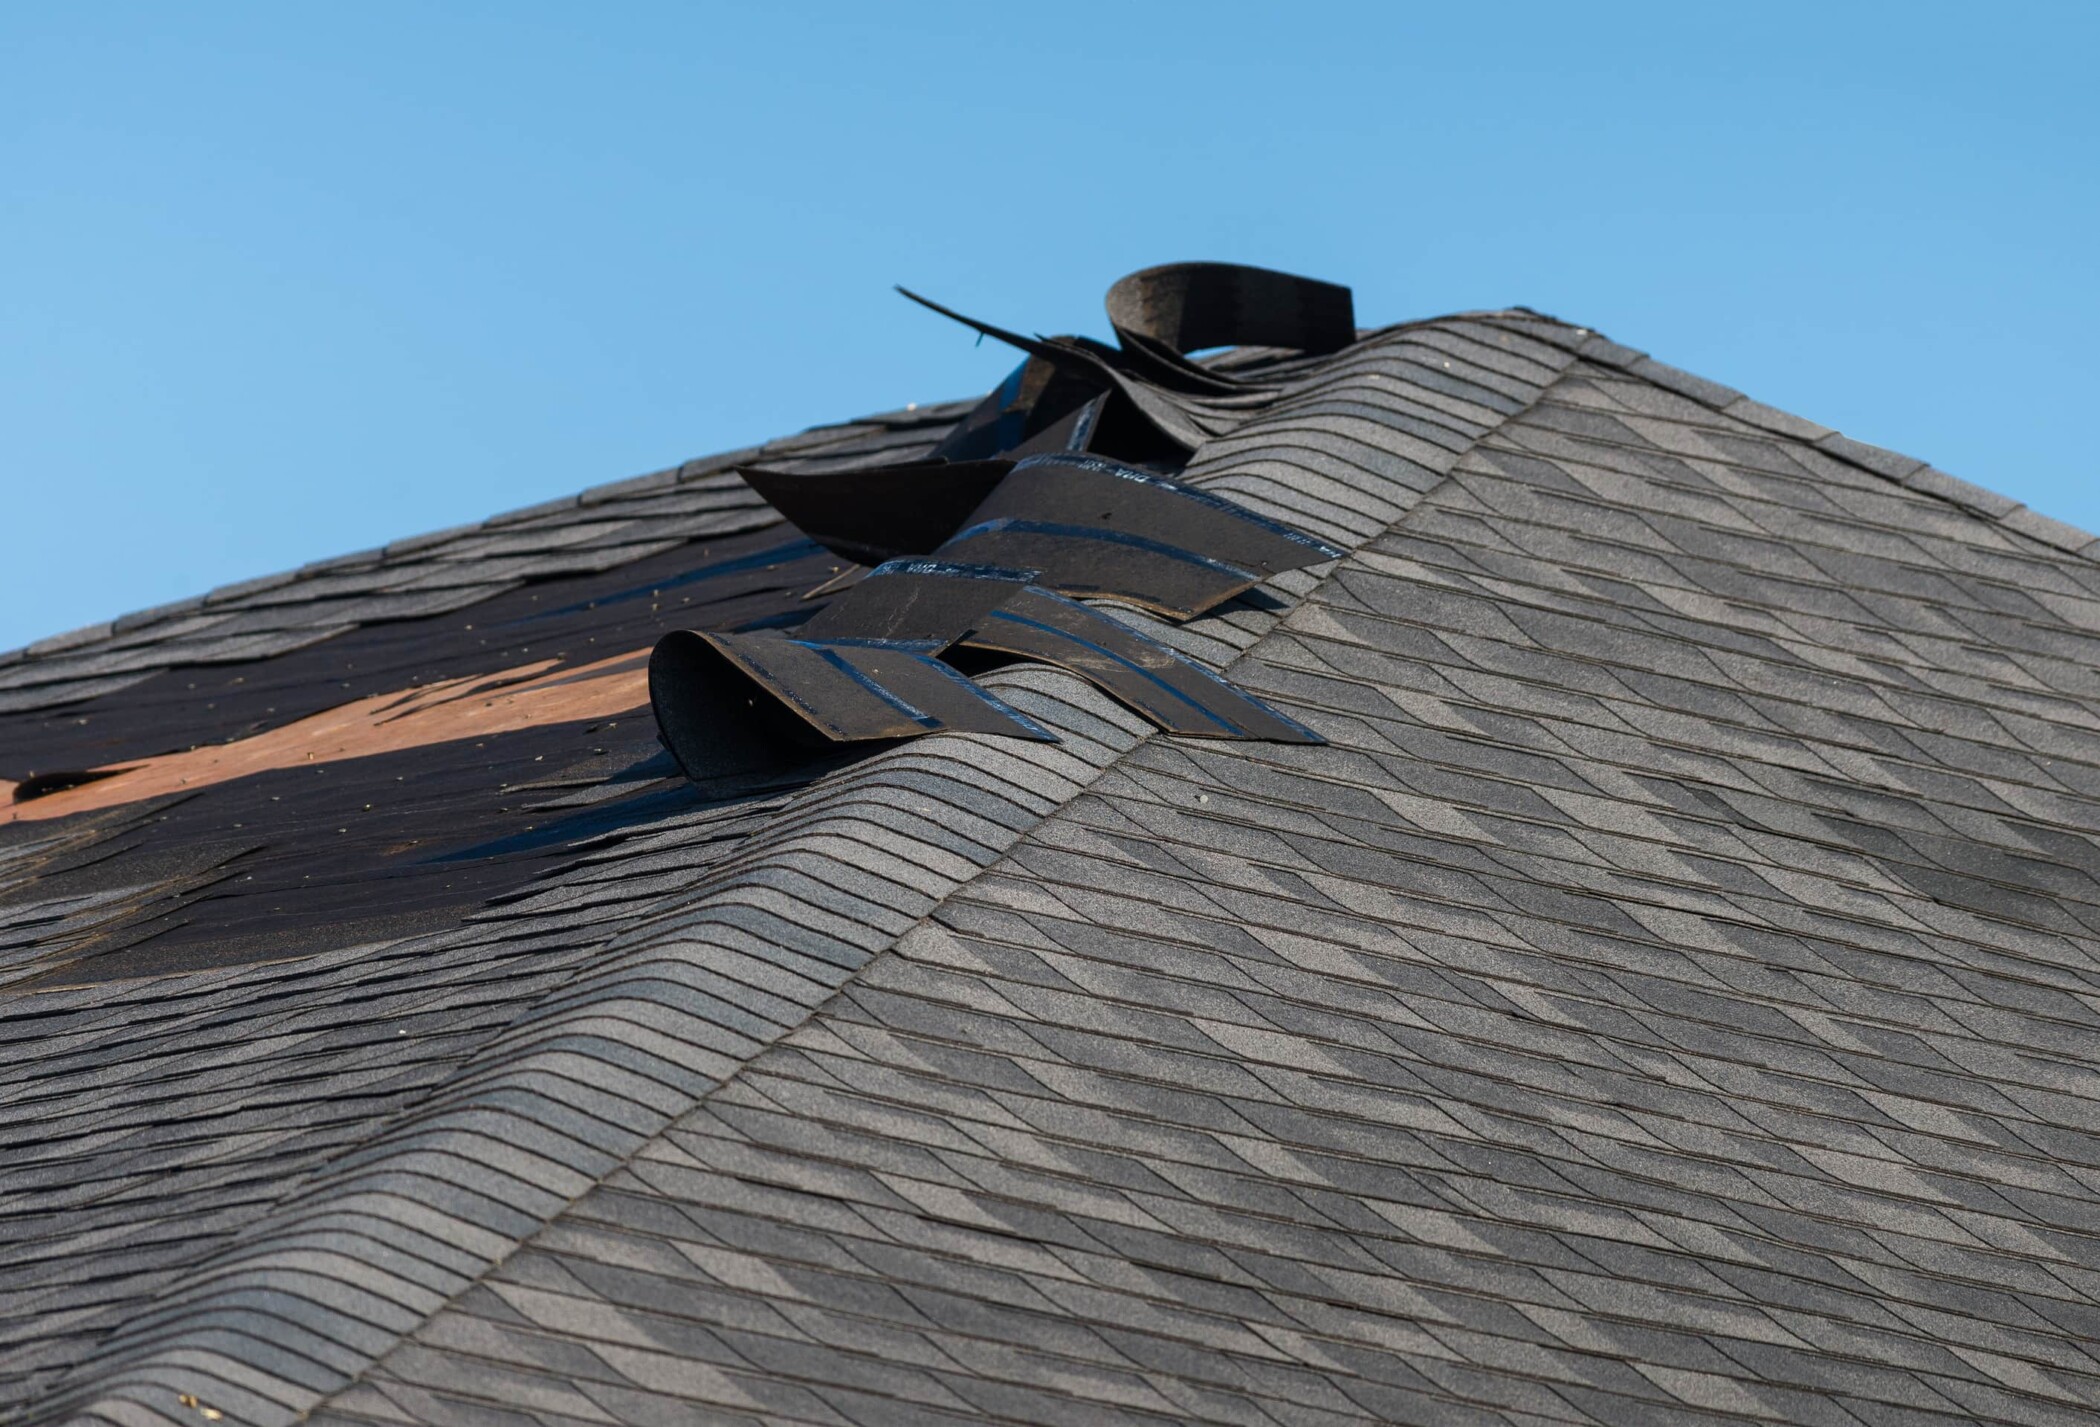
Wind Damage
Strong winds can cause shingles to tent up or even blow-off, especially if they are not attached correctly, are wearing away, or your flashing has failed around structures on your roof. Even if the wind flips up your shingles temporarily, this can cause irreversible damage to them because it’s broken their tight leak-proof seal.
If only a small section of your shingles have sustained wind damage, it’s possible you can get a smaller repair in lieu of a full replacement. Look for any uneven spots on your shingles if you suspect wind damage.
Water or Moisture Damage
In areas that experience heavy rainfall, or snow and ice; if your roof does not shed that water appropriately, it can sit and cause pretty severe damage to your roof. Moisture that sits in one spot can weaken your shingles, gutters, and even cause a sunken spot on your roof. These cause leaks by ruining the integrity of your roof or causing spots to give way.
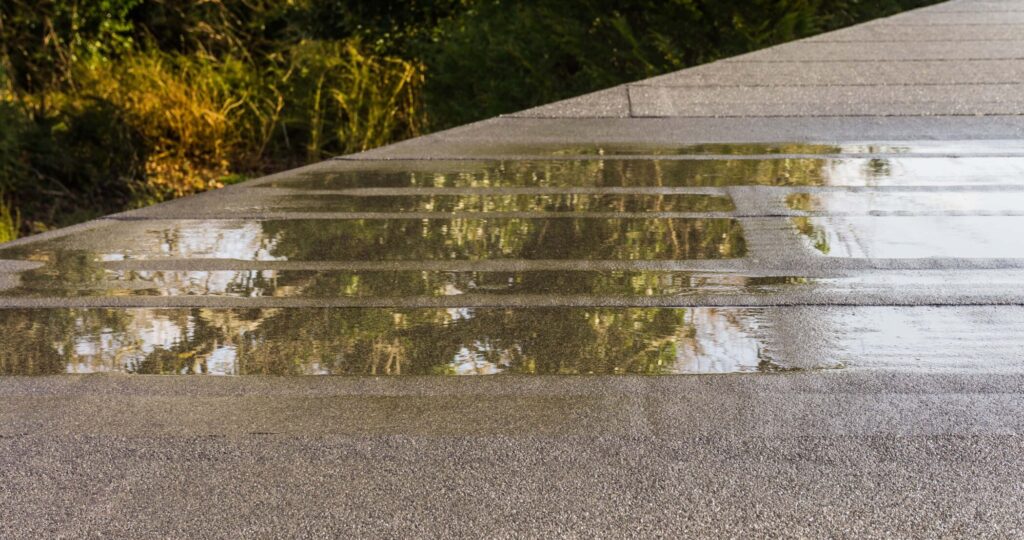
Water damage may require further repairs than just your roof if the moisture has infiltrated your attic or ceilings. So, it’s important to watch for signs early on and ensure your roof is solid. This is especially true in climates that anticipate heavy rainfall, like Florida.
Hail Damage
Though rare, hail that is large enough can cause pretty significant damage to your roof. If hail doesn’t penetrate through the shingles or flashing, it still ends up sloughing off the granules of your shingle which are there to protect them from leaks.
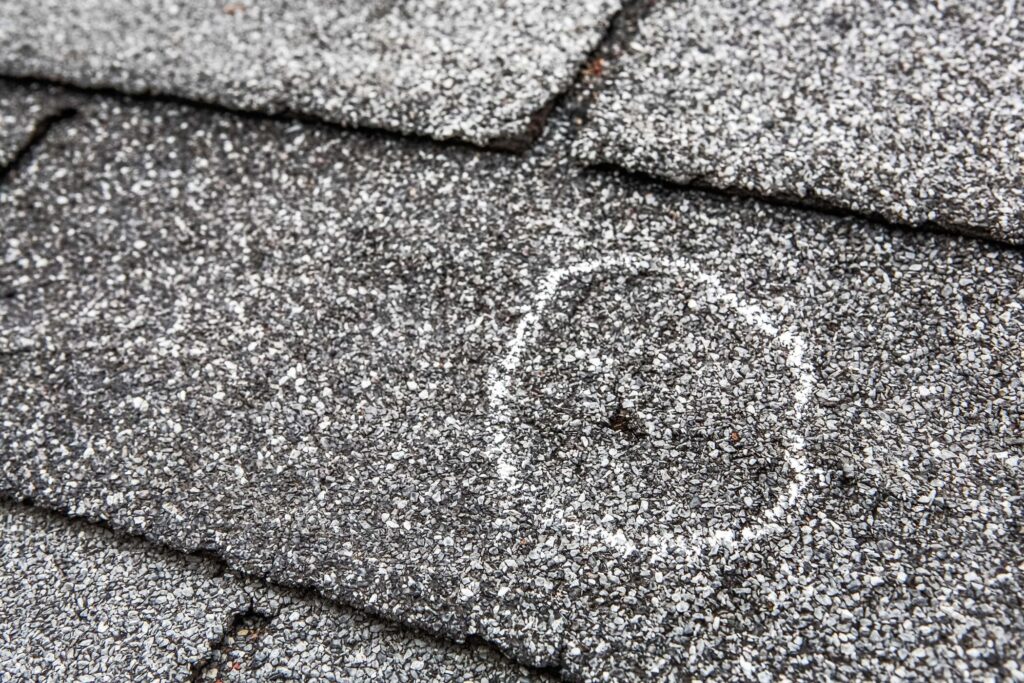
Hail damage can be relatively easy to spot as you’ll see the areas where your shingles are missing granules or have been dented from large pieces of hail. It’s important to get this diagnosed quickly and repair those damaged shingles so your roof is not compromised.
Worn Down Roofing Materials
Unfortunately, roofs aren’t made to last forever. In fact, asphalt shingles, which are the most commonly used in the U.S. have a lifespan of about 15-30 years depending on your climate. As your roof ages, it becomes more vulnerable to things like leaks, damage, cracking, and poor insulation. All of these things, over time, can lead to leaks if left unmaintained.
Do a visual check of your roof and gutters every Spring to ensure it’s still in good shape, especially if it’s nearing or past its expected lifespan. The best thing you can do is get roof maintenance done before it becomes a bigger issue.
Structural Damage
Structural damage could be caused by a tree falling during a storm, large debris landing on your roof, or it can even be caused by your aging home. If your foundation is failing, or your interior walls, those can cause sinks in your roof if left alone. Structural damage is an opportunity to get a full replacement of your roof, but also ensure the attic is insulated, and the flashing installed properly—it can be a full reset, which we can do at Secured Roofing & Restoration.
We want homeowners to know what damage looks like, so they can identify it and call us right away. Our professional team of roofers is readily available for any type of roof damage. If you notice you have any of these damages and are looking for a repair or discuss a roof replacement, give us a call at 407-986-ROOF.
Ask the Pros: What Do You Do After Storm Damage?