


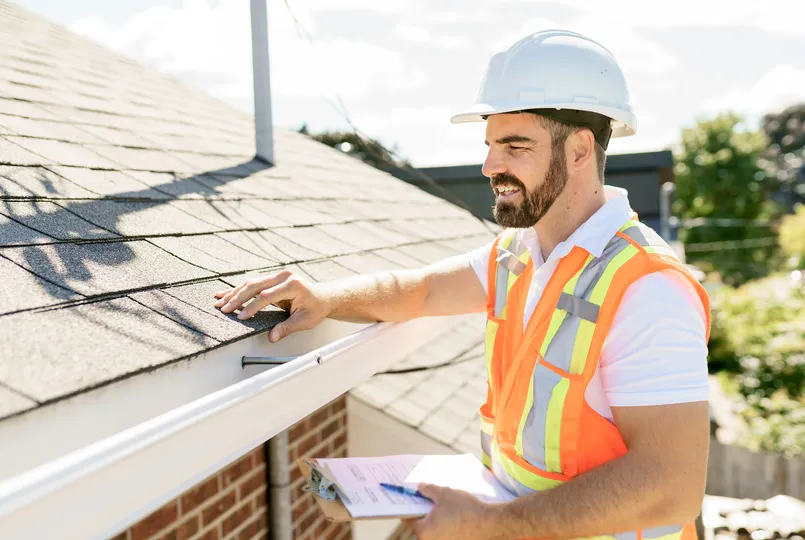
General Roofing
What Is a Roof Ridge Vent? (Homeowners Guide)
 Written by : Secured Roofing and Restorations
 10 minutes read


Maintaining your home’s roof can be significantly improved by understanding components like roof ridge vents, which are often overlooked yet crucial to any roofing system. This blog will guide you through everything you need to know about roof ridge vents, including how they work, their benefits, installation tips, and more, including:
- What a roof ridge vent is
- Different types of roof ridge vents
- The essentials of roof ventilation
- Common misconceptions about roof ridge vents
- Signs that your home needs better ventilation
- 4 steps to install roof ridge vents
- How to maintain your roof ridge vent
- Cost considerations for roof ridge vents
- FAQs
🤔 What Is a Roof Ridge Vent?
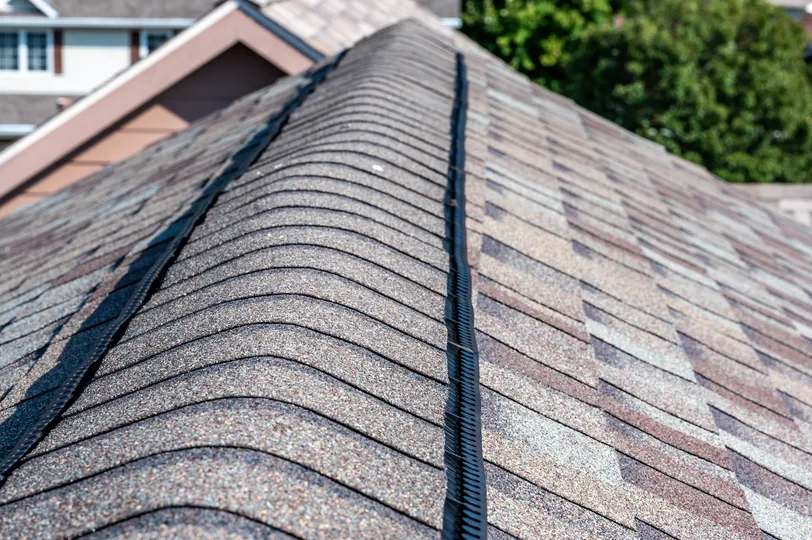
Roof ridge vents are essential components installed at the peak of a pitched roof, designed to facilitate the escape of hot, humid air from the attic space. By allowing this warm air to exit, roof ridge vents help maintain a more comfortable and stable indoor environment. This continuous strip of venting runs along the roof’s ridge, ensuring a balanced airflow that not only extends the lifespan of your roof but also significantly improves indoor air quality. With proper installation, these vents can effectively prevent issues such as mold growth and structural damage caused by trapped moisture.
How Roof Ridge Vents Work
Roof ridge vents operate based on the simple yet effective principle of natural convection. As warm air rises, it escapes through the ridge vent, creating a low-pressure area in the attic. This low pressure allows cooler air to be drawn in through soffit vents located at the eaves of the roof. The combination of rising warm air and incoming cool air leads to a constant exchange of air, keeping your attic cool and dry. This process is particularly crucial in warmer months when heat buildup can lead to increased humidity levels, potentially damaging insulation and wood structures.
Benefits of Installing Roof Ridge Vents
Installing roof ridge vents provides numerous advantages that contribute to the overall health of your home, including:
- Improved attic ventilation: Crucial for regulating indoor temperatures.
- Reduced energy costs: A well-ventilated attic helps your HVAC system operate more efficiently.
- Extended roof life: Proper ventilation manages moisture levels, preventing premature deterioration from heat and humidity.
- Healthier living environment: Balanced airflow reduces the likelihood of mold growth and maintains optimal indoor air quality.
Overall, the installation of roof ridge vents is a smart investment for any homeowner looking to enhance their home’s comfort and durability.
👇 Types of Roof Ridge Vents
There are various types of roof ridge vents available, each with its own advantages. Some common types include shingle-over vents, aluminum vents, and plastic vents.
Shingle-Over Vents
Shingle-over vents are designed to be covered with shingles, making them nearly invisible when installed properly. This feature allows them to blend seamlessly with the overall aesthetics of your roof, enhancing its visual appeal while still functioning effectively. These vents provide excellent ventilation, allowing air to circulate freely and helping to regulate temperature within your home. By preventing moisture buildup and reducing heat accumulation, shingle-over vents contribute to the longevity of your roofing materials and improve the energy efficiency of your home.
Aluminum Vents
Aluminum vents stand out for their durability and corrosion resistance, making them an ideal choice for various climates. Unlike other materials, aluminum does not rust, ensuring that your vents maintain their structural integrity over time. These vents offer robust ventilation capabilities, effectively allowing stale air to escape while letting fresh air in. Their lightweight nature makes them easy to install, and they often come in pre-fabricated designs that can fit various roofing styles. Additionally, aluminum vents can be painted or finished to match your roof, providing both functionality and aesthetic appeal.
Plastic Vents
Plastic vents are an excellent option for homeowners seeking a lightweight and cost-effective solution for roof ventilation. These vents are typically made from high-quality, UV-resistant plastic, ensuring they can withstand harsh weather conditions without fading or degrading. Available in a variety of colors, plastic vents allow you to customize their appearance, making it easy to match them with your roof’s design. Their affordability does not compromise performance, as they still provide adequate ventilation to maintain a comfortable indoor environment. Additionally, plastic vents are often easy to install and require minimal maintenance, making them a practical choice for many homeowners.
❗️ The Essentials of Roof Ventilation
Proper roof ventilation is essential for maintaining a healthy home. It prevents moisture buildup, reduces energy costs, and prolongs the life of your roof.
Importance of Balanced Ventilation
Balanced ventilation ensures that your attic remains at an optimal temperature. It involves a combination of intake and exhaust vents to facilitate airflow.
Energy Efficiency
A well-ventilated attic reduces the workload on your HVAC system, leading to lower energy bills. It ensures that your home stays cool in summer and warm in winter.
Preventing Moisture Damage
Moisture buildup can lead to mold growth and structural damage. Proper roof ventilation prevents these issues, protecting your home and health.
🫢 Common Misconceptions About Roof Ridge Vents
There are several misconceptions about roof ridge vents. Some homeowners believe they are unnecessary or ineffective.
Myth: Roof Ridge Vents Are Unnecessary
Some believe that roof ridge vents are not essential. However, proper ventilation is crucial for maintaining a healthy home environment.
Myth: Roof Ridge Vents Cause Leaks
Another misconception is that roof ridge vents cause leaks. When installed correctly, they are watertight and do not contribute to leaks.
Myth: Ridge Vents Are Only for Warm Climates
Ridge vents are effective in all climates. They help regulate temperature and prevent moisture buildup, whether you live in a warm or cold region.
⚠️ Signs That Your Home Needs Better Ventilation
Poor ventilation can lead to several issues, including high energy bills, mold growth, and structural damage. Look out for these signs:
- High Energy Bills: If your energy bills are unusually high, it could be due to poor roof ventilation. An overheated attic forces your HVAC system to work harder.
- Mold and Mildew: Mold and mildew growth in your attic or upper floors indicate excessive moisture. Proper ventilation can prevent these issues.
- Sagging Roof Deck: A sagging roof deck is a sign of moisture damage. It can weaken your roof’s structure and lead to costly repairs.
- Condensation on Windows: If you notice moisture accumulating on your windows, it’s a sign of high humidity levels that can be alleviated by improved ventilation.
- Stale or Stuffiness in the Air: A persistent stuffy or stale smell indoors can indicate that air is not circulating properly, which can be improved with better ventilation.
- Frequent Allergies or Respiratory Issues: If you or your family members experience frequent allergies or respiratory problems, poor ventilation may be a contributing factor.
- Uneven Temperature Distribution: If certain rooms feel significantly warmer or cooler than others, it may be due to inadequate airflow and ventilation.
- Excessive Dust Buildup: A noticeable increase in dust accumulation can signal that your home lacks proper air exchange, leading to stagnant air.
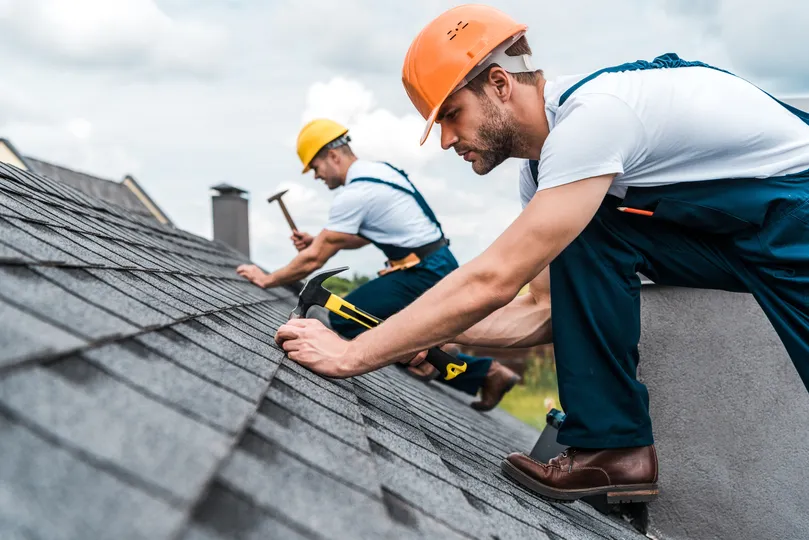
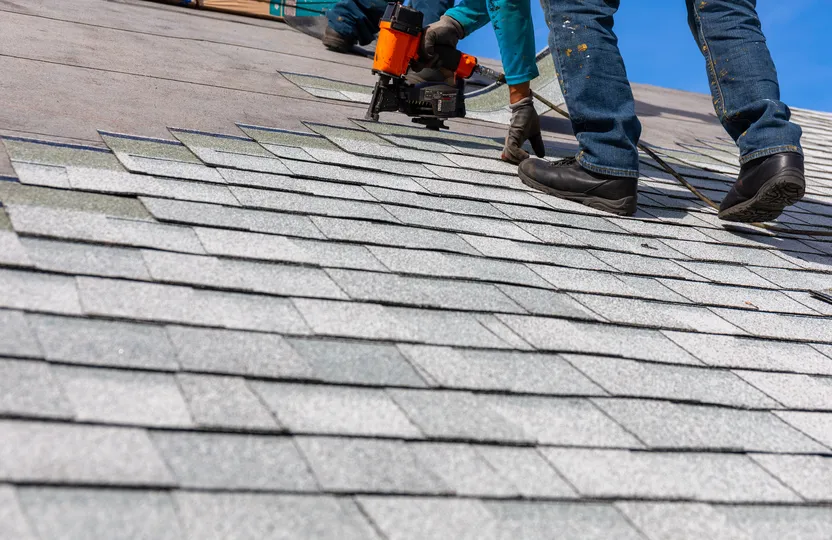
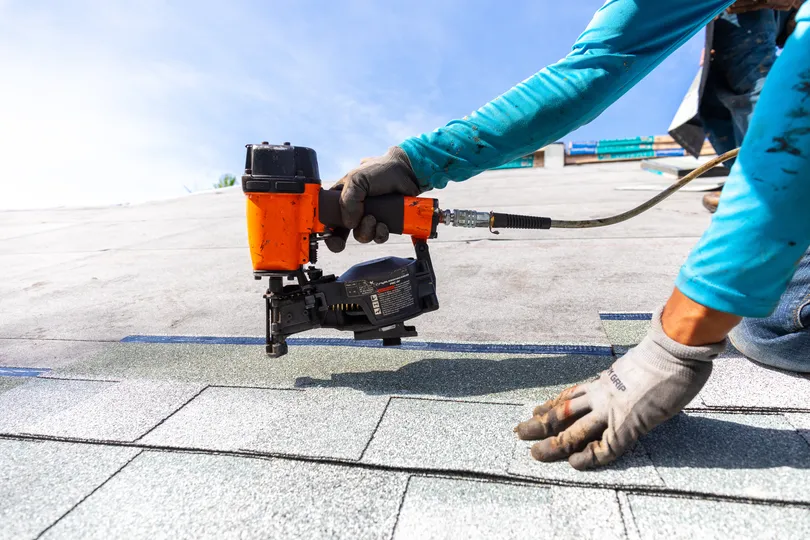
🛠️ 4 Steps to Install Roof Ridge Vents
Installing roof ridge vents is a task that requires careful planning and execution. Here’s a step-by-step guide:
1. Prepare the Roof
Start by carefully removing the shingles along the roof’s ridge. Use a flat bar or roofing shovel to gently lift the shingles without causing damage to the surrounding ones. Take your time to ensure the area is clean and free of debris, as any leftover material could affect the installation of the vent. Inspect the underlying roof deck for any signs of damage or rot that may need attention before proceeding.
2. Cut the Vent Slot
Using a circular saw, carefully cut a slot along the roof’s ridge. Before cutting, measure the width required for the vent you are installing, typically the manufacturer’s specifications. Mark the slot’s dimensions with a chalk line, ensuring it’s straight. When cutting, maintain a steady hand and wear appropriate safety gear, such as goggles and a dust mask, to protect yourself from debris.
3. Install the Vent
Once the slot is cut, place the ridge vent over it, ensuring it covers the entire opening. Secure the vent with nails, using a hammer or nail gun, at regular intervals as specified by the vent manufacturer. Check that the vent is aligned correctly along the ridge and sits flush with the roof. This alignment is crucial to prevent water from seeping underneath. If necessary, use a level to confirm the vent is even before securing it completely.
4. Replace the Shingles
Carefully replace the shingles over the newly installed vent. Start from one end and work your way to the other, ensuring each shingle overlaps the edge of the vent. This overlap should cover the nails used in the vent installation to create a watertight seal. Pay attention to the alignment of the shingles to maintain a seamless finish that blends naturally with the existing roof. Once all shingles are replaced, double-check for any gaps or areas that may need additional sealing.
💡 How to Maintain Your Roof Ridge Vent
Maintaining your roof ridge vent is essential for ensuring its effectiveness. Regular inspections and cleaning can prevent issues.
Regular Inspections
Conduct regular inspections to check for any damage or blockages. Ensure that the vent is securely attached and free of debris.
Cleaning the Vent
Clean the vent periodically to remove any debris or buildup. This will ensure that air can flow freely through the vent.
Professional Maintenance
Consider hiring a professional for regular maintenance. They can identify and address any issues that you may have missed.
💵 Cost Considerations for Roof Ridge Vents
The cost of installing roof ridge vents can vary based on several factors, including the type of vent and the complexity of the installation.
Material Costs
The cost of the vent itself can vary. Shingle-over vents are typically more expensive than plastic or aluminum vents.
Installation Costs
Installation costs can vary based on the complexity of the job. Hiring a professional can ensure that the job is done correctly.
Long-Term Savings
While there is an initial cost, installing roof ridge vents can lead to long-term savings. Improved energy efficiency can reduce your utility bills.
❓ FAQs
Q: Are Roof Ridge Vents Necessary?
Yes, roof ridge vents are crucial for maintaining proper ventilation in your attic. They help regulate temperature and prevent moisture buildup.
Q: How Long Do Roof Ridge Vents Last?
Roof ridge vents can last as long as your roof. Regular maintenance can extend their lifespan.
Q: Can I Install Roof Ridge Vents Myself?
While it is possible to install roof ridge vents yourself, hiring a professional is recommended to ensure proper installation.
🙌 Maximize Your Home’s Potential with Roof Ridge Vents
Understanding and installing roof ridge vents can significantly benefit your home. From improved energy efficiency to preventing moisture damage, the advantages are clear. At Secured Roofing and Restorations, we are committed to helping homeowners like you achieve the best results for your roofing needs. Our expertise and dedication ensure that your roof is in the best hands. Reach out to us today to learn more about how we can help you.
If you need assistance with your roofing project, our team at Secured Roofing and Restorations is here to help. Contact us now and experience the difference our professional services can make.
6 Reasons To Use Impact Resistant Shingles on Your Roof
Written by : Secured Roofing and Restorations
8 minutes read
Your roof stands as a critical line of defense against the elements. Homeowners are increasingly turning to impact resistant shingles as the preferred choice for durability and protection. But what makes these shingles so special? In this blog post, we’ll explore the reasons why impact resistant shingles are a smart investment for your home. We’ll cover everything from their superior durability to the financial benefits they offer.
- What are impact resistant shingles?
- 6 reasons to use impact resistant shingles on your roof
- Installation process
- Maintenance requirements
🤔 What Are Impact Resistant Shingles?
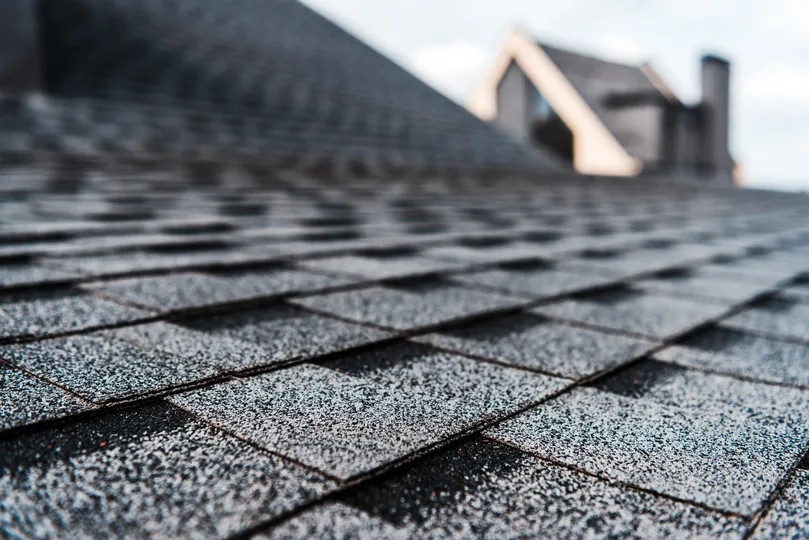
Impact resistant shingles are specifically engineered to withstand severe weather conditions, such as hail, strong winds, and heavy rain. These shingles are typically composed of a blend of materials, including asphalt, rubber, and polymers, which not only enhance their durability but also contribute to a longer lifespan and reduced maintenance needs.
Specifications and Standards
To be classified as impact resistant, shingles must adhere to stringent standards. The UL 2218 rating, for instance, evaluates a shingle’s capacity to endure impact. A Class 4 rating represents the highest level of protection, signifying exceptional performance against hail and other harsh elements, providing homeowners with peace of mind in extreme weather.
Types of Impact Resistant Shingles
There are several types of impact resistant shingles available, including:
- Architectural shingles: Offer a layered look and greater durability.
- Three-tab shingles: Often more budget-friendly.
Each type comes with varying levels of resilience and design options, enabling homeowners to select the best fit for their aesthetic preferences and structural needs.
Cost Considerations
While impact resistant roof materials might entail a higher initial cost compared to traditional options, their long-term advantages frequently justify the expense. These benefits include:
- Reduced risk of damage
- Lower insurance premiums
- Extended durability, which can save homeowners money over time
In the following sections, we will delve deeper into these long-term financial and practical benefits.
🏠 6 Reasons To Use Impact Resistant Shingles on Your Roof
When it comes to protecting your home, choosing the right roofing material is crucial. Impact-resistant shingles offer a range of benefits that can enhance the longevity and safety of your roof. Here are six compelling reasons to consider making the switch to impact-resistant shingles for your next roofing project.
1. The Unmatched Durability of Impact Resistant Shingles
Durability is arguably the most compelling reason to choose shingles with a high impact resistance. Their robust construction ensures that they can withstand severe weather conditions.
Material Strength
The materials used in impact resistant shingles are specifically chosen for their strength and flexibility. This makes the shingles less likely to crack or break under pressure.
Long Lifespan
Thanks to their durability, impact resistant shingles generally have a longer lifespan than traditional shingles. This means fewer replacements and repairs, saving you money in the long run.
Warranty Options
Many manufacturers offer extended warranties on impact resistant shingles, providing homeowners with additional peace of mind.
2. Weather Resilience
Weather resilience is another significant advantage of impact resistant shingles. These shingles are designed to hold up against various weather conditions, ensuring your home remains protected.
Hail Resistance
Hail can cause significant damage to traditional shingles. Impact resistant shingles, however, are specifically designed to withstand hailstorms, reducing the risk of costly repairs.
Wind Resistance
High winds can lift and tear traditional shingles. Impact resistant shingles are engineered to stay in place even during strong wind events, providing better protection for your home.
Water Resistance
Heavy rain can lead to leaks and water damage. Impact resistant shingles provide better water resistance, helping to prevent these issues and protect your home’s interior.
3. Cost-Effectiveness
While the initial cost of impact resistant shingles may be higher, their long-term benefits make them a cost-effective choice.
Fewer Repairs and Replacements
The durability of impact resistant shingles means you’ll spend less on repairs and replacements over time, saving you money in the long run.
Energy Efficiency
Impact resistant shingles are often more energy-efficient than traditional shingles. They can help regulate your home’s temperature, reducing your energy bills.
Increased Home Value
Installing impact resistant shingles can increase your home’s value, making it a worthwhile investment if you plan to sell your home in the future.
4. Insurance Benefits
Many insurance companies recognize the advantages of impact resistant shingles and offer discounts to homeowners who install them.
Lower Premiums
Because impact resistant shingles reduce the risk of damage, many insurance companies offer lower premiums to homeowners who use them.
Better Coverage
Some insurance policies may offer better coverage for homes with impact resistant shingles, providing additional financial protection for homeowners.
Claim Reductions
With impact resistant shingles, you’re less likely to file claims for roof damage, which can help keep your insurance rates low.
5. Environmental Impact
Choosing impact resistant shingles can also have positive environmental effects.
Sustainable Materials
Many impact resistant shingles are made from sustainable materials, reducing their environmental footprint.
Reduced Waste
The long lifespan of impact resistant shingles means fewer replacements and less waste, contributing to a more sustainable environment.
Energy Savings
Improved energy efficiency means you’ll use less energy to heat and cool your home, reducing your overall carbon footprint.
6. Aesthetic Appeal
Impact resistant shingles are available in a variety of styles and colors, allowing you to maintain or even enhance your home’s aesthetic appeal.
Versatile Designs
With a wide range of designs available, you can choose impact resistant shingles that complement your home’s architecture.
Color Options
Impact resistant shingles come in various colors, allowing you to select the perfect shade to match your home’s exterior.
Customization
Some manufacturers offer customization options, enabling you to create a unique look for your home.
🛠️ Installation Process
The installation process for impact resistant shingles is similar to that of traditional shingles, but it’s essential to hire experienced professionals to ensure proper installation.
Professional Installation
Hiring a professional guarantees that your impact-resistant shingles are installed correctly, maximizing their benefits. Professionals have the expertise and tools to ensure a secure fit, which can enhance the durability and performance of your roofing system, ultimately protecting your home from severe weather.
Time Frame
The installation process typically takes a few days, depending on the size of your roof and the weather conditions. Larger roofs or adverse weather may extend the timeline, so it’s essential to plan accordingly and communicate with your installer about the expected duration to minimize disruptions.
Preparation Tips
Before installation, ensure your roof is clean and any necessary repairs are completed to provide a solid foundation for your new shingles. It’s advisable to remove debris, check for leaks, and address any structural issues to ensure a smooth installation process and to maximize the longevity of your new roofing materials.
💡 Maintenance Requirements
Maintaining impact resistant shingles is straightforward, but regular inspections and minor upkeep can extend their lifespan.
Regular Inspections
Schedule regular roof inspections at least twice a year, ideally in the spring and fall. This proactive approach helps identify potential issues such as leaks, damaged shingles, or structural weaknesses early on, allowing for timely maintenance and ensuring your roof remains in top condition.
Cleaning Tips
Keep your roof clean by regularly removing debris like leaves, branches, and moss. Accumulated debris can trap moisture and lead to mold growth or shingle deterioration over time. Consider using a soft-bristle brush or hiring a professional to safely clean your roof without causing damage.
Repair Recommendations
Address any minor repairs, such as small leaks or loose shingles, promptly. Ignoring these issues can lead to more significant problems, such as water damage or costly repairs down the line. Regularly inspect your roof and take action as soon as you notice any signs of wear and tear.
🙌 Upgrade Your Home with Impact-Resistant Shingles for Safety and Style
Selecting impact-resistant shingles for your home is a smart choice that brings numerous benefits, including superior protection against harsh weather and potential savings on insurance costs. These shingles not only enhance your home’s aesthetic appeal but also support environmental sustainability through their long-lasting nature and energy efficiency.
At Secured Roofing and Restorations, we pride ourselves on being the trusted partner for all your home exterior needs. Our experienced team is dedicated to delivering top-notch installation services, ensuring your investment is protected with professionalism and care. We understand that your home is your sanctuary, and we’re here to enhance its value and comfort.
If you’re considering upgrading to impact-resistant shingles, get in touch with us today! Let us show you how we can help make your home safer and more beautiful.
Roof Coating: How To Protect Your Roof (2024)
Written by : Secured Roofing and Restorations
13 minutes read

As any homeowner knows, maintaining your roof is crucial to safeguarding your home’s integrity and value. This is where roof coating comes into play. In this comprehensive guide, we’ll walk you through everything you need to know about roof coating—from its benefits to the steps for applying it, including:
- What is roof coating?
- How roof coating works
- Preparing your roof for coating
- 5-step guide to applying roof coating
- Common mistakes to avoid
- Maintenance tips for coated roofs
- Cost considerations
- Environmental impact
🤔 What is Roof Coating?
Roof coating is a specialized fluid applied to roofing materials to create a protective layer that significantly enhances the roof’s longevity and functionality. This coating is designed to bond with the existing roofing surface, providing essential benefits that include improving durability, reflecting harmful UV rays, minimizing heat absorption, and preventing water infiltration. By creating a seamless barrier, roof coatings are a proactive solution to numerous common roofing issues, ultimately leading to cost savings by extending the time between necessary repairs or total roof replacements.
Key Features
One of the standout features of a high-quality roof coating is its impressive ability to extend the life of your roof significantly. These coatings are formulated to offer various protective properties, such as UV protection to prevent sun damage, waterproofing capabilities to guard against leaks and moisture accumulation, and enhanced resistance to extreme weather conditions, including heavy rain, snow, and intense sunlight. Additionally, many roof coatings are designed to be environmentally friendly, contributing to energy efficiency by reflecting heat and lowering cooling costs in warmer months. Overall, a good roof coating not only safeguards your investment but also enhances the performance of your roofing system over time.
Common Materials
Roof coatings are made from a variety of materials, each with unique characteristics and benefits suited to different roofing types and environmental conditions. Common materials include:
- Acrylic: Known for its versatility and ease of application, acrylic coatings are water-based, making them environmentally friendly. They excel in UV protection and are suitable for most climates, providing excellent reflectivity and durability.
- Silicone: These coatings offer exceptional waterproofing capabilities and are highly resistant to ponding water, making them ideal for flat roofs. Silicone coatings maintain their flexibility over time, which helps them withstand temperature fluctuations and weathering.
- Asphalt: Often used for built-up roofing systems, asphalt coatings provide a durable protective layer that helps seal and waterproof the roof surface. They are commonly chosen for their effectiveness in harsh weather conditions.
- Polyurethane: Renowned for their toughness and elasticity, polyurethane coatings are ideal for roofs that experience foot traffic or heavy equipment use. They provide excellent resistance to abrasion and impact, making them a great choice for commercial applications.
By understanding the various materials and their features, building owners can make informed decisions when selecting the right roof coating for their specific needs and environmental challenges.
🏠 How Roof Coating Works
Roof coating is a protective layer applied to roofing surfaces that enhances durability and extends the lifespan of the roof. Understanding how roof coatings work can help homeowners make informed decisions about maintaining and protecting their roofs.
Reflective Capabilities
Roof coatings are designed to reflect a significant portion of UV rays away from the roof surface, which helps to keep the roof cooler during hot weather. This reduction in thermal load not only minimizes energy consumption for cooling but also prolongs the roof’s lifespan by preventing heat-related damage.
Protective Barrier
The coating serves as a strong protective barrier against harsh environmental factors such as rain, wind, and debris. By sealing small cracks and imperfections, it prevents water infiltration and stops minor issues from escalating into costly repairs, ensuring the roof remains in good condition over time.
Improved Aesthetics
Beyond their functional advantages, roof coatings can greatly enhance the aesthetic appeal of your home. Available in a wide range of colors and finishes, they allow homeowners to customize their roofs to complement or elevate their home’s exterior, adding to the overall value and curb appeal.
Types of Roof Coatings
Roof coatings play a vital role in extending the lifespan of your roofing system while enhancing its performance. They come in various types, each designed to address specific needs such as waterproofing, UV protection, and energy efficiency. Understanding the different types of roof coatings can help you choose the best option for your roofing project.
Acrylic Coatings
Acrylic coatings are popular for their affordability and ease of application, making them a go-to choice for many homeowners and contractors. They work well on various roof types, including metal and shingle roofs, and offer excellent UV protection, which helps to prolong the life of the roofing material and reduce energy costs by reflecting sunlight.
Silicone Coatings
Silicone coatings are known for their exceptional water resistance and durability. They create a seamless, flexible membrane that is particularly effective in areas that experience frequent rain or standing water issues. This makes them ideal for flat roofs, as they prevent leaks and protect the underlying structure from moisture damage.
Asphalt Coatings
Asphalt-based coatings are commonly used for their strong adhesive properties and ability to withstand harsh weather conditions. They provide a robust layer of protection against the elements, including heavy rain, snow, and UV rays. These coatings are often used on asphalt roofs and can help extend the lifespan of the roofing system while enhancing its appearance.
The Benefits of Roof Coating
Roof coating offers numerous advantages that can enhance the longevity and performance of your roofing system. By applying a protective layer, homeowners can improve energy efficiency, reduce maintenance costs, and extend the life of their roofs.
- Longevity
- Extends roof lifespan by 10-15 years
- Protects from elements, reducing costly replacements
- Saves homeowners money and provides peace of mind
- Energy Efficiency
- Reflects sunlight to lower cooling costs
- Eco-friendly choice, particularly in warmer climates
- Maintains cooler indoor temperatures, reducing energy consumption and utility bills
- Leak Prevention
- Forms a seamless barrier to prevent leaks and water damage
- Important during heavy rain seasons to avoid structural damage and mold growth
- Enhances protection, ensuring roofs remain intact and functional for years to come
👉 Preparing Your Roof for Coating
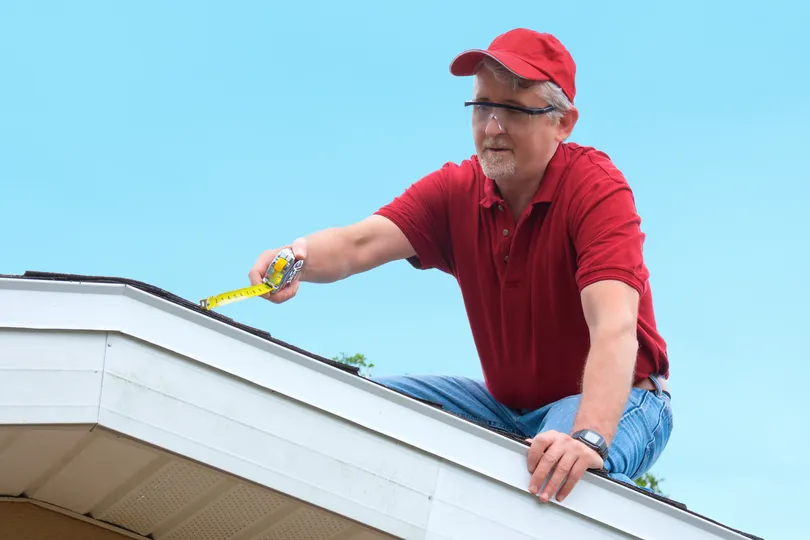
Preparing your roof for coating is a crucial step to ensure the longevity and effectiveness of the application. Proper preparation involves cleaning the surface, repairing any damage, and ensuring optimal weather conditions. By taking the time to prepare your roof, you can achieve better adhesion and a more durable finish.
Inspection
Before applying any coating, it’s essential to inspect your roof thoroughly. Look for signs of damage, such as cracks, leaks, or loose tiles. Pay close attention to areas where water might accumulate or where the roof is exposed to harsh weather conditions, as these spots are more prone to damage.
Cleaning
A clean roof ensures better adhesion of the coating. Use a pressure washer to remove dirt, debris, and any existing loose coating. Additionally, check for mold or algae growth and consider using a specialized cleaner to eliminate these issues, ensuring a smooth surface for the new coating.
Repairs
Address any minor repairs before applying the coating. Fix small cracks, replace damaged shingles, and ensure the roof is in good condition. It’s also wise to inspect flashing around vents and chimneys, as these areas can often be overlooked but are crucial for preventing leaks.
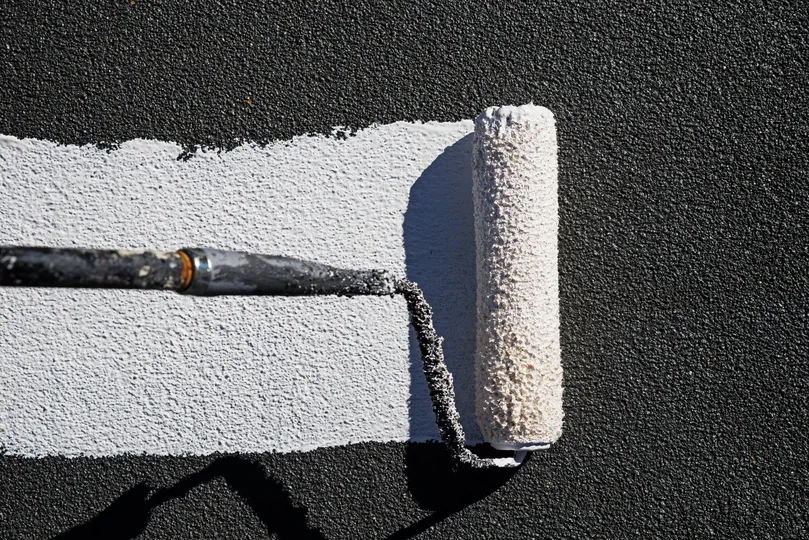
🛠️ 5-Step Guide to Applying Roof Coating
Whether you’re looking to protect your roof from the elements or enhance its longevity, following these steps will ensure a successful application.
1. Choose the Right Coating
Selecting the right roof coating is crucial for ensuring longevity and effectiveness. Consider your roof type—whether it’s flat, sloped, metal, or shingled—and the specific climate conditions of your area, such as UV exposure, rainfall, or extreme temperatures. Different coatings offer various benefits, such as reflectivity to reduce heat absorption or waterproofing capabilities. Be sure to read the manufacturer’s instructions thoroughly, as they provide specific guidelines regarding the coating’s suitability for your roof and any unique preparation requirements.
2. Gather Materials
Before you start your roofing project, gather all necessary materials to ensure a smooth process. You will need the roof coating specific to your chosen type, along with application tools like rollers or brushes that are appropriate for the coating’s consistency. A sturdy ladder is essential for reaching all areas of your roof safely, and don’t forget safety equipment such as gloves, goggles, and a mask to protect against fumes and falling debris. Having everything on hand before you begin will help you avoid interruptions and ensure a more efficient application process.
3. Apply the Primer
Applying a primer is essential for many coatings, as it helps to create a strong bond between the roof and the coating. Before applying, inspect the roof for any damage or debris and clean the surface thoroughly. Follow the manufacturer’s guidelines for the type of primer needed and the application technique. Use a roller or brush to apply the primer evenly, ensuring complete coverage without pooling. Allow the primer to dry completely before proceeding, as this step is critical for optimal adhesion of the subsequent layers.
4. Apply the Base Coat
Once the primer has dried, it’s time to apply the base coat. This layer acts as the foundation for your roof’s protection, so applying it evenly is key. Start at one end of the roof and work your way across, using a roller for larger areas and a brush for edges and corners. Pay attention to the manufacturer’s recommendations regarding the thickness of the base coat and the drying time between applications. Properly applying this layer will enhance the performance of your roof coating system.
5. Apply the Top Coat
After the base coat has dried completely, it’s time to apply the top coat. This final layer provides essential protection against the elements and enhances the durability of your roof. Use the same techniques as with the base coat, ensuring an even application across the entire surface. The top coat not only helps in waterproofing but also adds an additional layer of insulation and can improve the aesthetic appeal of your roof. Once applied, allow it to cure according to the manufacturer’s instructions for the best results.
🚫 Common Mistakes to Avoid
When considering roof coatings, it’s essential to be aware of common mistakes that can undermine their effectiveness. Avoiding these pitfalls can save you time and money while ensuring your roof is properly protected.
Skipping the Inspection
Neglecting to inspect your roof prior to applying a coating can result in inadequate adhesion, causing the coating to lift or wear off prematurely. An inspection allows you to identify and address any underlying issues such as cracks or leaks, ensuring a strong foundation for the coating.
Applying Coating to a Wet Surface
It’s crucial to make sure your roof is entirely dry before applying the coating. Any remaining moisture can hinder the bonding process, compromising the coating’s effectiveness and increasing the risk of peeling over time. Allow sufficient drying time after rain or washing the roof before proceeding.
Ignoring Manufacturer’s Instructions
Following the manufacturer’s guidelines for application and drying times is vital for achieving the best results. These instructions are designed to ensure the coating adheres properly and performs well. Deviating from them can lead to issues such as uneven application and reduced longevity of the coating.
💡 Maintenance Tips for Coated Roofs

Coated roofs require regular maintenance to ensure their longevity and effectiveness. By following specific care guidelines, you can protect your investment from damage and extend its lifespan.
Regular Inspections
Conduct regular inspections to catch any signs of wear and tear early. Look for cracks, loose shingles, or water damage. Address any minor issues promptly to prevent them from escalating into more significant problems that could lead to costly repairs.
Cleaning
Keep your roof clean by removing debris and dirt regularly. This includes clearing leaves, branches, and moss that can accumulate over time. Maintaining the reflective properties of the coating not only enhances its appearance but also improves energy efficiency by reflecting more sunlight.
Recoating
Depending on the type of coating used, you may need to reapply every few years to maintain its effectiveness. Regular recoating not only extends the life of your roof but also enhances its protective qualities against harsh weather conditions and UV damage.
💵 Cost Considerations
Understanding the financial implications is crucial for effective planning and budgeting, ensuring that resources are allocated efficiently to achieve our goals.
Initial Investment
The upfront cost of roof coating may seem high, but it’s important to view it as a long-term investment. By protecting your roof, you can prevent costly repairs and extend its lifespan, ultimately leading to significant savings on maintenance and energy bills over time.
ROI
When evaluating roof coating, it’s crucial to consider the return on investment (ROI). Not only does a coated roof last longer, but it also improves energy efficiency by reflecting sunlight, reducing cooling costs. These savings often surpass the initial expenditure, making it a financially sound decision.
Budgeting
Creating a comprehensive budget for your roof coating project is essential. Factor in the costs of high-quality materials and skilled labor, as well as any necessary repairs that need to be completed before applying the coating. By planning ahead, you can ensure that you stay within your financial limits while achieving the best results.
🌱 Environmental Impact
The environmental impact of roof coating is significant, as these coatings can enhance energy efficiency and reduce heat absorption in buildings. By reflecting sunlight, they not only lower cooling costs but also contribute to a decrease in urban heat islands and improve overall sustainability.
Eco-Friendly Options
Many roof coatings are eco-friendly and can significantly reduce your home’s carbon footprint. These coatings are designed with the environment in mind, often containing low levels of harmful substances. When choosing a coating, look for products that are low in VOCs (volatile organic compounds), which not only improves indoor air quality but also minimizes harmful emissions into the atmosphere.
Energy Savings
Roof coatings play a crucial role in reducing the need for air conditioning, as they can reflect sunlight and reduce heat absorption. This helps lower your energy consumption, leading to decreased utility bills and a smaller carbon footprint. By improving your home’s energy efficiency, roof coatings contribute to a more sustainable lifestyle and lessen your dependence on non-renewable energy sources.
Sustainable Materials
Opting for coatings made from sustainable materials is an excellent way to further minimize your environmental impact. These materials are often sourced responsibly and designed to last longer, reducing the need for frequent replacement. By choosing sustainable options, you not only support eco-friendly practices but also enhance the durability and performance of your roofing system.
🙌 Protect Your Home and Investment with Secured Roofing and Restorations
Roof coating is an essential part of home maintenance that offers numerous benefits, from extending your roof’s lifespan to improving energy efficiency. By following the steps outlined in this guide, you can ensure a successful application and enjoy the peace of mind that comes with a well-protected home. Our team at Secured Roofing and Restorations is here to help you every step of the way. Don’t hesitate—protect your investment today. Contact us to get started!